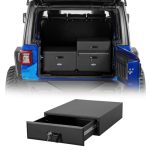
You have just dropped a significant amount of money on a set of aggressive Bushwacker fender flares for your Jeep JK. You are envisioning a rugged, custom look that will turn heads on the trail and allow you to stuff massive tires under the wheel wells. But the reality of the installation process can be daunting. A single misaligned hole or a stripped bolt can turn your dream upgrade into a weekend-long nightmare of frustration and ill-fitting plastic.
This guide is your comprehensive roadmap to a flawless installation. We will walk you through every critical step, from the initial preparation to the final torque spec, ensuring your Bushwacker flares sit perfectly flush, seal against the elements, and transform your JK’s appearance. Whether you are a seasoned DIY mechanic or a first-time modifier, understanding the nuances of this install will save you time, money, and the headache of a crooked flare. By the end of this article, you will have the confidence and knowledge to complete this project with professional-grade results.
Preparation: The Foundation of a Perfect Fit
Before you even open the box containing your new Bushwacker flares you must prepare your Jeep and your workspace. The single biggest mistake JK owners make is rushing into the install without a proper plan. Start by parking your Jeep on a level surface and turning the wheels to their full lock in one direction. This gives you maximum clearance to access the factory flare bolts. You will need a clean, well-lit area, preferably a garage, to keep dust and debris off the fresh paint and new plastic parts.
Gather your tools meticulously. You will need a T-25 Torx bit for the factory bolts, a 10mm socket for the inner fender liner screws, a plastic trim removal tool set, a drill with a 1/8-inch pilot bit and a 1/4-inch final bit, a center punch, a high-quality automotive-grade silicone sealant, and a torque wrench capable of inch-pounds. Do not skip the center punch; it is essential for preventing your drill bit from walking on the painted metal. Also, purchase a roll of 3M automotive-grade double-sided tape specifically for exterior trim. The tape included in some kits is adequate, but upgrading it ensures a rattle-free, long-term bond.
Finally, inspect your new flares against the vehicle. Lay each flare (front driver, front passenger, rear driver, rear passenger) on the corresponding wheel well. Check for any warping or damage from shipping. Bushwacker flares are made of durable plastic, but they can be slightly deformed in transit. If you notice a bow, place the flare in the sun or use a heat gun on a low setting to gently warm and reshape it before installation. This pre-fit step will reveal any major fitment issues before you start drilling irreversible holes in your Jeep’s body.
Removing the Factory Flares and Cleaning the Surface
With your tools ready, begin the removal of the factory fender flares. Start with the front flares. Using your T-25 Torx bit, remove the bolts that secure the flare to the body. There are typically three bolts on the top edge and two on the side near the door. Do not lose these bolts; you may need them for the new install. Next, use the 10mm socket to remove the screws holding the inner fender liner to the bottom of the flare. Gently pull the inner liner away and then carefully pry the factory flare off the body using your plastic trim tools. Work slowly to avoid cracking the old plastic.
Once the factory flare is off, you will be left with a bare metal edge and a layer of foam tape residue. This is the most critical cleaning step. Use a 3M adhesive remover or isopropyl alcohol and a plastic scraper to remove every trace of the old foam tape. Any leftover residue will prevent your new Bushwacker flares from sitting flush, leading to gaps and potential water leaks. Pay special attention to the corners and the top edge where the old tape tends to leave a stubborn film. After the residue is gone, wash the area with soap and water, then wipe it down with a wax and grease remover.
For the rear flares, the process is similar but requires removing the tail light assembly. Unplug the tail light harness, remove the three 10mm nuts holding the light housing, and set the light aside. You will then find additional bolts securing the rear flare. Remove them and the inner liner screws. The rear flares are often more difficult to remove due to their length and the curvature of the quarter panel. Be patient and use even pressure. Once all four flares are removed, you should have a completely clean, bare metal surface on all four corners of your Jeep.
Dry Fitting and Marking Your Drill Points
Now comes the step that separates a perfect install from a crooked one: the dry fit. Do not apply any tape or sealant yet. Place the new Bushwacker flare onto the wheel well. It should snap into place loosely, resting on the factory mounting points. You will notice that the flare has pre-drilled holes, but your Jeep’s body does not. You must transfer these hole locations. Start by aligning the top edge of the flare with the body line of the Jeep. The flare should follow the natural curve of the fender. Use painter’s tape to temporarily hold the flare in place.
With the flare held securely, use a fine-tipped marker to mark the center of each pre-drilled hole onto the Jeep’s painted metal. This is where the center punch becomes invaluable. Remove the flare and, at each marked location, give a light tap with the center punch to create a small dimple. This dimple will guide your drill bit and prevent it from skating across the paint, which can cause scratches and misalignment. Take your time with this step. A misaligned hole is difficult to correct and will ruin the look of the entire install.
Repeat this process for all four flares. For the front flares, you will typically have 8 to 10 holes to drill. For the rear you may have 10 to 12. Before drilling, double-check your alignment by holding the flare back up to the vehicle. Ensure the gap between the flare and the body is even all the way around. If the flare is touching the paint in one spot and gapped in another, you need to adjust your positioning. A 1/16-inch gap is acceptable and will be filled by the sealant, but a 1/4-inch gap will look unprofessional.
Drilling, Tapping, and Applying Sealant
With your dimples marked, it is time to drill. Start with the 1/8-inch pilot bit. Drill through the outer sheet metal only. The JK’s body panels are surprisingly thin, so use a steady, light pressure. Drilling too fast or with too much force can warp the metal. After drilling all pilot holes, switch to the 1/4-inch final bit. This size is standard for the plastic push-pin style fasteners that Bushwacker provides. Drill through the same holes, again being careful not to enlarge the hole beyond 1/4-inch. A clean, round hole is essential for a tight fastener fit.
Now, apply a generous bead of automotive-grade silicone sealant to the back edge of the flare. Focus on the top edge and the corners, as these are the most prone to water intrusion. Do not skimp on the sealant. A thin bead will not seal properly, and water will eventually find its way behind the flare, leading to rust. Also, apply the 3M double-sided tape to the flat mounting surface of the flare. This tape provides the primary holding force and prevents the flare from vibrating against the paint. Peel the backing off the tape only when you are ready to mount the flare permanently.
Press the flare firmly onto the Jeep, aligning the holes you drilled with the holes in the flare. Insert the provided push-pin fasteners or bolts. Do not tighten them fully yet. Start all fasteners by hand to ensure they are not cross-threaded. Once all fasteners are started, use your torque wrench to tighten them to the manufacturer’s specification, typically around 15 to 20 inch-pounds for plastic push-pins. Over-tightening will crack the flare or strip the plastic. Wipe away any excess sealant that squeezes out with a clean rag and mineral spirits.
Key Takeaways
- ✓ Thorough surface preparation and cleaning of old adhesive residue is the single most important factor for a flush, leak-free fit.
- ✓ Always dry-fit the flares and use a center punch to mark drill points to prevent the drill bit from walking and scratching the paint.
- ✓ Use a high-quality automotive silicone sealant and 3M double-sided tape for a permanent, rattle-free bond that prevents water intrusion.
- ✓ Do not over-tighten the fasteners; use a torque wrench set to 15-20 inch-pounds to avoid cracking the plastic flares.
- ✓ Allow the sealant to cure for a full 24 hours before driving or washing the vehicle to ensure a complete and durable seal.
Frequently Asked Questions
Do I need to remove the factory fender liner to install Bushwacker flares?
No, you do not need to fully remove the inner fender liner. You only need to remove the screws that attach the bottom of the factory flare to the liner. After the new flare is installed, you may need to trim the liner slightly for clearance, but the liner itself remains in place to protect the engine bay and wiring.
Can I install Bushwacker flares without drilling into my Jeep’s body?
No, drilling is required. Bushwacker flares are designed to be a permanent upgrade. They use the factory mounting points for alignment, but the new flares require additional holes to be drilled into the sheet metal for the provided push-pin fasteners. There is no bolt-on, no-drill option for this specific product line.
What is the best way to remove the old foam tape residue from the factory flares?
The most effective method is to use a 3M adhesive remover or a citrus-based degreaser combined with a plastic razor blade. Heat the residue gently with a heat gun to soften it, spray the remover, and scrape. Avoid using metal scrapers, as they will scratch the paint. Follow up with isopropyl alcohol to remove any oily film.
Will installing Bushwacker flares increase the width of my Jeep JK?
Yes, significantly. Bushwacker flares are designed to cover larger tires and provide a wider stance. Depending on the model (flat style vs. style), they can add 2 to 5 inches of width per side. Be that this may affect your vehicle’s legality on public roads regarding tire coverage laws in your state.
How do I prevent the flares from fading or turning chalky over time?
Bushwacker flares are made from textured black plastic that is UV-resistant but not UV-proof. To prevent fading, apply a dedicated plastic trim restorer or a UV protectant spray every three to six months. Avoid using petroleum-based dressings, as they can damage the plastic. For long-term protection, consider painting the flares with a flexible automotive paint.
Conclusion
Installing Bushwacker fender flares on your Jeep JK is a rewarding project that dramatically improves both the aesthetics and functionality of your vehicle. By following this step-by-step guide, you have learned that the secret to a perfect fit lies not in brute force, but in meticulous preparation, precise drilling, and proper sealing. From cleaning the old residue to allowing the silicone to cure, every step builds upon the last to create a professional-grade installation that will last for years.
Now that your flares are installed, take a moment to admire your work. Your Jeep looks tougher, and you have the satisfaction of knowing you did it right. The next step is to hit the trails and test your new clearance. Remember to re-check the tightness of the fasteners after your first off-road trip, as vibrations can sometimes loosen them. Enjoy your upgraded JK, and drive with confidence knowing your flares are perfectly fitted and sealed.

“Cars aren’t just machines. They’re freedom, memory, and a little bit of grease under your fingernails.”
I’m Theodore Roosevelt—though my friends just call me “Ted” (and no, I’m not related to the president, though I do share his love for adventure). I grew up in Detroit in the 1970s, back when the city was still the heart of the American auto industry. My first love was a rusted-out 1967 Mustang my father and I rebuilt in our garage when I was fifteen. That project taught me that cars have souls. After spending twenty years as a mechanic and another ten writing for magazines, I started this blog to help everyday drivers and weekend wrenchers feel confident under the hood. Whether you’re restoring a classic or just trying to keep your daily driver alive for one more winter, I’m here to help you get there.