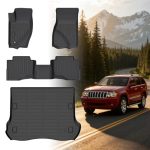
Why Upgrade to a Metalcloak Rear Track Bar? The Science of Stability
The factory track bar on a 1997 Jeep Wrangler TJ is a stamped steel component with rubber bushings that degrade over time. As these bushings wear, they introduce slop into the suspension system, allowing the rear axle to shift laterally during cornering, braking, and off-road articulation. This lateral movement is a primary contributor to the infamous "death wobble" a vague, wandering steering feel. A Metalcloak rear track bar replaces this weak link with a heavy-duty, adjustable design that uses high-durometer polyurethane bushings and a forged steel end, eliminating play and providing a solid, precise connection between the axle and the frame.
Beyond simply replacing worn parts, the Metalcloak track bar offers adjustability that the factory part lacks. When you lift your TJ, the geometry of the suspension changes, and the factory track bar is no longer the correct length to center the axle perfectly. An off-center axle can cause driveline vibrations, uneven tire wear, and poor handling. The Metalcloak bar features a threaded adjuster that allows you fine-tune the length to perfectly center your axle after any lift height from 2 to 6 inches. This precision adjustment is the key to unlocking the full potential of your suspension upgrade.
Finally, the construction of the Metalcloak bar is vastly superior. The bar itself is made from thick-wall DOM steel tubing, which is significantly stronger and more resistant to bending than the factory stamped steel. The bushings are designed to be serviceable and greaseable, meaning you can maintain them for years rather than replacing the entire assembly. For a 1997 Wrang that has likely seen decades of use, this upgrade is not just about performance; it is about reliability and safety. You are investing in a component that will outlast the rest of your suspension.
Tools, Parts, and Preparation: Setting Yourself Up for Success
Before you even jack up your Jeep, gathering the correct tools and parts is crucial for a smooth installation. For this job, you will need a floor jack and two sturdy jack stands, a 15mm socket and wrench for the track bar bolts, a 18mm socket and wrench for the axle-side bolt, a torque wrench capable of 100-130 ft-lbs, a wire brush or drill with a wire wheel, penetrating oil like PB Blaster, and a pry bar or large screwdriver. You will also need a tape measure or a dedicated axle centering tool. Do not forget safety glasses and gloves, as you will be working under the vehicle.
The most important part of preparation is dealing with rust. On a 1997 Wrangler, the bolts holding the factory track bar are likely corroded and seized. Start spraying the frame-side and axle-side bolts with penetrating oil at least 24 hours before you plan to start the job. Reapply the oil every few hours. This simple step can save you hours of frustration and prevent you from snapping a bolt, which would turn a simple install into a major repair. While you are waiting, inspect the surrounding area for any other worn components like control arm bushings or shock mounts.
Once you have your tools and the Jeep is safely on jack stands with the rear axle supported, remove the rear tires. This gives you clear access to the track bar mounting points. The factory track bar is located on the driver's side, connecting the frame rail to the axle tube. Before removing anything, measure the distance from the center of the axle tube to the frame rail on both the driver and passenger sides. Write these numbers down. This baseline measurement will be your guide when you install the new adjustable bar. A difference of more than 1/4 inch indicates your axle is currently off-center.
Step-by-Step Installation: Removing the Old and Installing the New
With the Jeep safely supported and the tires removed, start by removing the factory track bar. Begin with the axle-side bolt, which is usually the easier of the two. Use your 18mm socket and a breaker bar to break the nut loose. If it is stubborn, apply more penetrating oil and let it sit for 10 minutes. Once the nut is off, you may need to use a hammer or pry bar to push the bolt out, as rust often binds it to the bushing sleeve. Next, tackle the frame-side bolt. This one is often tighter and in a more awkward position. Use a combination of sockets, extensions, and a universal joint if needed. Once both bolts are out, the factory bar will drop free.
Now, prepare the Metalcloak bar for installation. The bar comes with a pre-installed bushing on one end and a threaded adjuster on the. Apply a thin layer of the included anti-seize compound to the threads of the adjuster. This is critical for future adjustments and preventing corrosion. Screw the adjuster into the bar until it is approximately the same length as the factory bar you just removed. Do not tighten the jam nut yet. Install the new bar by loosely threading the frame-side bolt first, followed by the axle-side bolt. Use the new hardware provided by Metalcloak, which typically includes Grade 8 bolts and lock nuts.
With both bolts loosely in place, it is time to center axle. This is the most important step. Using your tape measure, adjust the length of the Metalcloak bar by turning threaded adjuster. Your goal is to make the distance from the axle tube to the frame rail identical on both the driver and passenger sides. This may require several iterations of adjusting and re-measuring. Once the axle is perfectly centered, tighten the jam nut on the adjuster to 50 ft-lbs. Finally, torque the frame-side bolt to 100 ft-lbs and the axle-side bolt to 130 ft-lbs. Reinstall your tires, lower the Jeep to the ground, and perform a final torque check on all bolts with the vehicle's weight on the suspension.
Common Pitfalls and How to Avoid Them: Lessons from the Garage
The most common mistake during this install is failing to properly center the axle. Many DIYers simply match the length of the old bar and call it done. This is a critical error because the old bar was likely the wrong length for your lift height, or its worn bushings allowed the axle to sit crooked. Always measure and adjust. A second common pitfall is over-tightening the polyurethane bushings. Unlike rubber, polyurethane bushings should not be compressed to the point where the metal sleeve contacts the bracket. Tighten the bolt until the bushing just starts to bulge, then stop. Over-tightening will bind the suspension and cause harsh ride quality.
Another issue arises from rusted or damaged bolt holes. If you snap a bolt or strip the threads in the frame bracket, you have a serious problem. To avoid this, use penetrating oil liberally and apply heat from a propane torch if a bolt refuses to budge. If you do strip a hole, a thread repair kit (helicoil) is your best friend. For the frame-side bracket, which is a welded nut, you may need to drill it out and use a nut and bolt instead. This is a more advanced repair, but it isable with basic tools. Always have a backup plan, such as a tap and die set, on hand.
Finally, do not neglect the importance of a test drive and re-torque. After driving for 50-100 miles, the new bushings will settle, and the bolts may loosen slightly. Get back under the Jeep and re-torque all fasteners to the specified values. This simple step ensures long-term reliability and prevents the dreaded clunking noise that comes from loose suspension components. Also, pay attention to how the Jeep feels. If you still experience wandering, you may need to check your track bar, steering components, or alignment.
Fine-Tuning Your Suspension: Beyond the Track Bar Install
Installing the Metalcloak rear track bar is a fantastic first step, but it is often part of a larger suspension system. For the best handling results, you should pair this upgrade with a front track bar of similar quality. An upgraded front track bar will eliminate the remaining slop in the front suspension, giving you a truly planted feel. Metalcloak offers a matching front bar that is adjustable and built to the same high standards. Together, these two bars will transform your TJ's highway manners.
Consider your shock absorbers and control arms as well. A new track bar will highlight weaknesses in other components. If your shocks are old and worn, you will still feel excessive body roll and bouncing. Upgrading to a quality shock like the Metalcloak RockSport or a Fox 2.0 will complement the new track bar perfectly. Similarly, if your control arm bushings are shot, the axle will still move around under load. Replacing them with adjustable control arms allows you to correct your pinion angle and caster, further improving handling and reducing driveline vibrations.
Finally, do not forget about tire pressure and alignment. After any suspension work, a professional alignment is highly recommended. A proper alignment ensures that your tires are pointing in the right direction, maximizing tire life and handling. For a lifted TJ, you will want a shop that understands solid-axle vehicles. Set your tire pressure to the manufacturer's recommendation for your tire size, typically between 26-32 PSI for all-terrain tires. Proper tire pressure is the cheapest handling upgrade you can make. With the track bar installed, the axle centered, and the alignment dialed in, your 1997 Wrangler will feel a completely different vehicle.
Key Takeaways
- ✓ The Metalcloak rear track bar eliminates axle slop, directly addressing death wobble and wandering steering on 1997-2006 Wrangler TJs.
- ✓ Proper axle centering is critical; always measure from the frame rail to the axle tube on both sides and adjust the bar length accordingly.
- ✓ Use penetrating oil and heat to deal with rusted bolts on a 1997 vehicle to prevent snapping hardware.
- ✓ Do not over-tight polyurethane bushings; tighten until the bushing just starts to bulge to avoid binding the suspension.
- ✓ Pair the rear track bar with a front track bar, quality shocks, and a professional alignment for the best overall handling improvement.
Frequently Asked Questions
Will a Metalcloak rear track bar fix my death wobble completely?
While a rear track bar is a major step, death wobble is often caused by a combination of worn parts. The rear track bar addresses lateral axle movement, which is a primary contributor. However, you should also inspect your front track bar tie rod ends, drag link, ball joints, and wheel balance. Replacing the rear bar will significantly reduce the likelihood of death wobble, but a full front-end inspection is recommended for a complete cure.
Can I install this track bar without a lift kit?
Yes absolutely. The Metalcloak rear track bar is adjustable and can be set to the factory length for a stock-height Jeep. The benefit is still significant because the polyurethane bushings are more durable and precise than the worn rubber factory bushings You will notice a tighter, more responsive rear end even on a stock suspension.
How do I know if my axle is centered correctly?
The most accurate method is to measure from a fixed point on the rail to the center of the axle tube on both the driver and passenger sides. These measurements should be within 1/8 inch of each other. You can also visually check by looking at the gap between the tire and the fender flare, but the tape measure method is far more precise.
What is the torque specification for the Metalcloak track bar bolts?
A For the frame-side bolt, torque to 100 ft-lbs. For the axle-side bolt, torque to 130 ft-lbs. The jam nut on the threaded adjuster should be torqued to 50 ft-lbs. Always re-torque these bolts after 50-100 miles of driving account for bushing settling.
Do I need to grease the bushings on the Metalcloak track bar?
Yes, the Metalcloak track bar features greaseable bushings. After installation, use a grease gun to apply a high-quality polyurethane-compatible grease until you see it purging from the bushing seals. This should be done during installation and then as part of your regular maintenance schedule, such as every oil change or before a major off-road trip.
Conclusion
Upgrading the rear track bar on your 1997 Jeep Wrangler TJ with a Metalcloak unit is one of the most rewarding and impactful modifications you can make. It directly addresses the core issues of axle slop and poor handling that plague these classic vehicles. By following the detailed steps in this guide, from proper preparation with penetrating oil to the critical step of axle centering, you can complete this installation in a single afternoon and immediately feel the difference. The result is a Jeep that tracks straight, corners confidently, and inspires trust on both the highway and the trail.
In 2026, your 1997 Wrangler is more than just a vehicle; it is a piece of automotive history that deserves to drive as well as it looks. Do not settle for the worn-out, wandering feeling of a 30-year-old suspension. Take control of your Jeep's handling with this proven upgrade. Gather your tools, order your Metalcloak track bar, and get ready to fall in love with your TJ all over again. The road ahead is smoother, safer, and far more enjoyable.

“Cars aren’t just machines. They’re freedom, memory, and a little bit of grease under your fingernails.”
I’m Theodore Roosevelt—though my friends just call me “Ted” (and no, I’m not related to the president, though I do share his love for adventure). I grew up in Detroit in the 1970s, back when the city was still the heart of the American auto industry. My first love was a rusted-out 1967 Mustang my father and I rebuilt in our garage when I was fifteen. That project taught me that cars have souls. After spending twenty years as a mechanic and another ten writing for magazines, I started this blog to help everyday drivers and weekend wrenchers feel confident under the hood. Whether you’re restoring a classic or just trying to keep your daily driver alive for one more winter, I’m here to help you get there.