You are sitting in your Jeep Wrangler, the wind in your hair, but the factory radio sounds like it is broadcasting from a tin can. The static, the lack of Bluetooth, and the outdated interface are ruining your off-road soundtrack. Upgrading to a modern Pioneer head unit is one of the most rewarding modifications you can make, transforming your daily commute and weekend trail ride into a premium audio experience. However, the process can feel intimidating if you have never pulled a dashboard apart.
This guide is your comprehensive roadmap for a successful Pioneer radio installation in your Jeep Wrangler. We will demystify the two critical components you need: the dash kit and the wiring harness. By the end of this article, you will exactly which parts to buy, how to connect them without cutting a single factory wire, and how to avoid the common pitfalls that leave other Jeep owners frustrated. Whether you drive a TJ, JK, or JL, this information applies directly to your project.
Why You Need a Dash Kit and Wiring Harness
The factory radio in your Jeep Wrangler is not a standard size. It is a custom-fit unit designed to snap into a specific dashboard cavity with unique mounting brackets and trim bezels. A dash kit, also known as an installation kit or mounting bracket, bridges the gap between your new Pioneer radio and the Jeep’s dashboard. Without it, your new head unit would simply fall into the hole or look like an afterthought with ugly gaps around the edges. The dash kit provides a clean, factory-like appearance and ensures the radio is securely mounted to withstand the vibrations of off-road driving.
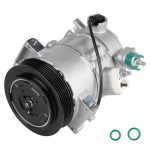
The wiring harness is equally important. Modern Jeep Wranglers use a complex electrical system where the radio is integrated with the vehicle’s CAN bus network for features like steering wheel controls, vehicle speed sensing, and chimes. A standard wiring harness adapter, such as the popular Metra or Axxess models, plugs directly into your Jeep’s factory connector on one end and provides bare wires or a Pioneer-specific plug on the other. This eliminates the need to cut, splice, or solder any of your vehicle’s original wiring, preserving your warranty and making the installation reversible.
When you combine a quality dash kit with the correct wiring harness, you are not just installing a radio; you are integrating a new brain into your Jeep’s audio system. The dash kit handles the physical fit, while the harness handles the electrical communication. For example, if you own a 2018 Jeep Wrangler JL, you will need a specific dash kit that accommodates the larger 8-inch screen opening and a harness that retains your factory amplifier and steering wheel controls. Skipping either component leads to a sloppy install or a non-functional radio.
Choosing the Right Dash Kit for Your Wrangler Model
SECTION_2_CONTENT
First paragraph of this section.
Second paragraph with more details.
Third paragraph with practical tips or examples
oding the Wiring Harness: CAN Bus and Integration
The wiring harness is where most DIY installers get confused. Your Jeep Wrangler uses a Controller Area Network (CAN bus) system to communicate between modules. The factory radio is not just a stereo; it is a node on this network. When you remove it, you need a harness that can simulate the radio’s presence to prevent errors like a battery drain, loss of chimes, or a non-functional backup camera. For Pioneer radios, the most common harness is the Axxess AXSWC or the Metra AX-ADCT2, which includes a module that decodes the CAN bus signals.
For a basic installation without steering wheel controls, a simple harness like the Metra 70-6502 will work for older TJs and early JKs. This harness provides power, ground, speaker wires, and an illumination wire. However, for 2011 and newer Wranglers, you must use a data interface module. This module connects to your Pioneer radio via the SWC (Steering Wheel Control) input and provides a 12-volt accessory signal that turns the radio on and off with the ignition. Without this module, your Pioneer radio may not turn off when you remove the key, draining your battery.
A common example is installing a Pioneer DMH-WT3800NEX in a 2015 JK. You would need the iDatalink Maestro RR module, which not only retains steering wheel controls but also displays vehicle information like tire pressure and engine temperature on the Pioneer screen. The wiring process involves connecting the Maestro module to the Pioneer’s data port and then plugging the Maestro’s T-harness into the Jeep’s factory connectors. This is a plug-and-play solution that requires no wire cutting, but you must program the module using a computer or smartphone app before installation.
Step-by-Step Installation Process
Begin by disconnecting the negative battery terminal. This is a critical safety step that prevents short circuits and protects the sensitive electronics in your Jeep. Wait five minutes for the airbag system capacitors to discharge. Then, use a plastic trim removal tool to gently pry off the factory radio bezel. For JK and JL models, you will need to remove the entire center stack trim, which may require unscrewing a few screws hidden behind the lower dash panel. Take your time and work slowly to avoid breaking the plastic clips.
Once the bezel is off, remove the four bolts holding the factory radio in place. Slide the radio out and disconnect the antenna cable and the main wiring harness connector. Now, take your new dash kit and assemble it according to the instructions. Most kits require you to attach metal side brackets to the Pioneer radio and then slide the radio into the dash kit frame. Secure the radio with the provided screws. Next, connect your wiring harness. Plug the vehicle-side connector into the harness adapter, then connect the adapter’s wires to the Pioneer’s wiring harness. If you are using a data interface module, connect it now.
Before you push everything back into the dash, test the system. Reconnect the battery, turn the ignition to the accessory position, and power on the Pioneer radio. Check that the radio turns on and off with the key, that sound comes from all four speakers, and that the steering wheel controls work. If you have a backup camera, shift into reverse to verify the image appears. If everything works, turn off the vehicle, disconnect the battery again, and carefully tuck all the wiring into the dash cavity. Use zip ties to secure loose wires and prevent rattles. Finally, snap the dash kit bezel into place and reinstall any trim panels.
Key Takeaways
- ✓ Always disconnect the battery before starting any radio installation to prevent electrical shorts and protect the airbag system.
- ✓ You must use a vehicle-specific dash kit to ensure a factory-like fit and secure mounting for your Pioneer radio.
- ✓ wiring harness adapter with a CAN bus interface module is required for 2011 and newer Wranglers to retain steering wheel controls and prevent battery drain.
- ✓ Test all functions, including power, sound, steering wheel controls, and backup camera, before fully reassembling the dashboard.
- ✓ Use heat-shrink connectors and zip ties for a professional, rattle-free installation that can handle off-road conditions.
Conclusion
Upgrading your Jeep Wrangler with a Pioneer radio is a straightforward project when you have the right parts and knowledge. The key is understanding that your Jeep is not a generic vehicle; it requires a specific dash kit for a perfect fit and a specialized wiring harness to communicate with its modern electrical system. By following the steps outlined in this guide, you can avoid the common headaches of battery drain, lost features, and sloppy installations. You will end up with a system that looks factory-installed and delivers the audio quality and smartphone integration you deserve.
Now is the time to gather your tools and order your parts. Start by identifying your Wrangler’s model year and checking whether you have a factory amplifier. Then, purchase a dash kit and wiring harness from a reputable brand like Met or iDatalink. With a Saturday afternoon and a little patience, you can transform your driving experience. Your next trail ride will be accompanied by crystal-clear music, hands-free calls, and seamless navigation. Get started today and hear the difference a proper installation makes.

“Cars aren’t just machines. They’re freedom, memory, and a little bit of grease under your fingernails.”
I’m Theodore Roosevelt—though my friends just call me “Ted” (and no, I’m not related to the president, though I do share his love for adventure). I grew up in Detroit in the 1970s, back when the city was still the heart of the American auto industry. My first love was a rusted-out 1967 Mustang my father and I rebuilt in our garage when I was fifteen. That project taught me that cars have souls. After spending twenty years as a mechanic and another ten writing for magazines, I started this blog to help everyday drivers and weekend wrenchers feel confident under the hood. Whether you’re restoring a classic or just trying to keep your daily driver alive for one more winter, I’m here to help you get there.