
A Jeep XJ exhaust install is the process of replacing or upgrading the exhaust parts on a Jeep Cherokee XJ, usually from the catalytic converter back or from the header back. It matters because the right setup can improve sound, flow, reliability, and throttle response without hurting safety or emissions compliance
If your Jeep XJ sounds like a rattling farm truck, smells like fumes, or feels choked at higher rpm, the exhaust is one of the first places I would inspect. The Cherokee XJ is tough, but most of these rigs are now old enough to have rusty pipes, cracked manifolds, tired hangers, and mufflers full of loose metal.
I have seen clean-looking XJs lose power because the catalytic converter brick had broken apart inside the case. I have also seen owners spend money on loud pipes and end up with drone, exhaust leaks, and failed inspection results.
This Jeep XJ Exhaust Install Step By Step Guide For Ultimate Performance Upgrade will show you how to plan the job, choose the right parts, remove the old system, install the new exhaust, check for leaks, and stay legal in the USA, UK, Canada, and Australia.
Common Jeep XJ Exhaust Problems Before You Upgrade
Rusted Pipes, Broken Hangers, and Leaks
The first problem is age. A 1984–2001 Jeep Cherokee XJ has had years of rain, mud, salt, winter roads, heat cycles, and trail abuse. In the northern USA, Canada, and parts of the UK, road salt eats exhaust pipes fast.
The leak usually starts small. You hear a ticking sound near the engine or a puffing noise under the floor. Then the muffler seam opens, the tailpipe drops, or the hanger breaks on a rough road.
The fix is simple: inspect the whole system before buying parts. Check the header, downpipe, catalytic converter, muffler, tailpipe, clamps, rubber hangers, and oxygen sensor wiring. Do not replace one pipe if the rest is ready to fail.
A real example: I once looked at a 1999 Jeep Cherokee 4.0 that had a new muffler but an old crushed downpipe. The owner thought the new muffler would add power. It did not, because the restriction was still ahead of it.
Choosing Loud Instead of Useful
The second problem is picking sound over function. A straight-through muffler can sound great for ten minutes. Then highway drone sets in at 60–70 mph, and the Jeep becomes tiring to drive.
The XJ’s 4.0 inline-six has a deep tone, but it can get harsh with the wrong muffler. A daily driver needs balance. A trail rig needs clearance and durability. A street-only build needs inspection-friendly parts.
My practical rule is this: choose a 2.25-inch to 2.5-inch system for most Jeep XJ 4.0 builds. That range helps exhaust flow without killing exhaust velocity, which is the speed of exhaust gas moving through the pipe.
“Less backpressure means higher exhaust flow as long as the exhaust velocity isn’t reduced.” — Christian Hazel, Automotive Journalist, MotorTrend
That is why bigger is not always better. A 3-inch pipe can be too much for a mostly stock 4.0 and may feel lazy at low rpm.
Ignoring Emissions and Inspection Rules
The third problem is removing emissions parts without thinking about the law. Many owners hear “performance exhaust” and think it means deleting the catalytic converter. For a road-driven Jeep, that is a bad move.
In the USA, removing or disabling emissions controls can violate Clean Air Act rules. In the UK, a missing or leaking exhaust can fail MOT inspection. In Canada, rules vary by province, but Ontario drivers should think about inspection and MTO road safety standards. In Australia, exhaust changes can affect roadworthy certificates and state noise limits.
“SEMA believes in following the law, and federal law is clear with regard to tampering of emissions systems.” — Mike Spagnola, President and CEO, SEMA
For a street Jeep, keep a working catalytic converter and oxygen sensors. If your catalytic converter is bad, replace it with a legal, correct-fit unit for your region.
Tools, Parts, and Cost Before You Start
Parts You May Need
A basic Jeep XJ exhaust install can be a cat-back job, which means the system after the catalytic converter. A deeper upgrade can include the header, downpipe, catalytic converter, muffler, and tailpipe.
For most owners, I suggest this order:
- Inspect the exhaust manifold or header
- Replace the downpipe if crushed or rusted
- Keep or replace the catalytic converter legally
- Install a quality muffler
- Install a mandrel-bent tailpipe
- Replace all clamps, gaskets, and rubber hangers
- Check oxygen sensor wiring and bungs
Mandrel-bent means the pipe keeps its shape through bends. Cheap crush-bent pipe narrows at the bends, which can reduce flow.
Realistic Cost Estimate
A Jeep XJ exhaust install cost depends on how much you replace and whether you do the labor yourself.
For a basic cat-back exhaust:
- USA: $250–$700 parts, $150–$400 labor
- UK: £220–£650 parts, £120–£350 labor
- Canada: CAD $350–$900 parts, CAD $180–$500 labor
- Australia: AUD $400–$1,050 parts, AUD $200–$600 labor
For a header-back job with catalytic converter and shop labor, expect much more. A full repair can reach $900–$1,800 USD, £750–£1,600 GBP, CAD $1,200–$2,300, or AUD $1,300–$2,600.
DIY saves labor money, but only if you have safe lifting gear, cutting tools, patience, and a place to work.
Tools You Need
You do not need a race shop, but you do need the right basics.
- Floor jack and jack stands rated for the Jeep
- Wheel chocks
- Penetrating oil
- Metric and SAE socket set
- Breaker bar
- Exhaust hanger pliers
- Sawzall or exhaust pipe cutter
- Torque wrench
- Safety glasses and gloves
- Anti-seize compound
- New exhaust clamps
- Replacement gaskets
- OBD scanner for checking codes
Do not work under a Jeep held only by a jack. Use jack stands on solid ground. If your driveway is sloped, wet, soft, or uneven, pay a shop.
Step 1: Inspect the Whole Jeep XJ Exhaust System
Start cold. Exhaust parts can burn skin long after the engine shuts off.
Put the Jeep on level ground. Chock the wheels. Raise it safely. Then follow the exhaust from the engine to the tailpipe.
On the Jeep XJ 4.0, pay close attention to the exhaust manifold. Cracks are common, especially near the collector. A cracked manifold can sound like a lifter tick and may smell like fumes near the firewall.
Look for:
- Black soot marks around joints
- Broken welds
- Loose heat shields
- Crushed pipe near the transfer case
- Rust holes near clamps
- Missing rubber hangers
- Catalytic converter rattles
- Melted oxygen sensor wires
- Tailpipe touching the leaf spring or bumper
A quick test I use is the cold-start listen test. Start the Jeep and listen near the manifold, downpipe, and muffler before the exhaust gets hot. A leak often sounds sharper when cold.
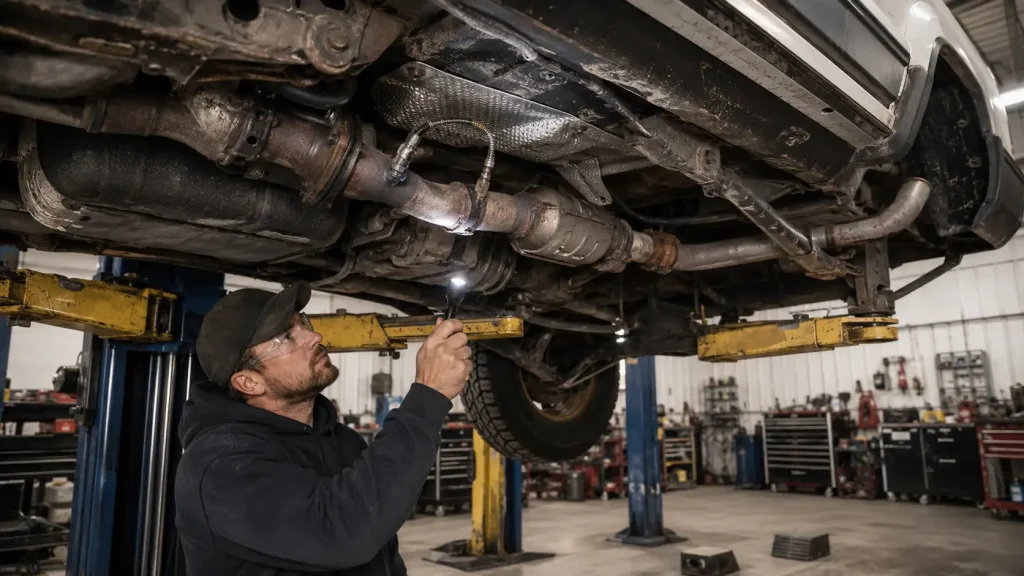
If you smell exhaust inside the cabin, stop driving until you find the cause. Carbon monoxide has no smell, and exhaust leaks can be dangerous.
“With something this potentially dangerous, the responsible step is a full recall.” — Jason Levine, Executive Director, Center for Auto Safety
That quote was about a different vehicle issue, but the lesson fits any exhaust leak. Cabin fumes are never a small problem.
Step 2: Decide What Type of Exhaust Upgrade You Need
Cat-Back Exhaust
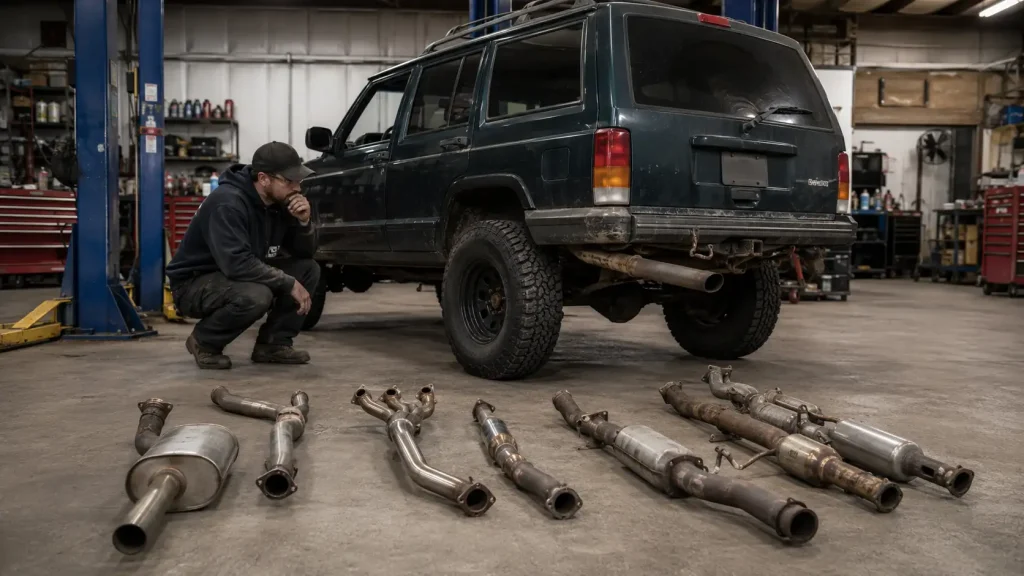
A cat-back install is the easiest upgrade. You replace the pipe and muffler after the catalytic converter. This is best if your converter and downpipe are still good.
A cat-back can improve sound, reduce rust issues, and help flow. It is also the least risky option for emissions compliance because you are not removing the catalytic converter.
For many XJ owners, this is the sweet spot.
Header and Downpipe Upgrade
A header upgrade makes sense if your stock manifold is cracked. The factory-style manifold can fail after years of movement and heat.
A good replacement header can improve durability and flow. Still, this job is harder than a cat-back because you must work near the intake, fuel rail, and engine bay wiring.
If your bolts are rusty, broken, or stuck in the cylinder head, this becomes a professional job fast.
Full System Refresh
A full refresh is best for an XJ with heavy rust, poor previous repairs, or a blocked catalytic converter. This may include header, downpipe, catalytic converter, muffler, and tailpipe.
I recommend a full refresh for high-mileage Jeeps if several parts are already failing. It costs more now but saves repeat labor later.
A real scenario: a 2000 Jeep Cherokee came into a local shop with three different clamp styles, a patched muffler, and a tailpipe rubbing the rear shock. The owner had fixed it piece by piece. A full system ended up cheaper than chasing leaks every few months.
Step 3: Remove the Old Exhaust Safely
Soak every clamp, bolt, and hanger with penetrating oil. Do it the night before if you can. Rusted exhaust fasteners are rarely polite.
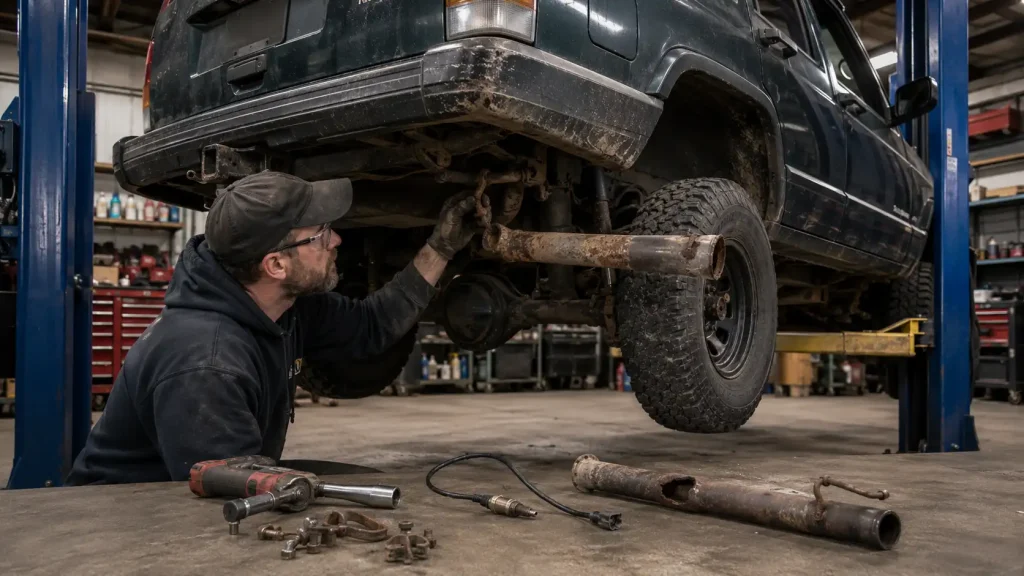
Start from the rear and work forward. Remove the tailpipe from the hanger. Then loosen the clamp at the muffler or catalytic converter. If the pipe will not move, cut it.
On most older XJs, cutting is normal. Do not waste an hour trying to save a rotten pipe.
If you are removing the system near the catalytic converter, be careful with oxygen sensors. Disconnect the wiring before twisting pipes. A damaged oxygen sensor can trigger a check engine light and affect fuel efficiency.
For 1996–2001 OBD-II XJs, oxygen sensor function matters more because the computer watches emissions performance more closely. If your sensor threads look rough, replace the sensor or chase the bung threads before install.
Never use a torch near fuel lines, dry leaves, oil leaks, or undercoating. If the Jeep is rusty and the bolts need heat, a licensed mechanic is the safer choice.
Step 4: Test-Fit the New Exhaust Before Tightening
Do not tighten everything at once. This is the mistake that causes tailpipes to hit shackles, bumpers, shocks, and leaf springs.
Hang the system loosely first. Start at the front and work back. Install the downpipe, catalytic converter, muffler, and tailpipe in order.
Leave the clamps loose enough that you can rotate and adjust the pipes. Make sure the muffler is not pressed against the floor pan. Make sure the tailpipe clears the rear leaf spring through suspension movement.
On lifted XJs, check clearance around:
- Rear shock
- Fuel tank skid
- Leaf spring shackle
- Hitch receiver
- Rear bumper
- Track bar area up front
- Transfer case crossmember
A 2-inch or 3-inch lift can change how the exhaust sits under the Jeep. Long-arm kits, skid plates, and aftermarket bumpers can create extra fitment problems.
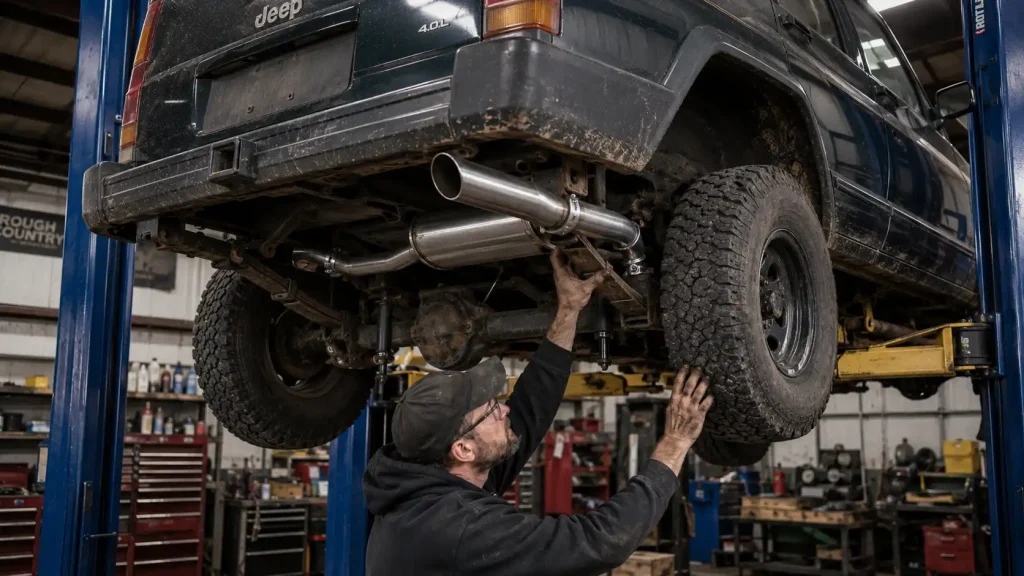
Once the system is aligned, tighten the front connection first, then the middle, then the rear. This helps the exhaust sit naturally.
Step 5: Install Gaskets, Clamps, and Hangers the Right Way
Use new gaskets. Reusing old crushed gaskets is a good way to create leaks.
Use anti-seize on bolts that may need removal later, but keep it away from oxygen sensor tips. Anti-seize on the sensor body threads is fine if the sensor manufacturer allows it. Do not coat the sensing end.
For clamps, use the right size. A clamp that is too large can crush unevenly. A clamp that is too small will not hold.
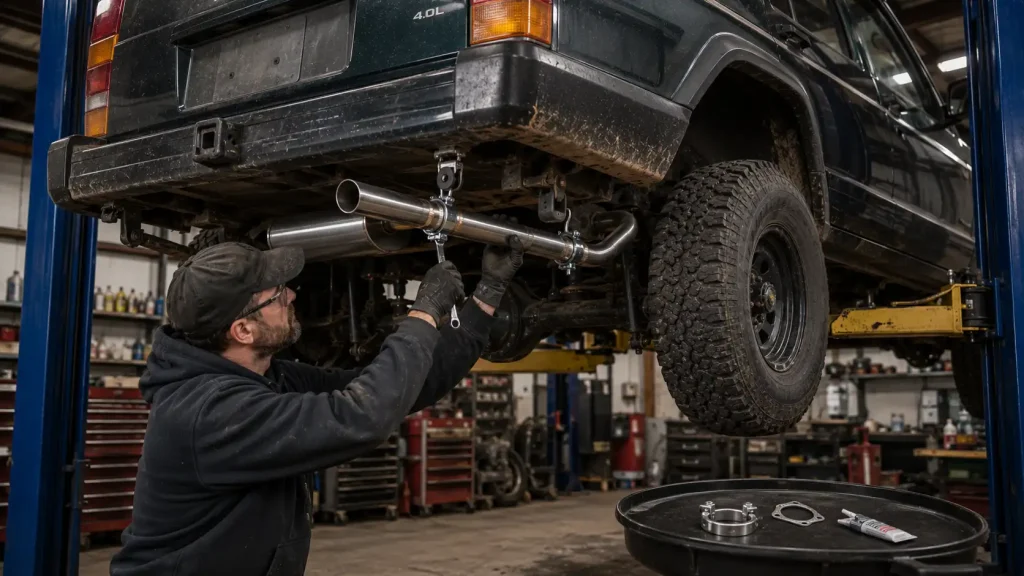
Band clamps are better if you want to remove the exhaust later. U-bolt clamps are cheaper and common, but they can dent the pipe. For a trail Jeep, stronger mounting matters because the exhaust takes more vibration.
Check the rubber hangers. Old rubber stretches and lets the pipe swing. If your tailpipe moves too much by hand, replace the hanger.
A simple trick: after tightening, shake the exhaust by hand. It should move slightly with the rubber mounts, but it should not hit the body or suspension.
Step 6: Start the Jeep and Check for Leaks
Start the engine outside, never in a closed garage. Let it idle.
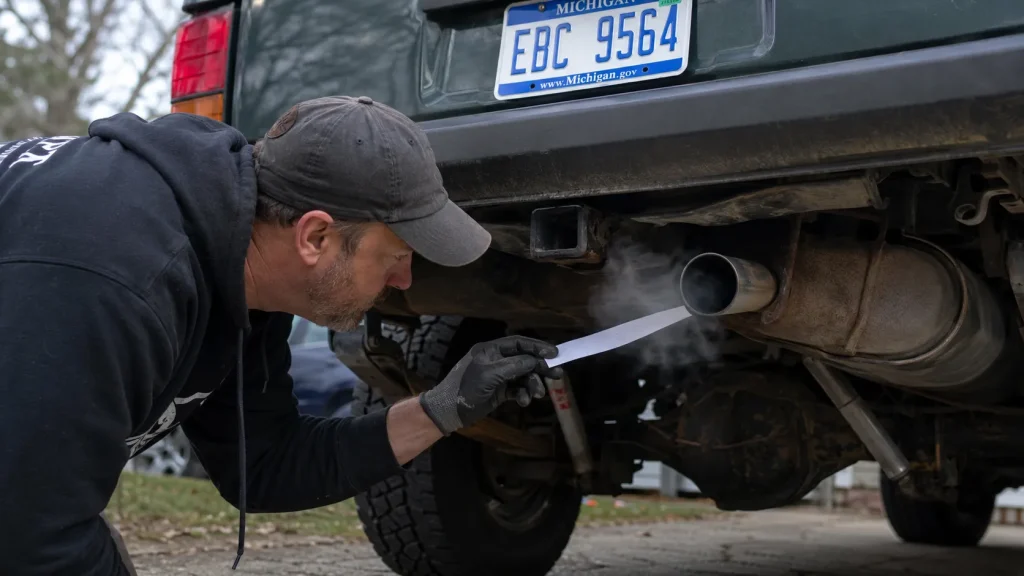
Listen for ticking, puffing, or sharp tapping near joints. You can hold a gloved hand near a joint to feel escaping gas, but do not touch hot metal.
Another method is the paper test. Hold a small strip of paper near each joint. If the paper flutters from escaping gas, you may have a leak.
Check these areas first:
- Header flange
- Collector gasket
- Downpipe connection
- Catalytic converter joints
- Muffler inlet and outlet
- Tailpipe clamp
- Oxygen sensor bungs
After the first heat cycle, shut the Jeep off and let it cool. Then recheck clamps and hangers. Metal expands when hot and contracts when cold, so a clamp that felt tight at first may need a second check.
Drive slowly around the block. Listen for rattles over bumps. Then do a short highway test. If the Jeep drones badly at cruising speed, the muffler choice may not match your use.
Performance Expectations: What You Will Actually Feel
A Jeep XJ exhaust install will not turn a stock 4.0 into a sports car. Be honest about that before spending money.
What you can expect is better sound, cleaner flow, less restriction, better throttle response, and fewer leaks. If your old catalytic converter was clogged or your muffler had collapsed inside, the difference can feel strong.
If your old system was already healthy, the performance gain may be modest. The biggest win may be reliability and drivability.
The 4.0 inline-six likes torque. It does not need a huge pipe. A 2.25-inch or 2.5-inch exhaust usually fits the engine well. Bigger pipe can reduce low-speed feel unless the engine has major upgrades like a stroker build, forced induction, or serious head work.
Think of the exhaust as one part of a system. Air intake, ignition health, fuel delivery, compression, gearing, tire size, and vehicle weight all matter.
A 1998 XJ on 31-inch tires may feel better with a cat-back and fresh tune-up. A 2001 XJ on 35s with stock gears may still feel slow because the axle gearing is wrong.
DIY vs Professional Install
DIY Makes Sense If
DIY is a good choice if the job is a simple cat-back install and your Jeep is not badly rusted. You need safe tools, space, and time.
DIY also makes sense if you enjoy working on your rig and can handle cutting old pipe. The XJ is simple compared with many modern SUVs, which makes it friendly for careful owners.
Plan for stuck bolts. Plan for at least one trip to the parts store. Plan for dirty hands.
Use a Professional If
Pay a shop if the manifold bolts are seized, the catalytic converter needs welding, the oxygen sensor threads are damaged, or the Jeep has heavy rust.
A professional exhaust shop can bend pipe, weld joints, position hangers, and fix fitment issues faster than most DIY owners.
Use a licensed mechanic for safety-related or legal work in regions that require certified repairs. In Australia, roadworthy-related work may need proper documentation. In the UK, repairs should be inspection-ready for MOT. In parts of Canada and the USA, emissions equipment must match local rules.
Legal, Safety, and Emissions Notes by Region
USA
For U.S. road use, keep the catalytic converter and oxygen sensors working. The EPA explains that emissions tampering is illegal under the Clean Air Act, and that includes removing or defeating emissions controls. A good reference is the EPA’s guidance on vehicle emissions tampering.
Some states, such as California, have stricter rules. If you live in a CARB state, make sure replacement parts are legal for that state.
UK
In the UK, the MOT test can fail a vehicle for exhaust leaks, excessive noise, or emissions problems. A holed exhaust can also affect emissions readings.
If your XJ is imported or modified, do not assume a loud exhaust will pass. Keep the catalytic converter if it was required for the vehicle’s age and type.
Canada
In Canada, exhaust rules vary by province. Ontario drivers should think about MTO safety standards, insurance issues, and local noise bylaws. In colder provinces, rust prevention matters because salt can destroy exhaust hardware.
A stainless cat-back can cost more upfront but may last longer in harsh winter use.
Australia
In Australia, exhaust changes must meet state or territory rules for noise and roadworthy inspections. A roadworthy certificate can be affected by leaks, unsafe mounting, missing emissions parts, or excessive noise.
If you drive trails, make sure the tailpipe exits safely and does not point at fuel lines, brake lines, or the body.
Common Mistakes to Avoid
The first mistake is installing the exhaust too close to the body. The XJ has limited space under the floor. A pipe that barely clears in the driveway may hit the body under load.
The second mistake is chasing loud sound with no plan. Loud does not mean faster. A smart muffler choice gives tone without punishing you on long drives.
The third mistake is ignoring the catalytic converter. A clogged converter can hurt power. A missing converter can create legal trouble and failed inspections.
The fourth mistake is using cheap clamps on a trail Jeep. Off-road vibration can loosen weak hardware.
The fifth mistake is skipping the second tightening check after heat cycling. This is one of the easiest ways to prevent leaks.
A real-world example: I helped inspect a 1997 XJ after an owner installed a cheap muffler with one loose rear hanger. The tailpipe looked fine at idle, but on the trail it hit the leaf spring and cracked the muffler outlet. A $12 hanger could have saved the job.
Long-Term Maintenance After the Install
After your Jeep XJ exhaust install, check the system after 50–100 miles. Then check it again after your next trail day or long highway trip.
Look for fresh soot, loose clamps, melted wiring, or pipes touching metal. Listen for new rattles. Watch for fuel smell, exhaust smell, or a check engine light.
If the check engine light appears, scan it. A P013x code may point to an oxygen sensor issue. A P0420 code may point to catalytic converter efficiency, sensor problems, or exhaust leaks near the converter.
Keep the exhaust clean when possible. Mud packed around hangers and clamps traps moisture. In winter states and provinces, rinse road salt from the underside when weather allows.
A good exhaust install should last years. The key is fitment, legal parts, and careful checks.
Frequently Asked Questions
What size exhaust is best for a Jeep XJ 4.0?
For most Jeep XJ 4.0 builds, 2.25 inches to 2.5 inches works well. It supports better flow without hurting low-rpm response. A 3-inch exhaust is usually too large for a mostly stock 4.0.
Can I install a Jeep XJ exhaust myself?
Yes, a careful DIY owner can install a cat-back exhaust with basic tools, jack stands, and patience. Use a shop if bolts are seized, welding is needed, or the exhaust manifold is cracked. Safety matters more than saving labor.
Will a new exhaust add horsepower to my Jeep XJ?
A new exhaust can improve flow and throttle response, especially if the old system was clogged, crushed, or leaking. Do not expect huge horsepower from a cat-back alone. The best gains come when the whole engine is healthy.
Do I need to keep the catalytic converter on my Jeep XJ?
For a street-driven Jeep, yes. Removing the catalytic converter can violate emissions laws and cause inspection problems. Replace a bad converter with a legal unit for your area.
Why does my Jeep XJ smell like exhaust inside?
You may have a leak near the manifold, downpipe, floor area, or tailpipe exit. Do not ignore cabin exhaust smell. Stop driving, ventilate the vehicle, and inspect the system because exhaust fumes can be dangerous.
Final Thoughts
A Jeep XJ Exhaust Install Step By Step Guide For Ultimate Performance Upgrade is really about doing the job correctly, not just making the Jeep louder. The three biggest takeaways are simple: inspect the whole system first, choose parts that match your engine and driving style, and keep the setup safe and legal.
A well-installed exhaust can make your XJ sound better, breathe better, and feel more dependable on the road or trail.
Take your time, check every joint, and your old Cherokee will reward you with a cleaner, stronger, better-driving feel.

“Cars aren’t just machines. They’re freedom, memory, and a little bit of grease under your fingernails.”
I’m Theodore Roosevelt—though my friends just call me “Ted” (and no, I’m not related to the president, though I do share his love for adventure). I grew up in Detroit in the 1970s, back when the city was still the heart of the American auto industry. My first love was a rusted-out 1967 Mustang my father and I rebuilt in our garage when I was fifteen. That project taught me that cars have souls. After spending twenty years as a mechanic and another ten writing for magazines, I started this blog to help everyday drivers and weekend wrenchers feel confident under the hood. Whether you’re restoring a classic or just trying to keep your daily driver alive for one more winter, I’m here to help you get there.