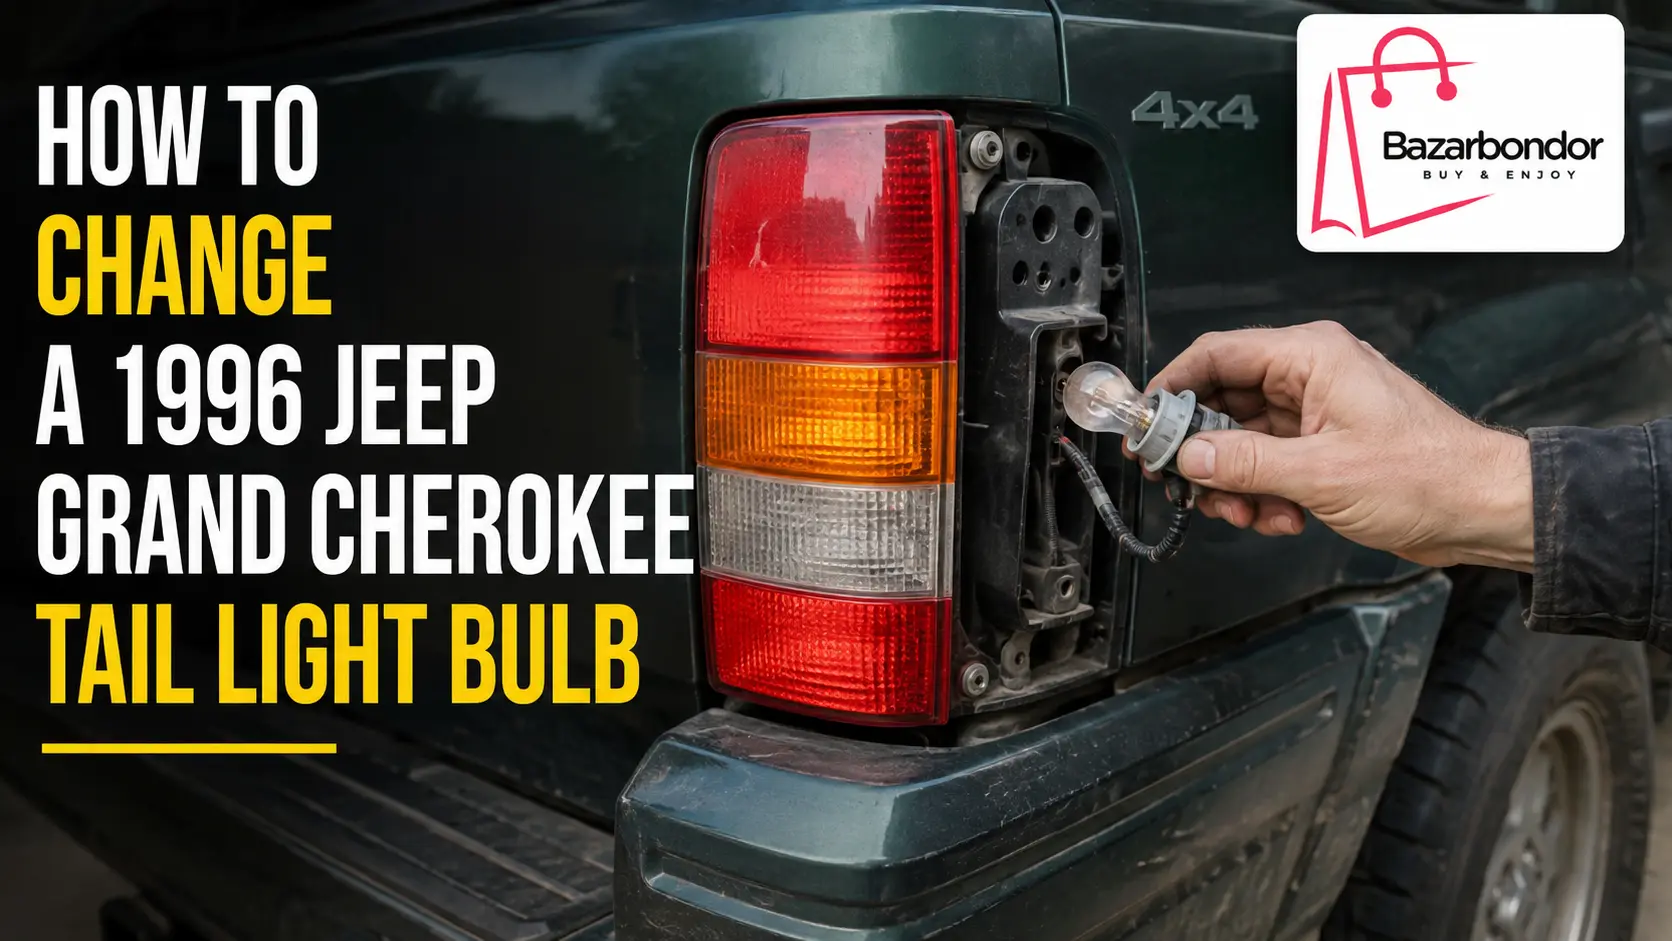
A burned-out tail light on a 1996 Jeep Grand Cherokee is usually a repair you can handle at home without advanced mechanical experience. The job mainly involves removing the rear lamp assembly, opening the correct bulb socket, replacing the failed bulb, and testing the light before putting everything back together.
The most important part is buying the correct replacement bulb. Older Grand Cherokees may have differences based on lamp position, equipment, or market specification, so do not rely on a bulb number simply because it appears in a generic online chart. Check the number printed on the old bulb and confirm it with a vehicle-specific bulb finder or the appropriate vehicle documentation. SYLVANIA also recommends checking the owner’s manual for bulb name and placement specific to the vehicle.
This guide explains how to change a 1996 Jeep Grand Cherokee tail light bulb, how to remove the lamp assembly safely, how to identify common rear bulbs, and what to check if the new bulb still does not work.
Quick Answer: How to Change a 1996 Jeep Grand Cherokee Tail Light Bulb
To replace the tail light bulb, park the Jeep safely, switch off the ignition and exterior lights, and open the rear liftgate. Remove the fasteners holding the tail light assembly to the body, then carefully pull the assembly outward. Find the socket for the failed light, rotate the socket to release it, remove the old bulb, and install the correct replacement.
Before reinstalling the housing, turn the lights on and confirm that the new bulb works. If it does, switch the lights back off, lock the socket into the housing, reposition the lamp assembly, and reinstall the fasteners.
For most owners, the job is straightforward as long as the lamp housing, socket, and wiring are in good condition.
What Tail Light Bulb Does a 1996 Jeep Grand Cherokee Use?
The safest way to identify the correct 1996 Jeep Grand Cherokee tail light bulb is to inspect the bulb you remove from the vehicle. Look for the bulb number stamped or printed on its base or glass and match it with a replacement specified for the same lighting function.
Replacement catalogs sometimes use different numbers for tail, stop, turn-signal, reverse, and other rear lighting positions. There may also be differences between vehicles sold in different markets. Because this guide is intended for owners in the USA, Canada, UK, and Australia, physical verification is especially important for imported or export-specification Grand Cherokees.
A vehicle-specific bulb finder is another useful check. SYLVANIA’s replacement guide, for example, allows owners to search by vehicle and advises confirming bulb placement through the owner’s information.
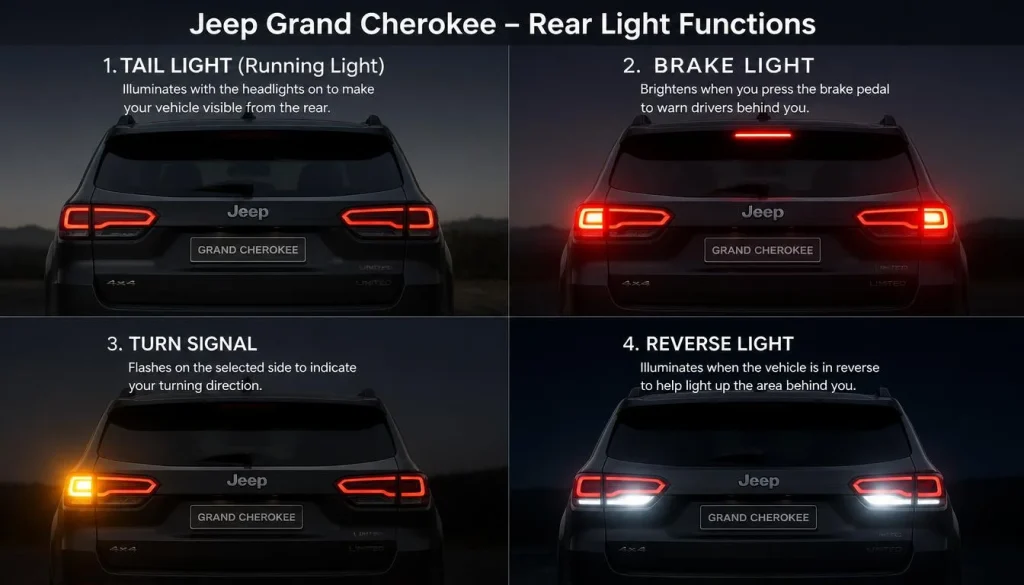
Tail Light vs Brake Light vs Turn Signal vs Reverse Light
It is easy to call every bulb in the rear housing a “tail light bulb,” but they do not necessarily perform the same job.
The tail or parking light illuminates when your exterior lights are switched on. The brake or stop light becomes brighter when the brake pedal is pressed. The rear turn signal, also called the rear indicator in the UK and Australia, flashes when you signal a turn. The reverse light illuminates when the transmission is placed in reverse.
Depending on the lamp design, one dual-filament bulb may perform both tail-light and brake-light functions. That is why you should identify which function has failed before removing or buying a bulb.
Does the Bulb Type Differ by Market?
It can. Lighting regulations and vehicle specifications have varied between North American and export markets, and an older Jeep may also have had its lamp assemblies replaced during its life.
Instead of assuming that a U.S.-market bulb chart automatically applies to a UK- or Australia-market vehicle, remove the failed bulb first and verify its number and socket design.
If your Grand Cherokee has aftermarket tail lights, do not assume that the original factory bulb specification still applies.
Tools and Parts You Need
You do not need a large tool collection for this job. In most cases, you will need a suitable replacement bulb, a small socket and ratchet or wrench that fits your lamp fasteners, clean gloves or a shop towel, and a flashlight if visibility around the rear housing is poor.
It is also useful to have a small container for the fasteners. A dropped bolt can turn a five-minute repair into a frustrating search around the cargo area or driveway.
How to Make Sure You Buy the Correct Replacement Bulb
Before purchasing a replacement:
- Confirm that you have a 1996 Jeep Grand Cherokee, not a standard Jeep Cherokee.
- Identify whether the failed light is the tail, brake, turn-signal, reverse, or center brake light.
- Check the part number on the original bulb.
- Compare the base and contact arrangement with the replacement.
- Confirm vehicle fitment using a reputable bulb catalog.
- If the tail light assembly is aftermarket, identify the bulb required by that assembly.
This simple check prevents one of the most common DIY problems: removing the lamp only to discover that the new bulb has the wrong base.
How to Remove the Tail Light Assembly on a 1996 Jeep Grand Cherokee
Start with the Jeep parked on a level surface. Set the parking brake and turn off the ignition and all exterior lights.
Open the rear liftgate so you can access the inner edge of the tail lamp area. Locate the fasteners securing the rear lamp assembly. Use the appropriate tool to remove them and place them somewhere safe.
Once the fasteners are out, support the lamp housing with both hands and carefully pull it away from the body.
Do not twist, pry, or yank the housing aggressively. Plastic lamp components become more brittle with age, and a 1996 vehicle may still have original mounting pieces.
You only need enough access behind the assembly to reach the bulb sockets.
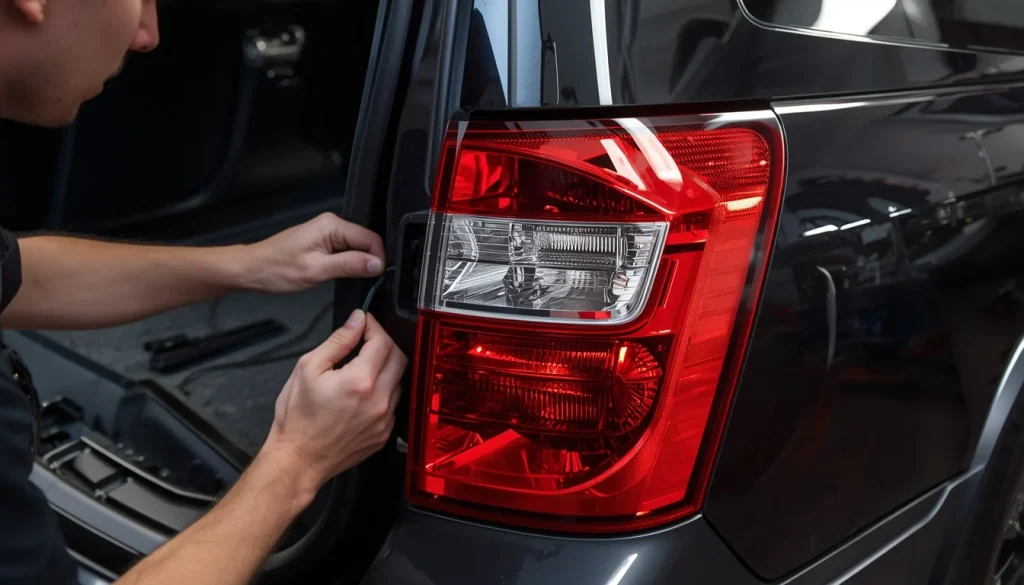
Driver-Side Tail Light Removal
The basic procedure on the driver’s side is to open the liftgate, remove the lamp fasteners, and carefully pull the housing outward.
Watch the wiring as the assembly comes away from the vehicle. There is no reason to stretch the harness just to change a bulb.
Passenger-Side Tail Light Removal
The passenger-side procedure is essentially the same. Again, support the housing while removing it and avoid putting unnecessary pressure on the wiring or plastic mounting points.
If one side feels unusually difficult to remove, stop and check for a fastener or retaining point you may have missed rather than forcing the lamp.
How to Change a 1996 Jeep Grand Cherokee Tail Light Bulb Step by Step
Step 1: Park the Jeep and Turn Off the Lights
Park somewhere safe with enough room to work behind the vehicle. Switch off the ignition and exterior lights and apply the parking brake.
If the lights have been on for a while, allow the bulb and housing to cool before working on them.
Step 2: Open the Rear Liftgate
Raise the liftgate fully. This exposes the area where the rear lamp assembly attaches to the body and gives you better access to its mounting hardware.
Make sure the liftgate is securely open before working around it.
Step 3: Locate the Tail Light Fasteners
Find the fasteners holding the tail light assembly in place. Inspect them before choosing your tool rather than forcing on a socket or wrench that does not fit correctly.
Older fasteners can be rusty or previously damaged, so use steady pressure.
Step 4: Remove the Tail Light Assembly
Remove the fasteners and keep one hand on the housing as it becomes loose.
Pull the assembly away carefully. If it resists, check that all required fasteners are removed. Avoid levering against painted bodywork with a screwdriver because it can damage both the paint and the lamp housing.
Step 5: Locate the Correct Bulb Socket
With the back of the lamp visible, identify the socket connected to the failed light.
If you are unsure which socket is correct, look at its position relative to the lens or have someone briefly operate the affected light before disassembly. Switch the lights off again before removing the socket.
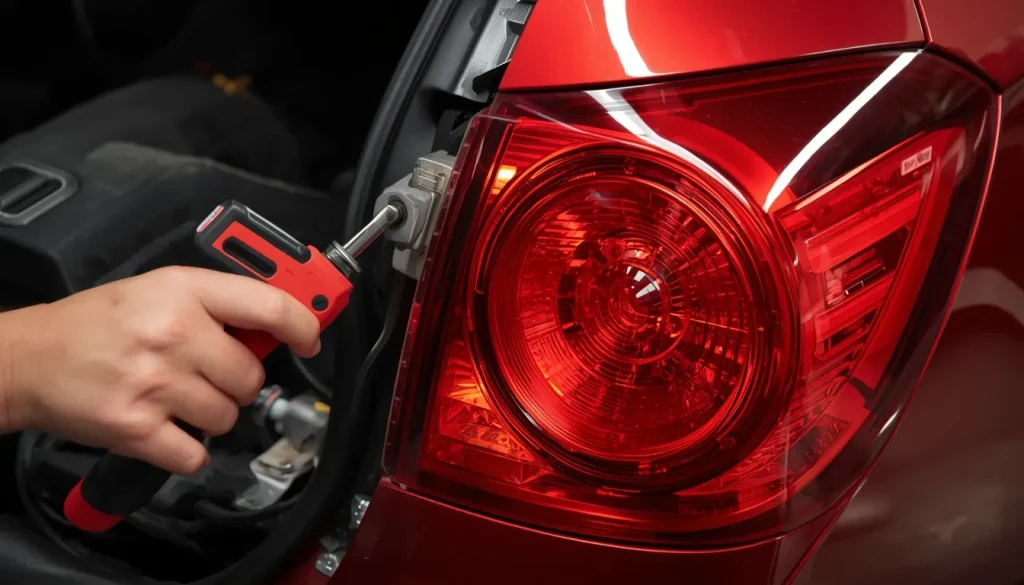
Step 6: Remove the Bulb Socket
Grip the socket rather than pulling on its wires. Rotate it in the direction required to unlock it from the lamp housing, then pull it straight out.
Inspect the socket as soon as it is removed.
Green or white corrosion, darkened contacts, melted plastic, or a loose-fitting bulb may indicate that you have more than a simple burned-out bulb.
Step 7: Remove the Burned-Out Bulb
Remove the old bulb from the socket using gentle, even pressure.
Compare it directly with the replacement. The base, contact arrangement, overall shape, and bulb number should match the required application.
A blackened bulb or visibly broken filament usually provides an obvious clue that the bulb has failed.
Step 8: Install the New Bulb
Fit the replacement firmly into the socket without using excessive force.
For replacement bulbs where glass handling is relevant, clean gloves or a clean shop towel are a sensible precaution. SYLVANIA specifically recommends avoiding direct contact with bulb glass during replacement.
If the bulb does not seat naturally, remove it and compare the base again. Do not force an incorrect bulb into the socket.
Step 9: Test the Tail and Brake Lights
Testing before reassembly can save considerable time.
Place the socket securely enough that it will not touch metal or fall, then test the affected lighting function. Depending on what you replaced, check the parking lights, brake lights, turn signal, hazards, or reverse light.
For a brake-light test, have another person press the brake pedal while you observe the rear lamp. If you are working alone, use a safe method of checking the light rather than taking risks around an unsecured vehicle.
Step 10: Reinstall the Tail Light Assembly
Once the light works correctly, switch the lights and ignition off again.
Insert the socket into the housing and rotate it until it locks securely. Check that any sealing surface is properly seated because moisture entering the lamp can lead to future corrosion.
Position the tail light assembly back against the vehicle and reinstall the fasteners.
Tighten them securely, but do not overtighten them. Old plastic lamp housings can crack when mounting hardware is forced down excessively.
Finish with one more lighting test.
How to Identify Each Rear Light Bulb
Knowing which rear light has failed prevents you from replacing the wrong bulb.
Tail and Parking Light
Switch the exterior lights on without pressing the brake pedal. The rear lamps that remain steadily illuminated are the tail or parking lights.
If only one side is dark, a failed bulb or local socket problem is likely. If both sides fail together, the problem may involve something shared by the circuit rather than two bulbs failing at exactly the same time.
Brake Light
Have another person press the brake pedal while you stand safely behind the Jeep.
If the normal tail light works but does not become brighter during braking, the stop-light portion of a dual-function bulb or another part of the brake-light circuit may be faulty.
Rear Turn Signal or Indicator
Activate the left and right turn signals separately.
A signal that flashes unusually quickly can sometimes indicate a failed bulb or a change in electrical load. LED conversions can also create hyperflash in some vehicle applications, and bulb manufacturers note that some LED installations may require additional load-management components.
Reverse Light
With appropriate safety precautions, the reverse lamps can be checked when reverse is selected.
If neither reverse lamp works, do not automatically replace both bulbs. A shared electrical problem is also possible.
Third Brake Light / CHMSL
The center high-mounted stop lamp, often called the third brake light or CHMSL, is separate from the main left and right tail lamp assemblies.
If the third brake light is the only failed light, identify and service that assembly rather than removing the main tail lamp unnecessarily.
Why Is My 1996 Jeep Grand Cherokee Tail Light Not Working?
Installing a new bulb will not solve every rear-light problem. A vehicle that is around three decades old may have issues with sockets, grounds, connectors, or wiring in addition to ordinary bulb failure.
Burned-Out Bulb
The bulb is still the simplest place to start, especially when only one lighting function on one side has stopped working.
Confirm the bulb with a visual inspection or test it before moving into more complicated electrical diagnosis.
Bad or Corroded Tail Light Socket
Moisture can enter an aging lamp assembly and attack the metal contacts inside a bulb socket.
Look for corrosion, discoloration, burnt contacts, softened plastic, or a bulb that no longer fits tightly.
If the socket is badly damaged, fitting another new bulb may provide only a temporary fix.
Blown Fuse
If several related lights stop working at the same time, check the relevant fuse information for your specific vehicle.
Never install a fuse with a higher rating simply to stop it from blowing. A fuse that repeatedly fails can indicate an electrical fault that needs proper diagnosis.
Loose or Damaged Wiring
Examine the wiring and connectors visible around the lamp.
Look for broken insulation, pulled wires, loose connectors, previous repairs, or wiring that has been trapped behind the housing.
Avoid probing wires randomly if you are not comfortable with automotive electrical testing.
Poor Ground Connection
A poor ground can cause lamps to behave strangely. Symptoms may include dim lights, intermittent operation, or one lighting function affecting another.
If a new bulb and a clean socket do not solve the problem, electrical diagnosis of power and ground at the socket is a logical next step.
New Bulb Still Does Not Work
If the correct new bulb does not illuminate, remove it and check that it is fully seated.
Then inspect the contacts and socket. If those look good, the next steps are checking the circuit’s fuse, power supply, ground, connectors, and related switches.
At that point, a multimeter or test light becomes useful. If electrical diagnosis is outside your comfort level, having a qualified technician test the circuit is usually more efficient than replacing parts at random.
Common Mistakes to Avoid
One of the easiest mistakes is confusing the Grand Cherokee with the Cherokee. They are different Jeep models, so instructions or parts intended for a Cherokee should not automatically be applied to a Grand Cherokee.
Another common mistake is buying the bulb before checking the failed lamp. Spending an extra minute verifying the old bulb can prevent an unnecessary trip back to the parts store.
Avoid forcing the housing when it does not release immediately. On an older SUV, plastic components and retainers may already be brittle.
Do not ignore corrosion just because the new bulb starts working. Corroded contacts can create resistance and lead to another failure later.
Finally, always test the light before fully reinstalling the housing.
Incandescent vs LED Bulbs for a 1996 Jeep Grand Cherokee
A conventional incandescent replacement is normally the simplest choice when you want the lighting system to behave much like the original setup.
It is inexpensive, widely available, and generally requires no additional electrical changes when the correct replacement specification is used.
LED replacements can offer lower power consumption, quick illumination, and potentially longer service life. However, LED conversions are not automatically problem-free. Depending on the bulb, lamp design, and circuit, problems can include incorrect light distribution, polarity issues, flickering, or turn-signal hyperflash.
SYLVANIA notes that some vehicles may require a load equalizer when aftermarket LED bulbs cause hyperflash, bulb warnings, or similar electrical behavior.
If reliability and originality are your priorities, a quality incandescent bulb is usually the simplest route. If you want LEDs, use a product specifically suitable for the required automotive lighting application and verify the final light output after installation.
Should You Replace Both Tail Light Bulbs at the Same Time?
You do not have to replace a working bulb simply because the bulb on the opposite side failed.
However, paired replacement has a practical advantage when both bulbs are the same type and age. If one original bulb has reached the end of its life, the other may not be far behind.
It also helps keep brightness and appearance consistent from side to side. SYLVANIA recommends replacing bulbs in pairs for equal brightness and colour.
If the other bulb was recently replaced and works properly, changing only the failed bulb is reasonable.
How Much Does Tail Light Bulb Replacement Cost?
DIY tail light bulb replacement is usually one of the less expensive lighting repairs because you are paying primarily for the bulb rather than significant labour.
Your actual cost depends on the bulb brand, whether you choose a standard or long-life incandescent bulb, whether you select LED technology, and whether additional parts are damaged.
Costs increase if the problem turns out to be a melted socket, damaged wiring, broken housing, or electrical fault rather than a failed bulb.
For this reason, inspect the socket and lamp assembly while they are already accessible.
FAQs About the 1996 Jeep Grand Cherokee Tail Light Bulb
What size tail light bulb does a 1996 Jeep Grand Cherokee use?
The correct bulb should be verified for the exact lamp function and vehicle specification. Check the number on the bulb being removed and confirm it with a reputable vehicle-specific bulb catalog. This is safer than assuming every rear position uses the same bulb.
How do you remove a 1996 Jeep Grand Cherokee tail light?
Open the rear liftgate, locate and remove the lamp assembly fasteners, and carefully pull the housing away from the body. Avoid forcing the housing because aging plastic components can break.
Is the tail light bulb also the brake light bulb?
It may be, depending on the lamp position and bulb configuration. A dual-filament bulb can provide a lower-intensity tail-light function and a brighter brake-light function. Verify the bulb removed from your vehicle.
What is the rear turn signal bulb on a 1996 Jeep Grand Cherokee?
Check the bulb installed in the turn-signal position and confirm it through a vehicle-specific replacement guide. Market and lamp-assembly differences make physical verification worthwhile, particularly on imported vehicles.
Can I use LED tail light bulbs in a 1996 Jeep Grand Cherokee?
LED replacements are available for many automotive bulb applications, but compatibility needs to be checked carefully. Some LED conversions can produce hyperflash or other electrical issues, particularly in turn-signal applications.
Why is my tail light still not working after replacing the bulb?
Possible causes include a poor connection, corroded socket, blown fuse, damaged wiring, weak ground, or another fault in the lighting circuit. Start at the socket and work through the circuit logically rather than replacing more bulbs.
How can I tell if my tail light socket is bad?
Common warning signs include corrosion on the contacts, melted or darkened plastic, loose bulb fitment, intermittent operation, or a bulb that works when moved but fails again afterward.
Are the driver-side and passenger-side replacement procedures the same?
The basic process is similar: access the rear assembly, remove its fasteners, pull the housing outward carefully, replace the appropriate bulb, test it, and reinstall the assembly.
Should I replace both rear bulbs together?
It is optional, but replacing matching bulbs as a pair can provide more consistent brightness and reduce the chance of returning to the same job soon afterward. Bulb manufacturers such as SYLVANIA recommend paired replacement for consistent output.
What should I do if I cannot identify the correct bulb?
Remove the old bulb and record its number, lighting position, and base style. Then check a vehicle-specific bulb finder or appropriate vehicle documentation. Jeep provides an owner’s-manual resource for vehicle information, while bulb manufacturers also recommend consulting vehicle documentation when confirming bulb placement.
Final Thoughts
Learning how to change a 1996 Jeep Grand Cherokee tail light bulb is useful because the repair is usually simple and requires only basic tools. The key is to work carefully with the aging lamp housing, identify the correct socket, verify the replacement bulb before installing it, and test the light before reassembling everything.
If the replacement bulb works, the job is finished. If it does not, use the opportunity to inspect the socket, wiring, connectors, fuse, and ground rather than assuming another new bulb will solve the problem.
A few extra minutes spent checking the entire lamp assembly can turn a basic bulb change into a lasting repair and help keep your Grand Cherokee visible to other drivers at night, during braking, and in poor weather.
“Cars aren’t just machines. They’re freedom, memory, and a little bit of grease under your fingernails.”
I’m Theodore Roosevelt—though my friends just call me “Ted” (and no, I’m not related to the president, though I do share his love for adventure). I grew up in Detroit in the 1970s, back when the city was still the heart of the American auto industry. My first love was a rusted-out 1967 Mustang my father and I rebuilt in our garage when I was fifteen. That project taught me that cars have souls. After spending twenty years as a mechanic and another ten writing for magazines, I started this blog to help everyday drivers and weekend wrenchers feel confident under the hood. Whether you’re restoring a classic or just trying to keep your daily driver alive for one more winter, I’m here to help you get there.