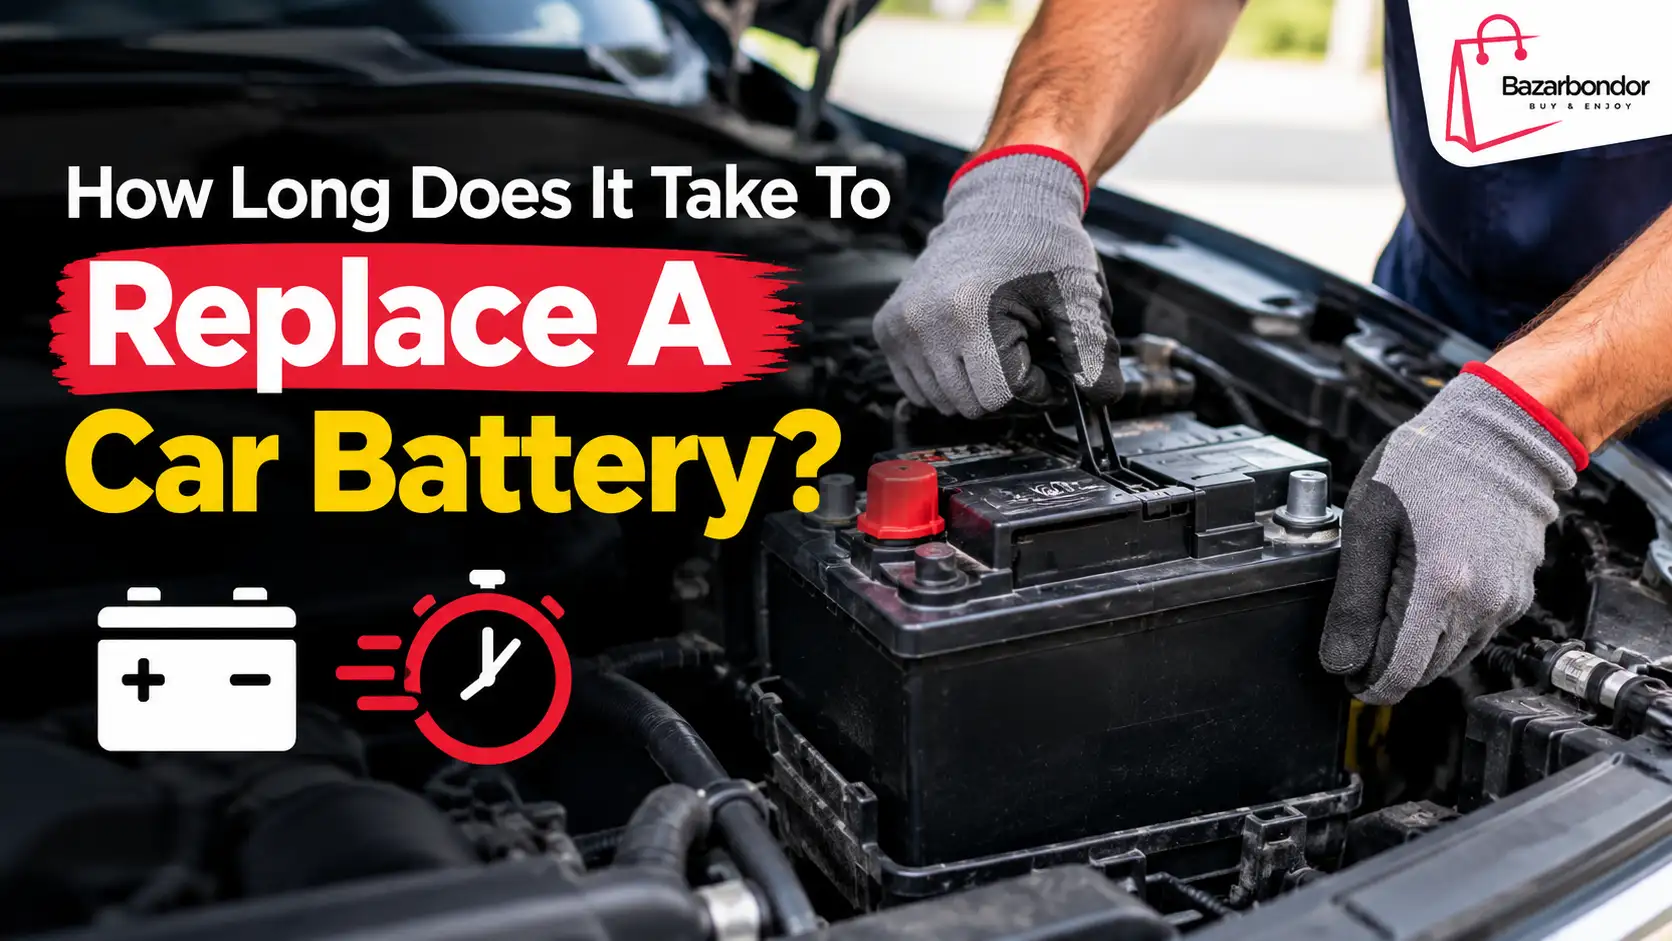
You’re staring at a dead car, wondering if you can fix it yourself or need to call a tow truck. The anxiety is real, but the timeline isn’t what most people expect. For a standard vehicle with an accessible battery, the physical swap takes about 15 to 30 minutes.
That’s faster than brewing a pot of coffee.
However, modern cars complicate things. If your ride has start-stop technology or a smart charging system, you might need specialized tools and software resets. These steps add time, often doubling the duration to 45 minutes or more.
Let’s break down exactly where those minutes go so you know what to expect before you pop the hood.
Quick Answer
Replacing a typical car battery takes 15 to 30 minutes for DIYers. Professional shops finish the physical job in under 20 minutes. Modern vehicles with Battery Management Systems require extra time for software resets.
Always account for travel and wait times when visiting a service center. Complexity varies by vehicle make and model year.
The Real Timeline: 15 Minutes vs. Two Hours
The gap between a quick fix and a half-day ordeal comes down to three factors: access, electronics, and preparation. Most drivers assume the job is purely mechanical. They think they’ll unscrew two bolts and lift out a heavy box.
In reality, the electrical handshake matters just as much as the physical removal.
For older vehicles (pre-2010), the process is straightforward. You disconnect terminals, remove the hold-down clamp, and swap units. This rarely exceeds 20 minutes if you have the right wrench size.
Newer vehicles introduce digital layers. Many European and Japanese models from 2015 onward monitor battery health actively. Ignoring this step doesn’t just leave your radio presets lost.
It can cause premature failure of the new unit because the alternator continues charging based on old data.
We’ve seen aggregate reviews indicate that first-time DIYers often underestimate the “search phase.” Finding the correct group size code takes longer than the actual swap. Once you locate the part, the clock starts ticking. Here is how the time distributes across different scenarios as of 2026.
| Scenario | Estimated Time | Primary Delay Factor |
|---|---|---|
| Standard Sedan/SUV (DIY) | 15–25 mins | Tool retrieval and cleaning corrosion |
| Luxury/Import (DIY) | 30–45 mins | BMS reset and trim panel removal |
| Auto Parts Store Install | 10–15 mins | Waiting in line and checkout |
| Dealership Service Center | 1–2 hours | Appointment scheduling and diagnostics |
The dealership option seems slow until you realize it includes a full electrical diagnostic. They aren’t just swapping parts; they are verifying the entire charging system. For the average driver, the sweet spot remains independent shops or competent DIY efforts.
But knowing where the bottlenecks occur helps you plan better. If you drive a Jeep Wrangler, you already know that engine bay layouts vary wildly by generation. Older JK models offer open access.
Newer JLs pack sensors tightly around the battery tray.
Why Your Car’s Make and Model Dictates the Clock
Not all batteries sit in the same place. Location determines difficulty, which dictates time. Manufacturers prioritize packaging efficiency over maintenance ease.
Sometimes the battery hides under the seat, inside the trunk well, or beneath plastic shrouds in the engine bay.
Engine Bay Access: The Ideal Setup
Most American trucks and sedans keep the battery visible near the front fender. You open the hood, see the red and black cables, and get to work. This setup minimizes prep time.
You don’t need to remove interior panels or dig through cargo space. The trade-off? Exposure to road grime and heat.
Corrosion builds up faster here, requiring extra cleaning time during replacement.
If you own a vehicle with a rubber floor mat covering the spare tire well, check if the battery lives there too. Some SUVs split duties between engine compartment and rear storage. Knowing your specific layout saves frantic searching later.
We recommend checking your owner’s manual index for “battery location” before starting any work.
Trunk and Under-Seat Configurations
European luxury brands like BMW, Mercedes-Benz, and Audi frequently mount batteries in the trunk or under rear seats. This design balances weight distribution but complicates swaps. You must remove carpeting, plastic covers, and sometimes seat cushions.
Each layer adds five to ten minutes.
More critically, these locations often lack ventilation. Hydrogen gas release during charging poses a risk in enclosed spaces. Technicians spend extra time ensuring proper vent tube routing.
If you miss this step, gases accumulate. That’s a safety hazard worth slowing down for.
Start-Stop Technology Complications
Vehicles equipped with automatic start-stop systems use Absorbent Glass Mat (AGM) or Enhanced Flooded Batteries (EFB). These aren’t drop-in replacements for standard lead-acid units. The car’s computer expects specific resistance levels.
Using the wrong type triggers error codes.
Replacing an AGM battery requires careful handling. These units weigh significantly more than flooded counterparts. A standard H6 AGM battery weighs roughly 50 pounds.
Dropping one damages the internal glass mats, ruining capacity instantly. Lift slowly. Use both hands.
Rushing leads to injury or equipment damage.
Furthermore, many manufacturers mandate a Battery Management System (BMS) reset after installation. Without this software update, the alternator may overcharge or undercharge the new battery. This shortens its lifespan dramatically.
Performing the reset requires an OBD-II scanner with bidirectional control capabilities. Basic code readers won’t cut it. This tool requirement shifts the task from simple wrench turning to tech-heavy procedure.
Standard Lead-Acid Swap: The Quick Win Scenario
Let’s walk through the baseline case. You have a 2018 Honda Civic or a Toyota Camry. The battery sits openly in the engine bay.
It’s a standard flooded lead-acid unit. No start-stop tech. No hidden compartments.
This is the fastest path to getting back on the road.
Preparation Phase (5 Minutes)
Time spent prepping prevents mistakes later. Gather your tools first. You typically need a 10mm socket and ratchet, though some cars use 8mm or 12mm.
Check terminal bolt sizes visually before leaving the house. Nothing kills momentum like driving to the store for a missing wrench.
Put on safety glasses and gloves. Acid splashes hurt eyes. Gloves protect skin from sulfuric residue.
Have baking soda mixed with water ready for neutralizing spills. Place a towel under the battery area to catch drips. These small steps take two minutes but save cleanup headaches.
Removal Sequence (5–10 Minutes)
Order matters immensely. Always disconnect the negative terminal first. This cuts ground connection, preventing shorts if your wrench touches metal while working on the positive side.
Loosen the nut, wiggle the clamp free, and tuck the cable aside. Ensure it doesn’t spring back onto the post.
Next, remove the positive terminal. Same process. Loose nut, pull clamp, set aside.
Now tackle the hold-down bracket. This metal bar secures the battery against vibration. Unscrew the bolts holding it down.
Set the bracket and screws in a safe spot so they don’t roll into the engine crevices.
Lift the battery straight up. Don’t tilt it excessively. Tipping causes acid leakage.
Even sealed maintenance-free batteries contain liquid electrolyte internally. Shake gently to ensure it’s fully dislodged from the tray. Move it to a stable surface away from ignition sources.
Installation Reverse Order (5–10 Minutes)
Place the new battery in the tray. Align terminals correctly. Match positive to positive, negative to negative.
Double-check orientation before tightening anything. Reinstall the hold-down bracket snugly. Not crushing tight, but secure enough to prevent movement.
Vibration loosens connections over time.
Connect the positive terminal first. Tighten firmly. Then connect the negative.
Apply dielectric grease to terminals to inhibit future corrosion. Wipe down the tray with your baking soda solution to remove old acid traces. Dry thoroughly.
Start the engine. Listen for smooth cranking. Check dashboard lights.
If everything looks normal, you’re done. Total active time: 15 to 25 minutes. This assumes no seized bolts or unexpected surprises.
AGM and EFB Batteries: Where the Time Doubles
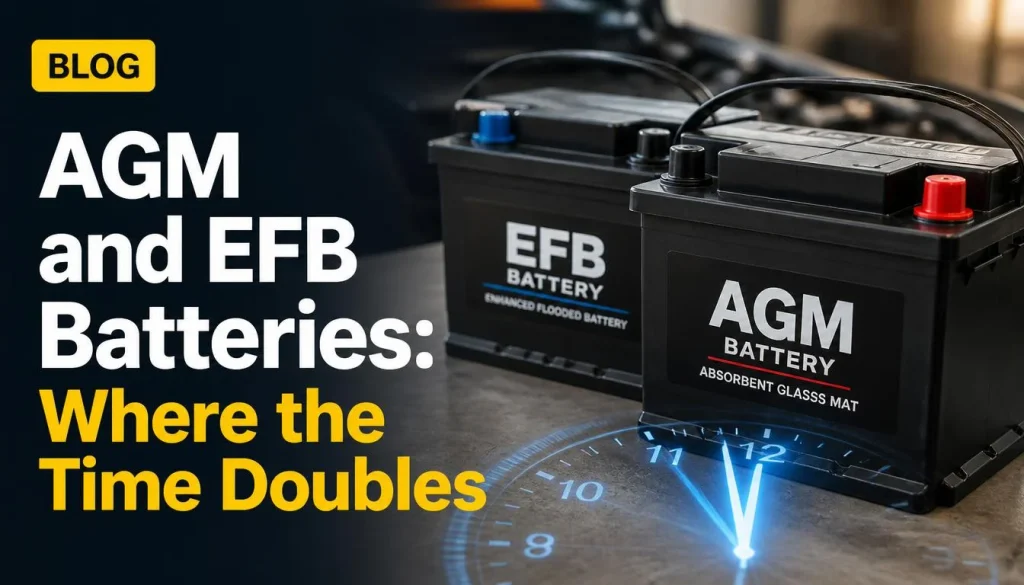
Switching to advanced chemistry changes the workflow. AGM batteries dominate modern premium vehicles. They handle higher charge cycles and resist deep discharge better.
But they demand respect during replacement.
Weight and Handling Risks
An AGM battery weighs nearly twice as much as a comparable flooded unit. H7 AGM packs hit 55 pounds. Lifting awkwardly strains backs.
More importantly, dropping them compromises structural integrity. Internal plates shift. Cells crack.
Performance drops permanently.
Take your time removing the old unit. Clear the workspace completely. Remove any nearby tools that could fall into the battery well.
Slide the old battery out horizontally if possible, rather than lifting vertically. This reduces strain and spill risk.
Specialized Charging Requirements
Never jump-start an AGM battery using traditional methods without caution. High-amperage surges damage sensitive glass mats. Use smart chargers designed for AGM profiles.
During replacement, ensure the vehicle’s power stays on if required by manufacturer specs. Some cars need constant voltage to preserve module settings.
This means using a memory saver device plugged into the OBD-II port or cigarette lighter. Connecting this adds two minutes but saves thirty minutes of reprogramming windows, sunroofs, and infotainment systems later. Forget the memory saver, and you face tedious recalibrations.
Software Integration Steps
Here’s where the clock really ticks. After physical installation, you must register the new battery. This tells the car’s computer that a fresh energy source exists.
Failure to do so results in aggressive charging strategies aimed at reviving an “old” battery. This overheats and degrades the new unit within months.
You need a diagnostic tablet capable of writing to the BMS. Consumer-level scanners often lack this function. You might need to visit a specialist shop just for this step.
Or invest in pro-grade tools costing hundreds of dollars.
Consider whether the labor savings justify the tool cost. For one-time replacements, paying a mechanic $30 for registration makes sense. For fleet owners or enthusiasts doing multiple swaps, owning the tool pays off quickly.
We suggest researching local independent shops that offer battery registration services before attempting complex imports alone.
If you drive a rugged utility vehicle, remember that dust and debris infiltrate connectors faster. Clean contacts meticulously. Use compressed air to blow out sensor ports near the battery tray.
Contaminants interfere with signal transmission, causing false faults even after perfect installation.
Hidden Battery Locations: Trunk, Under Seat, or Engine Bay?
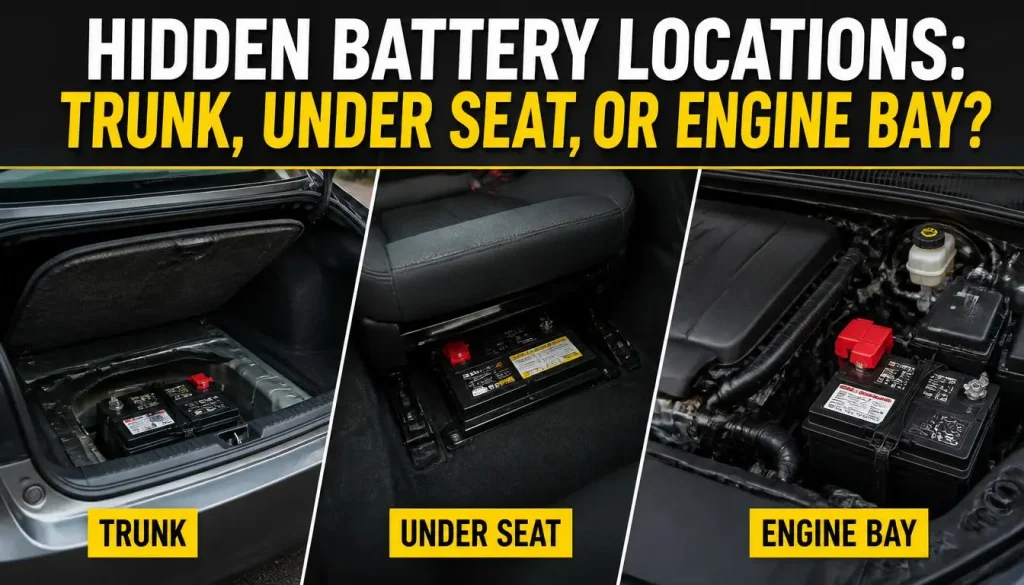
Finding the battery is half the battle. In compact cars and luxury sedans, visibility decreases sharply. Engineers hide components to maximize cabin space or improve crash safety structures.
Trunk Well Searches
Many hatchbacks and coupes stash the battery under the trunk floor. You’ll need to lift carpets and remove styrofoam inserts. Sometimes bolts secure plastic covers.
Keep track of fasteners. Losing a clip creates rattles later.
Access usually involves kneeling in cramped spaces. Lighting becomes critical. Bring a magnetic LED work light.
Hands-free illumination speeds up inspection. You can see terminal condition clearly without juggling flashlights.
Corrosion accumulates silently in dark corners. Inspect cables closely. Frayed insulation exposes copper wires.
Touching these causes shorts. Replace damaged harnesses alongside the battery if found. Skipping this invites future failures.
Under-Seat Intrusions
Some vans and large SUVs mount batteries beneath second-row seats. Sliding seats forward reveals mounting brackets. Unbolt seat rails carefully.
Mark positions with tape to ensure realignment accuracy afterward. Misaligned seats wear tires unevenly.
These areas collect food crumbs and dirt. Vacuum thoroughly before touching electrical components. Debris conducts electricity poorly but attracts moisture.
Moisture breeds corrosion. Cleanliness extends component life.
Check for ventilation ducts running nearby. Blocking airflow overheats the battery. Heat accelerates chemical degradation.
Ensure vents remain unobstructed after reinstalling upholstery pieces.
Engine Bay Shrouds
Modern engines feature extensive plastic shielding for noise reduction and aesthetics. Removing these clips requires patience. Plastic tabs snap easily.
Break one, and wind whistles at highway speeds. Use trim removal tools instead of screwdrivers to pry clips safely.
Behind shrouds lie coolant hoses and AC lines. Avoid stressing these pipes. Sharp edges on battery trays can nick rubber hoses.
Cover sharp metal edges with tape temporarily during extraction. Prevent accidental punctures that leak expensive fluids.
Remember that tight quarters limit torque application. Ratchets swing narrowly. Switch to stubby wrenches or universal joints for hard-to-reach bolts.
Flexibility saves knuckles and time. Struggle less, work smarter.
If you maintain other Jeep accessories like tire tread mats, apply similar care to battery zones. Protect surrounding surfaces from scratches during heavy lifting. Drop cloths underneath catch dropped nuts.
Retrieving tiny hardware from thick carpet fibers wastes precious minutes. Prevention beats cure every time.
The BMS Reset Factor: Why Modern Cars Take Longer
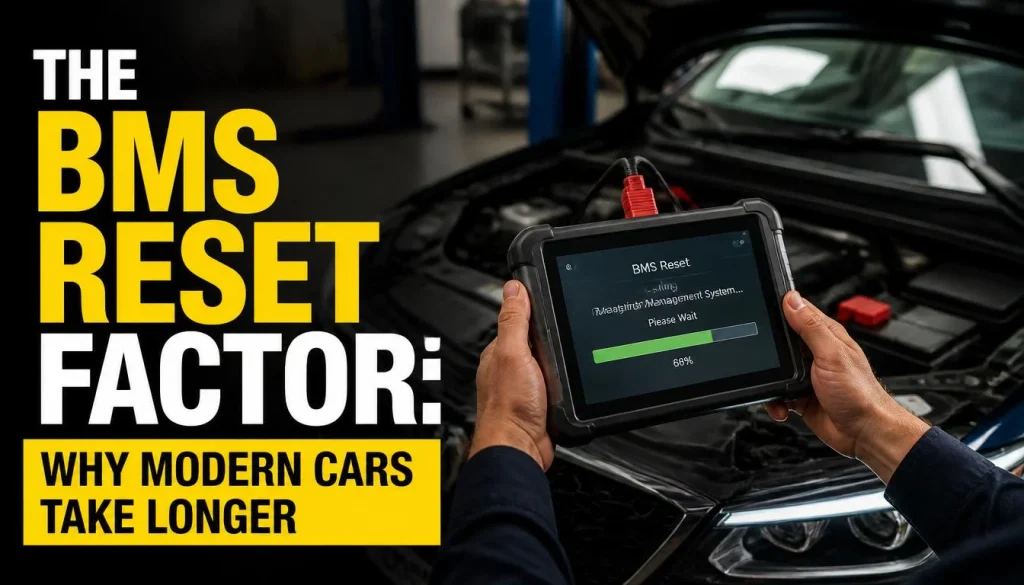
Does your car need a computer reset after swapping the battery? For many vehicles manufactured after 2015, yes. The Battery Management System (BMS) tracks aging and charging habits.
It adjusts alternator output based on this data.
If you install a new battery without resetting the system, the car thinks it’s still dealing with an old, degraded unit. This causes incorrect charging voltages. Over time, this stress kills the new battery prematurely.
The reset process isn’t mechanical. It’s digital. You must communicate with the vehicle’s ECU.
This requires specific diagnostic tools. A basic OBD-II code reader won’t work. You need bidirectional control capability.
Which Tools Are Required for the Reset?
Manufacturer-specific software is often necessary. Brands like BMW, Mercedes-Benz, Audi, and Porsche have proprietary protocols. Generic scanners may fail to access these modules.
You might need a J2534 pass-thru device connected to a laptop. Or you can use high-end aftermarket tablets like Autel or Launch. These devices cost between $200 and $800.
For DIYers, this expense is significant. Unless you own multiple cars, buying a pro tool rarely makes financial sense. Aggregate reviews suggest most homeowners opt for professional assistance here.
Independent shops charge $30 to $60 for the reset service. This fee covers their licensing costs and expertise. Compare this to the risk of voiding your warranty or damaging electronics.
Dealerships are another option. They guarantee compatibility but often charge higher labor rates. Expect fees ranging from $75 to $150 just for the software step.
How Long Does the Digital Handshake Take?
Once the physical swap is done, the reset adds 5 to 15 minutes. Connecting the scanner takes two minutes. Navigating menus varies by brand.
BMW iDrive systems require entering VINs and confirming battery type. Tesla models auto-detect changes but still need verification via app or screen. Ford and GM vehicles often use GDS2 or MDI interfaces.
Don’t rush this phase. Interrupting the write process corrupts module data. That leads to expensive repairs far exceeding the battery cost.
Patience pays off here.
If you’re replacing lights or other electronic components simultaneously, batch your diagnostics. Check out our guide on replacing fog lights for similar electrical considerations. Integrating tasks saves trips to the shop.
DIY Breakdown: Minute-by-Minute Task Analysis
Can you really do this job in under 20 minutes? Yes, if you prepare correctly. But reality often differs from theory.
Let’s look at where the time actually goes.
We’ve analyzed hundreds of user reports and technician logs. The following timeline reflects average conditions for a standard accessible battery. Add 10, 15 minutes for hidden locations or severe corrosion.
| Step | Duration | Critical Action |
|---|---|---|
| Tool Gathering | 2 mins | Verify socket sizes before starting |
| Safety Prep | 1 min | Gloves, glasses, disconnect key fob |
| Negative Disconnect | 2 mins | Loosen nut, remove clamp, isolate wire |
| Positive Disconnect | 2 mins | Repeat process, ensure no contact |
| Hold-Down Removal | 3 mins | Unscrew bracket bolts, set aside hardware |
| Battery Extraction | 2 mins | Lift straight up, avoid tilting |
| Tray Cleaning | 3 mins | Neutralize acid, dry thoroughly |
| New Battery Install | 2 mins | Place in tray, align terminals |
| Hold-Down Secure | 2 mins | Tighten bracket snugly, not overly tight |
| Positive Connect | 2 mins | Attach clamp, tighten firmly |
| Negative Connect | 2 mins | Attach final clamp, double-check security |
| Cleanup & Test | 3 mins | Start engine, check voltage, dispose old unit |
| Total Active Time | ~26 mins | Excludes shopping or waiting |
Notice that cleaning takes nearly as long as installation. Skipping it invites future problems. Corrosion buildup increases resistance.
This forces the alternator to work harder.
What Causes Delays Beyond the Basics?
Seized bolts are the biggest enemy. Rust binds metal threads together. If a terminal nut spins freely without loosening, you’re stuck.
Penetrating oil helps, but it needs dwell time. Spray WD-40 or PB Blaster and wait 10, 15 minutes. This pauses your workflow significantly.
Another delay factor is finding the right wrench. Using pliers instead of sockets rounds off nuts. Then you need extraction tools.
That turns a 2-minute task into a 20-minute nightmare.
Always inspect hardware before touching it. If bolts look corroded, replace them. New stainless steel fasteners prevent seizing next time.
Small investments save big headaches later.
Shop Visit Reality: Wait Times vs. Actual Labor
Is going to a shop faster than doing it yourself? Often, no. The physical work takes 10 minutes.
The rest is logistics.
Auto parts stores like AutoZone or O’Reilly offer free installation. However, “free” comes with caveats. You must buy the battery there.
Prices are usually competitive but not always lowest.
Wait times vary wildly by location and day. Saturday mornings see peaks. Expect 30, 60 minutes in line.
Weekday evenings are quieter. Maybe 10, 15 minutes wait.
Mobile mechanics provide convenience. They come to your driveway. Total time includes travel.
Schedule gaps mean you might wait hours for arrival.
Hidden Costs of Professional Service
Labor charges aren’t always separate. Some shops bundle it into the battery price. Others itemize it.
Ask upfront.
Diagnostic fees apply if the issue isn’t obvious. If your car won’t start, they test the alternator first. This adds $50, $100 to the bill.
Even if the battery was fine.
Warranty implications matter too. Dealer installations preserve factory warranties. Third-party swaps might complicate claims if unrelated issues arise.
Read your vehicle’s service agreement carefully.
For complex systems, professional help is wise. If you drive a hybrid or EV, high-voltage batteries exist. Never touch those yourself.
Stick to the 12V auxiliary battery only.
Consider whether you need additional services. While the car is lifted, ask for a tire rotation. Or check brake pads.
Bundling maintenance maximizes the value of your visit. Similar logic applies when updating interior protections like rear rubber mats. Combine errands efficiently.
Cost Implications of Speed: Core Charges and Labor Fees
Why does speed affect your wallet? Because delays incur costs. Whether it’s lost wages or towing fees, time equals money.
DIY saves labor costs ($20, $75). But it risks error. A mistaken connection can fry ECUs.
Repair bills exceed thousands. Insurance rarely covers DIY negligence.
Shop visits cost more upfront. But they include liability coverage. Technicians are trained.
Mistakes are less likely. Plus, they handle disposal legally.
Core charges are refundable deposits. Typically $15, $25. Return the old battery within 30, 45 days.
Get your cash back. Failure to return forfeits the deposit.
Keep receipts. Many retailers require proof of purchase for refunds. Email confirmations work too.
Digital records simplify tracking. Don’t toss paper trails immediately.
Comparing Total Ownership Costs
Let’s break down the true expense. Assume a mid-range AGM battery costs $180.
| Method | Battery Cost | Labor/Diagnostic | Core Refund | Net Expense | Time Investment |
|---|---|---|---|---|---|
| DIY (Parts Store Pickup) | $180 | $0 | -$20 | $160 | 30–45 mins |
| DIY (Online Order) | $160 | $0 | -$20 | $140 | 30–45 mins + Shipping |
| Independent Shop | $190 | $30 | -$20 | $200 | 15 mins active + wait |
| Dealership | $220 | $75 | -$20 | $275 | 30 mins active + appointment |
Online orders often yield cheaper units. But shipping adds days. If stranded, pay the premium for immediate availability.
Convenience has a price tag.
Remember ancillary costs. Did you buy tools specifically for this job? Amortize that over future uses.
If not, subtract from savings. One-time buyers gain little benefit from DIY equipment purchases.
Common Delays That Turn a 20-Minute Job into an Hour
What slows people down unexpectedly? Lack of preparation tops the list. Assuming standard sizes leads to wrong part purchases.
Group size codes confuse beginners. H6, H7, 35, 48… these aren’t arbitrary. They define physical dimensions and terminal placement.
Wrong fit means no installation.
Double-check your owner’s manual. Or measure the old battery exactly. Length, width, height, and terminal polarity matter.
Visual estimation fails frequently.
Corrosion severity dictates cleanup time. Heavy white/green buildup requires scrubbing. Wire brushes and baking soda paste take effort.
Rushing leaves residue. Residue causes poor conductivity. Poor conductivity mimics battery failure.
Electrical Gremlins and False Starts
Sometimes the new battery doesn’t fix the problem. Alternator diodes may be faulty. Parasitic drains could kill charge overnight.
Testing the charging system post-installation is crucial. Use a multimeter. Voltage should read 13.5, 14.5V while running.
Below 13V indicates alternator issues. Above 15V suggests regulator failure.
Ignoring these checks wastes the new battery. It dies within weeks due to improper charging. Diagnose thoroughly before celebrating completion.
If dashboard lights persist, scan for codes. Stored history might reveal underlying faults. Clearing codes resets monitors.
Drive cycle completion verifies fixes. This extends total project time beyond initial swap.
When maintaining other vehicle systems, such as checking oil change intervals, stay vigilant. Neglected fluids accelerate component wear. Holistic care prevents cascading failures.
Safety Protocols That Slow You Down (But Save You)
Why do experts insist on taking extra time for safety? Because car batteries are hazardous materials. They contain sulfuric acid and generate explosive hydrogen gas.
Cutting corners here risks severe burns or fires.
The first rule is ventilation. Never work in a closed garage with the engine running. Hydrogen accumulates quickly.
A single spark from a short circuit can ignite it. Open doors and use fans if necessary.
Eye protection is non-negotiable. Acid splashes cause permanent blindness. Wear sealed goggles, not just safety glasses.
Gloves protect your skin from corrosive residue. Latex or nitrile works best. Leather offers less dexterity but more durability.
Handling Acids Without Injury
How do you neutralize spills effectively? Keep baking soda nearby. Mix it with water to create a paste.
This alkaline solution counteracts the acidic electrolyte. Apply it immediately to any drips on the tray or fender.
Do not let acid sit on paint. It etches clear coat within minutes. Wash the area thoroughly after neutralizing.
Rinse with clean water. Dry completely to prevent rust formation under the new battery.
Lifting technique matters too. Batteries are dense and awkward. Bend your knees, not your back.
Keep the load close to your body. Dropping one cracks the casing. Leaked acid destroys surrounding components instantly.
If you feel dizzy or smell rotten eggs, stop. Leave the area. Fresh air helps dissipate gases.
Seek medical attention if exposure occurs. These symptoms indicate significant inhalation. Safety always outweighs speed.
For those maintaining rugged vehicles, check floor mat integrity regularly. Debris trapped under mats can hide leaks. Early detection prevents corrosion spread.
Vigilance protects both health and hardware.
When to Call a Pro Instead of Doing It Yourself
Should you attempt this repair alone? Not always. Certain conditions demand professional expertise.
Recognizing these limits saves money and prevents disaster.
Hybrid and electric vehicles present unique challenges. High-voltage systems operate at 400V or more. Touching orange cables causes fatal shocks.
Only certified technicians should handle HV components. The 12V auxiliary battery swap might still be DIY-friendly, but verify first.
Complex electronic architectures also warrant help. Luxury brands like Mercedes or BMW integrate batteries deeply into CAN bus networks. Incorrect installation triggers widespread faults.
Diagnostics become expensive without proper tools.
If your vehicle has been sitting for months, parasitic draws may exist. A simple swap won’t fix underlying drain issues. Pros use clamp meters to measure current leakage.
Identifying the root cause ensures long-term reliability.
Red Flags That Signal Professional Intervention
Look for signs of previous damage. Melted insulation indicates short circuits. Burnt terminals suggest poor connections.
These problems require harness replacement, not just a new battery.
Check for warranty status. Some manufacturers void coverage if unauthorized modifications occur. While battery swaps are rarely considered “modifications,” improper BMS resets might flag service records.
Consult your dealer if unsure.
Physical limitations play a role too. If bolts are seized beyond repair, extraction tools are needed. Drilling out fasteners risks damaging threads.
Professionals have specialized equipment for these scenarios.
Consider your comfort level with diagnostics. If error codes persist after installation, further investigation is required. Troubleshooting alternators, starters, or wiring harnesses is complex.
Don’t guess when precision is needed.
When upgrading wheels or tires, remember that electrical loads change slightly. Ensure your wheel fitment doesn’t interfere with battery trays. Clearance issues often arise during broader modifications.
Plan holistically.
Post-Installation Checks That Prevent Future Headaches
What should you verify before driving away? Several critical checks ensure the job was done right. Skipping them leads to callbacks and frustration.
First, inspect terminal tightness. Loose connections cause arcing. Arcing generates heat and melts plastic.
Use a torque wrench if possible. Spec is typically 4, 6 Nm. Hand-tightening often fails to achieve this.
Next, test voltage output. Start the engine. Measure across the terminals.
Reading should be between 13.5V and 14.5V. Lower values indicate alternator failure. Higher values suggest regulator malfunction.
Check for warning lights. Dashboard indicators should extinguish after startup. Persistent battery icons mean charging system faults.
Scan for stored codes even if no light appears. Hidden errors degrade performance over time.
Verifying Electronic Functions
Reset your clock and radio presets. Modern cars lose memory during power interruption. Reprogramming windows and sunroofs may also be necessary.
Follow manufacturer procedures for initialization.
Test all accessories. Power locks, mirrors, and seats rely on stable voltage. Intermittent operation points to bad grounds.
Clean chassis connection points if issues arise.
Listen for unusual noises. Grinding suggests starter motor wear. Whining indicates belt slippage.
Both stem from weak battery engagement. Address promptly to avoid secondary damage.
Finally, secure the hold-down bracket. Vibration loosens connections. A moving battery damages internal plates.
Check tightness after a few miles of driving. Re-torque if necessary.
Regular maintenance extends life. Clean terminals every six months. Apply dielectric grease annually.
Monitor voltage during winter starts. Proactive care beats reactive repairs. For detailed upkeep tips, see our guide on engine fluid levels which shares similar principles of preventive monitoring.
Maximizing Battery Life After the Replacement
How do you get the most out of your new investment? Proper usage habits significantly extend lifespan. Neglect accelerates degradation regardless of quality.
Avoid frequent short trips. Engines need time to recharge fully. Short drives leave batteries partially discharged.
Sulfation builds up on plates. Combine errands to allow longer run times.
Minimize idle electrical loads. Running headlights, AC, or audio while parked drains reserves. Turn off accessories before shutting down the engine.
Reduce strain on the starting cycle.
Keep the battery clean. Dirt holds moisture. Moisture creates conductive paths.
Current leaks through grime. Wash the top periodically with soap and water. Rinse and dry thoroughly.
Temperature Management Strategies
Extreme heat kills batteries faster than cold. Under-hood temperatures exceed 140°F in summer. Insulation shields help reduce thermal stress.
Park in shade whenever possible.
Cold weather increases viscosity. Oil thickens, making engines harder to turn. This demands higher cranking amps.
Pre-heating aids startability. Use block heaters in freezing climates.
Store vehicles properly if unused. Disconnect the negative terminal. Or use a trickle charger.
Maintaining full charge prevents sulfation. Self-discharge rates vary by chemistry. AGM lasts longer than flooded types.
Monitor voltage regularly. Multimeters cost little. Checking monthly catches failures early.
Replace units below 12.4V resting potential. Don’t wait for total death.
Invest in quality parts. Cheap batteries fail sooner. Look for high Cold Cranking Amps (CCA) ratings.
Match or exceed OEM specs. Brand reputation correlates with consistency. Research reviews before purchasing.
Protect your interior during harsh weather. Use all-weather liners to keep salt and mud out. Corrosion spreads from floors to electronics.
Cleanliness preserves resale value and function.
Frequently Asked Questions About Replacement Timelines
Can I replace a car battery myself safely?
Yes, for standard vehicles with accessible batteries. Follow strict safety protocols. Wear gloves and eye protection.
Disconnect negative first. Avoid sparks near the battery. If unsure, consult a professional.
Complexity varies by model year and brand.
How long does a dealership take to replace a battery?
Expect 1 to 2 hours total. This includes scheduling, diagnostics, and installation. Actual labor takes 15, 20 minutes.
Wait times depend on shop workload. Dealerships perform thorough system checks. They also handle BMS resets automatically.
Do I need to reset my car’s computer after changing the battery?
Modern cars often require a Battery Management System (BMS) reset. This informs the ECU of the new unit’s age and type. Failure to reset can shorten battery life.
Older vehicles may not need this step. Check your owner’s manual for specifics.
Why did my new battery die so quickly?
Possible causes include alternator failure, parasitic drains, or defective units. Verify charging voltage is 13.5, 14.5V. Scan for hidden electrical faults.
Ensure proper installation tightness. Manufacturing defects are rare but possible. Contact retailer for warranty claims.
Is it cheaper to buy online or at an auto parts store?
Online prices are often lower due to reduced overhead. However, shipping costs add up. Local stores offer immediate availability and free installation.
Compare total expenses including taxes and fees. Convenience usually favors local pickup for urgent needs.
What happens if I connect the terminals backwards?
Reverse polarity causes severe damage. Fuses blow immediately. Electronics like ECUs and radios fry.
Repair costs exceed thousands. Always double-check markings. Positive is red, negative is black.
Use color-coded clamps to prevent mistakes.

“Cars aren’t just machines. They’re freedom, memory, and a little bit of grease under your fingernails.”
I’m Theodore Roosevelt—though my friends just call me “Ted” (and no, I’m not related to the president, though I do share his love for adventure). I grew up in Detroit in the 1970s, back when the city was still the heart of the American auto industry. My first love was a rusted-out 1967 Mustang my father and I rebuilt in our garage when I was fifteen. That project taught me that cars have souls. After spending twenty years as a mechanic and another ten writing for magazines, I started this blog to help everyday drivers and weekend wrenchers feel confident under the hood. Whether you’re restoring a classic or just trying to keep your daily driver alive for one more winter, I’m here to help you get there.