
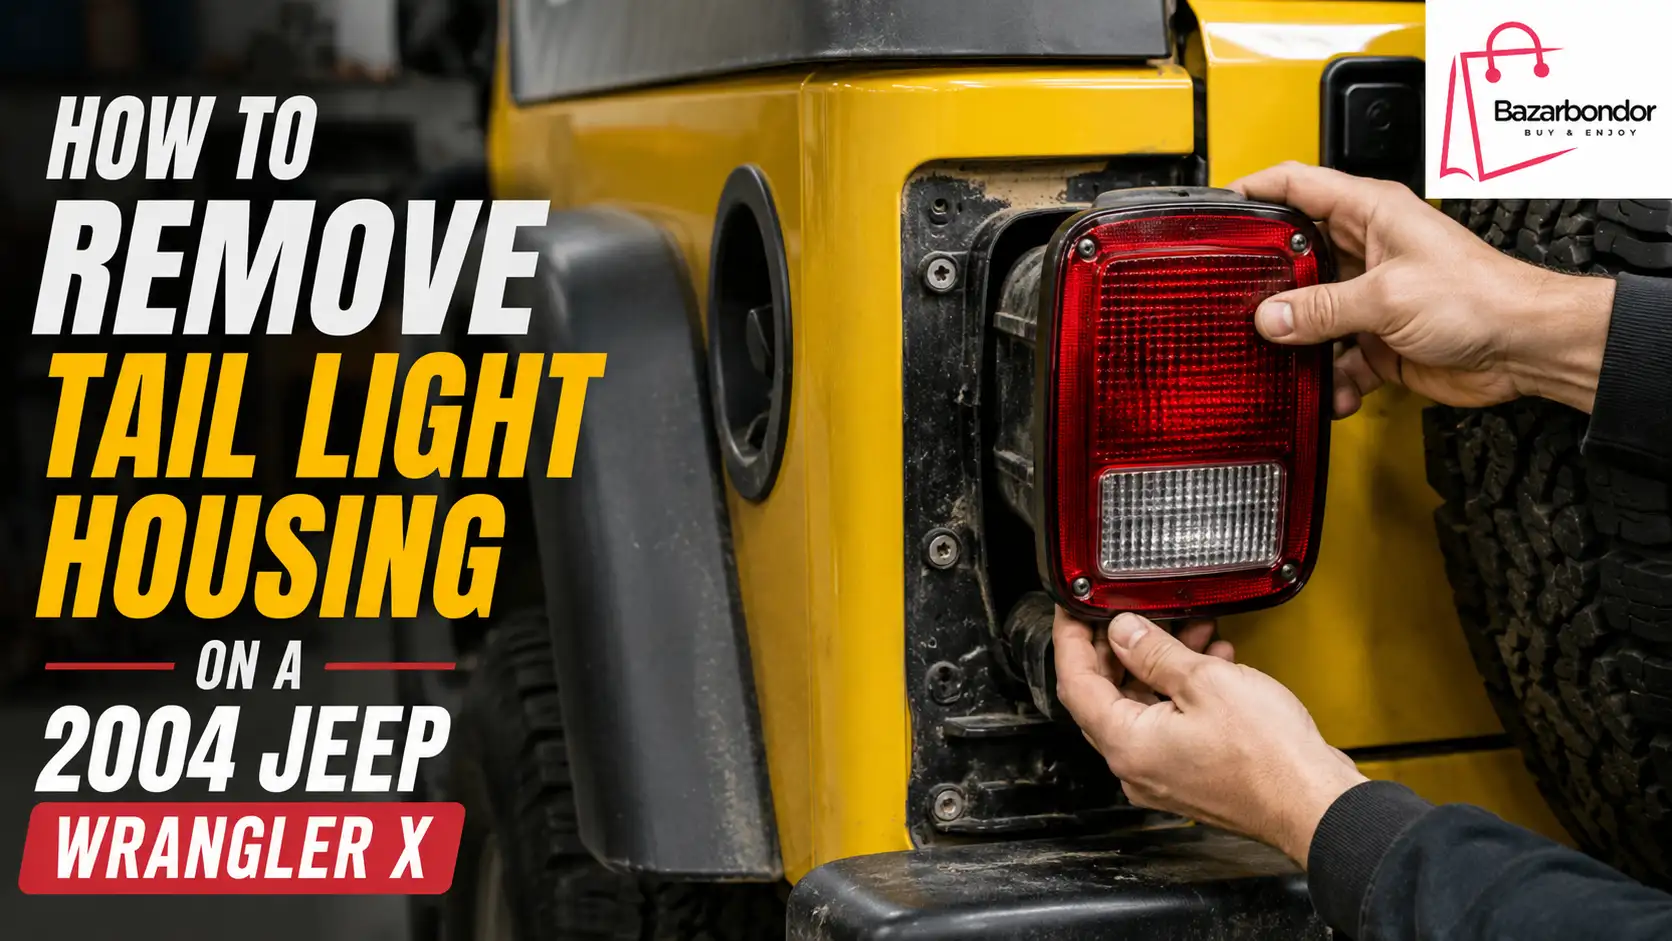
Removing the tail light housing on a 2004 Jeep Wrangler X is a simple DIY job once you know where the mounting bolts and wiring connector are located. The 2004 Wrangler X belongs to the TJ generation, so the rear light setup is fairly straightforward compared with many newer vehicles.
In most cases, you can remove the complete tail light assembly with basic hand tools, pull it carefully away from the body, disconnect the wiring harness, and take the housing off without removing the bumper. The passenger side can look a little more complicated because of nearby EVAP components, but you normally do not need to remove the EVAP canister just to take out the tail light.
This guide explains how to remove the tail light housing on a 2004 Jeep Wrangler X, how to deal with a stuck assembly, how to disconnect the wiring safely, and what to check before reinstalling or replacing the light.
What You Need to Remove the Tail Light Housing
You do not need many tools for this job. Having everything ready before you start makes the process easier.
You may need:
- A basic socket and ratchet set
- A screwdriver if your light uses screw-type replacement hardware
- Work gloves
- A clean microfiber cloth
- A flashlight
- Penetrating oil for rusty mounting hardware
- A small plastic trim tool if needed
- A replacement tail light assembly if the old housing is cracked or damaged
Factory-style Jeep TJ tail lights are held to the body with mounting fasteners. After those fasteners are removed, the housing can be moved outward far enough to reach the electrical connector.
Avoid using a metal pry bar around the painted body panel. It can damage the paint or crack the light housing.
Tail Light Housing vs. Lens vs. Bulb: What Are You Removing?
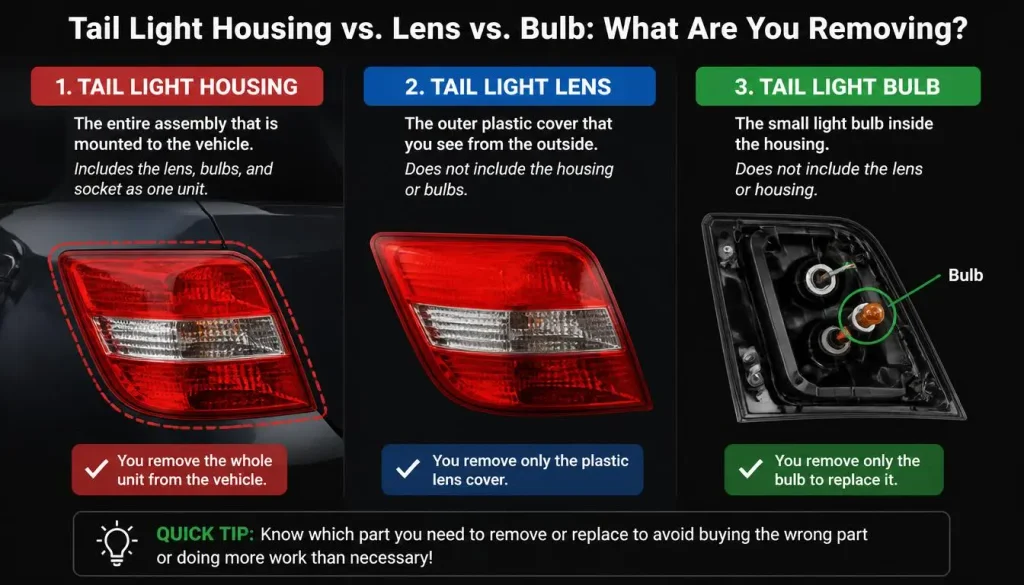
Before starting, it helps to know exactly which part you want to remove.
The tail light housing, also called the tail light assembly or tail lamp assembly, is the complete unit attached to the rear corner of the Jeep.
The lens is the colored outer cover.
The bulb socket sits inside the assembly and holds the bulb.
If you only need to replace a burned-out bulb, removing the entire housing may not always be necessary. However, if the housing is cracked, the mounting points are broken, water is getting inside, or you are installing a replacement assembly, removing the complete tail light housing is the correct job.
How to Remove Tail Light Housing on a 2004 Jeep Wrangler X
The removal process is similar on both sides of the Wrangler, although the passenger side can require a little more care around the wiring.
Step 1: Park the Jeep Safely
Park your Wrangler on a flat surface.
Turn off the engine, remove the key, and switch off all exterior lights.
If you recently drove the Jeep, give the rear lights a few minutes to cool before handling the housing.
Step 2: Locate the Tail Light Mounting Bolts
Stand behind the Jeep and look at the tail light assembly you want to remove.
On a factory-style Jeep Wrangler TJ tail light, you will normally find three main mounting fasteners securing the housing to the body.
Inspect all visible fasteners before removing anything. Aftermarket tail lights sometimes use slightly different screws, bolts, brackets, or mounting plates.
If the bolts are dirty or rusty, clean around them first so the tool can seat properly.
Step 3: Remove the Tail Light Housing Fasteners
Use the correct socket or screwdriver for the hardware installed on your Jeep.
Loosen each fastener carefully.
If a bolt feels seized, do not force it immediately. Apply a small amount of penetrating oil and give it time to work. Forcing a badly rusted bolt can round the head or damage the mounting point.
Keep the fasteners in a small container so they do not get lost.
Step 4: Pull the Housing Away From the Body
Once the mounting hardware is removed, support the tail light with one hand.
Gently pull the housing straight outward from the Jeep.
Do not yank it.
The wiring harness will still be connected behind the assembly, so you only need enough movement to reach the plug.
If the housing does not move easily, stop and check for a fastener you may have missed.
Step 5: Find the Tail Light Wiring Connector
Look behind the housing.
You should see the wiring running from the tail light assembly toward the body-side harness.
Follow the wires until you reach the electrical connector or pigtail connection.
Use a flashlight if access is tight.
Do not pull the light farther away by stretching the wiring.
Step 6: Disconnect the Tail Light Wiring Harness
Hold the connector body rather than the wires.
Press the locking tab and gently separate the two sides of the connector.
Older connectors can become stiff because of dirt, age, heat, or corrosion. If the plug does not release immediately, press the locking tab again and gently work the connector back and forth.
Do not pull hard on the wires. Damaging the Jeep TJ tail light wiring harness can turn a simple housing replacement into an electrical repair.
Step 7: Remove the Tail Light Assembly
After the electrical connector is disconnected, you can remove the tail light housing completely from the Jeep.
Place it on a clean surface.
At this point, you can inspect the housing, replace it, repair wiring problems, or transfer bulbs and sockets if your replacement assembly requires them.
How to Remove the Passenger-Side Tail Light Without Removing the EVAP Canister
The passenger-side tail light often causes more confusion than the driver-side assembly.
On 2003 to 2006 Jeep Wrangler TJ models, EVAP-related components are located near the passenger-side rear area. Because of this, some owners assume that the EVAP canister must be removed before the passenger tail light can come out.
For normal tail light housing removal, that usually is not necessary.
Remove the housing mounting fasteners first, then gently pull the assembly outward. There should normally be enough wiring movement to access the connector near the EVAP area.
Reach behind the housing, locate the plug, press the connector lock, and disconnect it.
The key is to work slowly. Do not try to force your hand deep behind the EVAP components if the connector can be brought closer by carefully moving the light housing outward.
If your Jeep has modified wiring, aftermarket EVAP equipment, trailer wiring, or a non-standard tail light setup, access may be different.
Is Driver-Side Tail Light Removal Different?
The basic process is the same on both sides:
- Remove the mounting hardware.
- Pull the housing outward.
- Locate the electrical connector.
- Disconnect the wiring.
- Remove the assembly.
The driver side may feel easier because there is usually less confusion around the EVAP equipment.
Still, older Jeeps are often modified. Trailer wiring, LED conversions, replacement bumpers, aftermarket lamps, and previous electrical repairs can change what you find behind the housing.
Always inspect your own Jeep rather than assuming the wiring is completely factory-original.
What to Do If the Tail Light Housing Won’t Come Off
A Jeep TJ tail light housing that refuses to move is usually being held by one of a few simple problems.
Check for a Missed Fastener
Do not keep pulling if the housing feels solidly attached.
Look around the assembly again and make sure every mounting bolt or screw has been removed.
This is especially important with aftermarket lights because their mounting hardware may not match the factory setup.
Look for Rust or Dirt
Years of mud, road salt, moisture, and dirt can make the housing feel stuck to the body.
Gently work the assembly from side to side.
Avoid aggressive prying.
A plastic trim tool can help create a small gap without scratching the Jeep.
Do Not Pull Against the Wiring
Sometimes the housing moves a short distance and then suddenly stops.
That often means the wiring harness has reached its limit.
At this point, do not pull harder. Reach behind the assembly and disconnect the wiring plug first.
Check for Aftermarket Wiring
Many older Wranglers have trailer wiring, LED tail lights, custom connectors, or spliced wiring.
If the light does not come out normally, look behind the housing for additional wires or connectors before applying more force.
How to Disconnect a Stubborn Tail Light Connector
An old tail light connector can be harder to remove than the housing itself.
First, locate the locking tab.
Press the tab firmly while gently pushing the two connector halves together. Then pull them apart.
Pushing inward first can sometimes release pressure from the locking clip.
If the connector is dirty, clean around it before trying again.
Do not insert a large screwdriver into the plug and twist aggressively. Old plastic becomes brittle and can break easily.
If the connector is damaged, cracked, melted, or badly corroded, consider replacing the tail light pigtail or affected section of the wiring harness.
When Should You Replace the Tail Light Housing?
Removing the assembly gives you a good opportunity to inspect its condition.
Replacement may be the better option if you find:
- A cracked outer lens
- Broken mounting points
- Water inside the housing
- Heavy condensation that keeps returning
- Melted bulb socket areas
- Corroded electrical contacts
- Damaged wiring
- Loose internal parts
- A housing that no longer seals properly
Water inside a tail light should not be ignored. Moisture can damage bulbs, sockets, connectors, and wiring over time.
If the housing itself is damaged, replacing the complete tail light assembly is often more reliable than trying to seal a badly cracked unit.
How to Reinstall the Tail Light Housing
Installation is basically the removal process in reverse.
Start by inspecting the electrical connector.
Make sure the terminals are clean and the wires are not damaged.
Connect the tail light wiring harness until the locking tab clicks into place.
Gently position the housing back against the body.
Make sure no wires are trapped between the housing and the Jeep.
Start the mounting fasteners by hand. This helps prevent cross-threading.
Tighten the fasteners evenly.
They should be secure, but do not overtighten them. Excessive force can crack a plastic housing, damage mounting points, or cause problems with an aftermarket assembly.
Test the Tail Lights Before Driving
Always test the lights after reinstalling the housing.
Check:
- Tail or running lights
- Brake lights
- Left and right turn signals
- Reverse lights
- Hazard lights
Ask someone to stand behind the Jeep while you operate the controls, or position the Jeep where you can see the light reflection on a wall or garage door.
If one function does not work, check the bulb, socket, connector, and wiring before assuming the replacement housing is defective.
A connector that is not fully seated can cause an intermittent light or complete failure.
Common Mistakes to Avoid
Removing a 2004 Jeep Wrangler tail light assembly is not difficult, but a few mistakes can make the job harder.
Pulling before all bolts are removed: This can damage the housing or body mounting points.
Yanking the housing by the wires: Always disconnect the connector before moving the light too far from the Jeep.
Confusing bulb replacement with housing removal: Make sure you are removing the correct part for the repair you are doing.
Using too much force on an old connector: Plastic electrical connectors can become brittle with age.
Overtightening the housing during installation: The light only needs to be secure.
Skipping the final light test: Always verify every rear lighting function before driving.
Assuming every TJ has factory wiring: A 2004 Wrangler may have had more than 20 years of repairs or modifications.
Frequently Asked Questions
How Do You Remove the Tail Light Housing on a 2004 Jeep Wrangler?
Remove the tail light mounting fasteners, gently pull the housing away from the rear body panel, locate the wiring connector, press its locking tab, disconnect the harness, and lift the complete tail light assembly away from the Jeep.
How Many Bolts Hold a Jeep TJ Tail Light Housing?
A factory-style Jeep Wrangler TJ tail light assembly commonly uses three main mounting fasteners. Aftermarket lights may use different hardware, so inspect the housing before removal.
Do I Need to Remove the EVAP Canister to Remove the Passenger Tail Light?
Normally, no. On a 2004 Jeep Wrangler TJ, the passenger-side housing can usually be pulled outward far enough to reach and disconnect the wiring without removing the EVAP canister.
Can I Remove a 2004 Jeep Wrangler Tail Light Without Removing the Bumper?
Yes. Normal tail light housing removal does not require removing the rear bumper.
Is a 2004 Jeep Wrangler X a TJ?
Yes. The 2004 Jeep Wrangler belongs to the TJ generation. The Wrangler X was one of the available trim levels.
Is a Tail Light Housing the Same as a Tail Light Assembly?
The terms are often used interchangeably when referring to the complete exterior light unit. The assembly can include the lens, housing, sockets, reflectors, and sometimes bulbs or wiring, depending on the replacement part.
Why Won’t My Jeep Wrangler Tail Light Housing Come Off?
The most common reasons are a missed mounting fastener, corrosion, dirt around the housing, limited wiring slack, or aftermarket hardware. Stop pulling and inspect the assembly carefully before using more force.
How Do I Disconnect the Jeep TJ Tail Light Wiring Harness?
Locate the electrical plug behind the tail light, press the locking tab, hold the connector body, and gently pull the two halves apart. Never pull directly on the wires.
Can I Replace Only the Tail Light Lens?
It depends on the condition and design of the light. If the housing is cracked, the seal is damaged, or the mounting points are broken, replacing the complete tail light assembly is usually the better repair.
Do 1997-2006 Jeep Wrangler TJ Models Use a Similar Tail Light Removal Process?
Many Wrangler TJ models from this generation use a similar rear tail light design and removal process. However, wiring layout, trim differences, aftermarket parts, and year-specific changes can affect access.
Final Thoughts
Learning how to remove the tail light housing on a 2004 Jeep Wrangler X is useful whether you are replacing a damaged assembly, fixing a wiring problem, or installing new rear lights. The main job is simple: remove the mounting hardware, move the housing outward carefully, disconnect the wiring harness, and remove the assembly.
The passenger side may look more difficult because of the nearby EVAP components, but you normally do not need to remove the canister for a standard tail light replacement.
Take your time with old fasteners and electrical connectors, avoid pulling on the wiring, and test the brake lights, turn signals, running lights, and reverse lights before driving. A few extra minutes of checking can prevent a loose connection or lighting problem later.