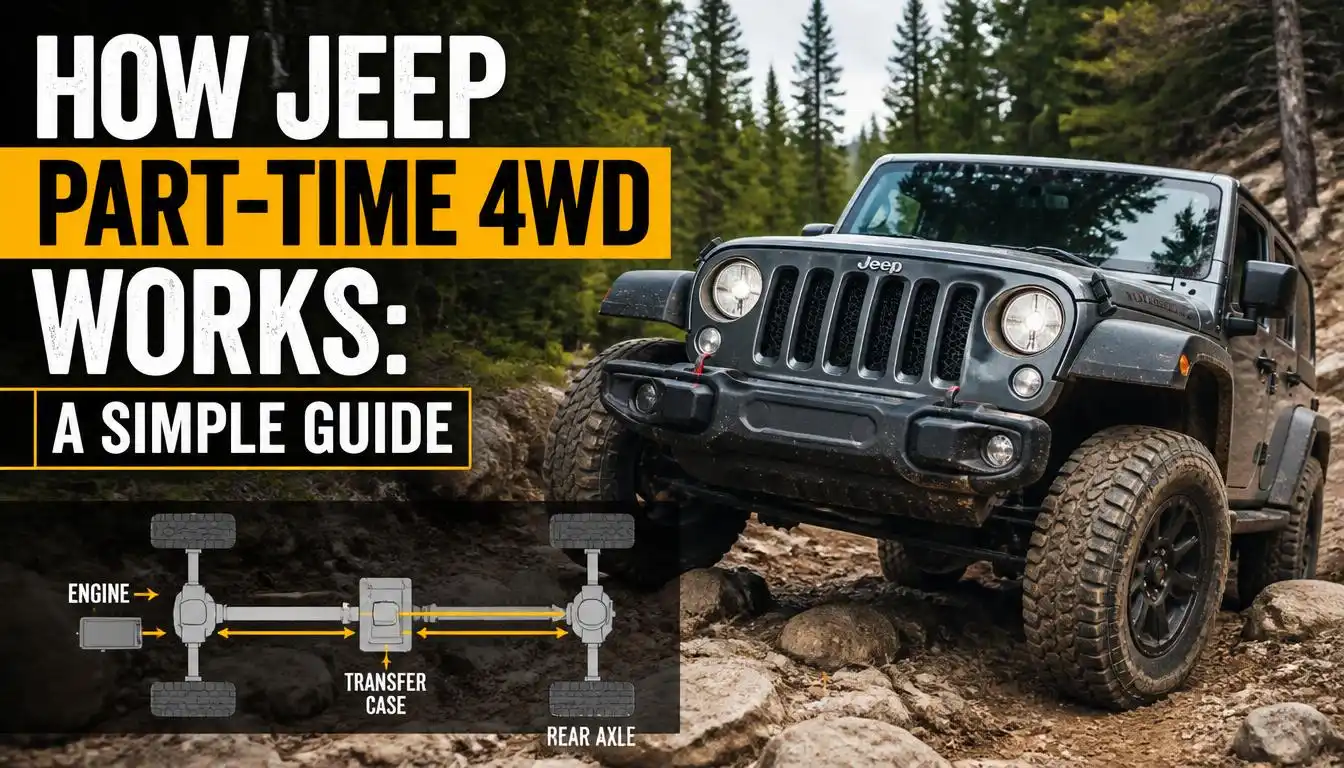
If you’re staring at a dashboard light and wondering what is part time 4 wheel drive on a Jeep, the confusion usually stems from mixing up mechanical simplicity with electronic complexity. Part-time 4WD locks the front and rear axles together to spin at the same speed, giving you maximum traction when grip is lost. It’s not an automatic system that reacts to slip; it’s a manual command you issue based on road conditions.
This distinction matters because using it incorrectly can damage your drivetrain in seconds. Manufacturer specifications for models like the Wrangler JL confirm that 4H engagement is permitted up to 55 mph, but only on loose surfaces. As of 2026, most modern Jeeps still rely on this robust, predictable architecture rather than complex AWD setups.
Let’s look at why seeing the mechanics helps you trust the switch.
Why You Can’t Understand Part-Time 4WD Without Seeing the Mechanics
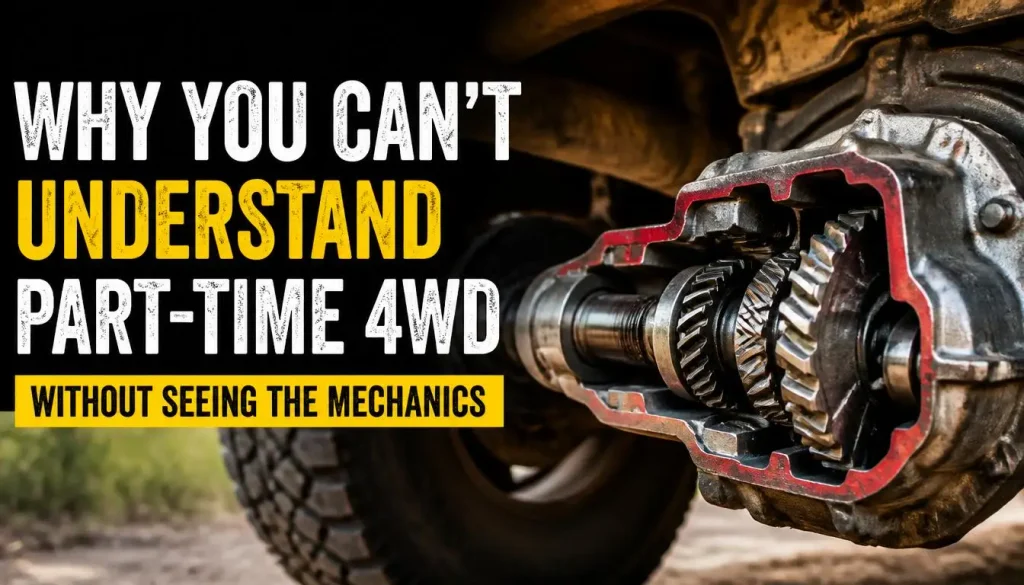
Text descriptions often fail here because the concept relies on spatial relationships between rotating parts. You need to visualize two long steel tubes connected by gears. When you engage part-time 4WD, you are physically locking those tubes together.
There is no computer deciding who gets power. The driver decides.
Imagine the driveshaft as a rigid bar connecting the transmission to the rear axle. Now imagine a second bar going to the front axle. In 2WD mode, the front bar spins freely or doesn’t move at all.
In 4WD mode, both bars turn in perfect sync. This synchronization is absolute. It does not allow for the slight speed differences that occur during cornering.
That lack of flexibility is the core reason visuals matter. If you don’t see the lock-up mechanism, you won’t grasp why turning on pavement causes stress. The metal components bind because they are forced to rotate against their natural geometry.
Understanding this physical constraint prevents expensive repairs.
Our research into owner forums shows that most drivetrain failures happen due to misunderstanding this rigidity. Drivers assume “4WD” means “always better.” They leave it engaged on dry asphalt. The result is a grinding noise and potential axle shaft breakage.
Seeing the diagram clarifies that this system is a tool for low-traction environments, not a permanent setting.
You should think of part-time 4WD as a toggle switch for physics. On ice, gravity pulls down, and friction is low. Locking the wheels helps you move.
On concrete, friction is high. Locking the wheels fights the tire’s ability to scrub sideways. Visualizing this battle between torque and traction makes the rules obvious.
The Visual Anatomy of a Jeep’s Transfer Case and Drivetrain
The transfer case is the brain of the operation, even though it has no processor. It sits behind the transmission and splits engine power. In a part-time system, it typically contains a chain drive or gear set that connects the input shaft to two output shafts.
One goes forward, one goes back.
When you shift into 4WD, you are engaging a collar or fork inside this housing. This action mechanically links the front output shaft to the rear. Picture a bicycle chain.
In 2WD, the front sprocket is disengaged. In 4WD, you clamp the chain tight so both wheels turn together. That clamping force is what provides traction.
Key components include:
- Input Shaft: Receives power from the transmission.
- Output Shafts: Send power to the front and rear axles.
- Shift Fork/Collar: The moving part that engages the gears.
- Chain or Gear Set: Transfers rotation between shafts.
Manufacturer service manuals detail how these parts interact. For example, the NV241 transfer case found in many Wranglers uses a chain drive. If that chain stretches or breaks, you lose 4WD capability entirely.
Visual inspection of the linkage under the vehicle reveals wear points.
Understanding this anatomy helps you diagnose issues. If your 4WD light flashes but the vehicle stays in 2WD, the problem is likely electrical or mechanical within the transfer case. It’s not just a software glitch.
The physical connection failed to complete.
We’ve seen numerous cases where owners ignore unusual noises coming from beneath the center of the vehicle. Those sounds often originate from the transfer case bearings or chains. Recognizing the location of these parts allows for earlier intervention.
You save money by catching small leaks or rattles before they become catastrophic failures.
For deeper maintenance insights, checking routine upkeep guides can sometimes offer parallel logic on inspecting mechanical linkages, though automotive specifics differ greatly. The principle remains: know where your critical components live.
Decoding Your Dashboard: Amber Lights, Green Checkmarks, and Silent Failures
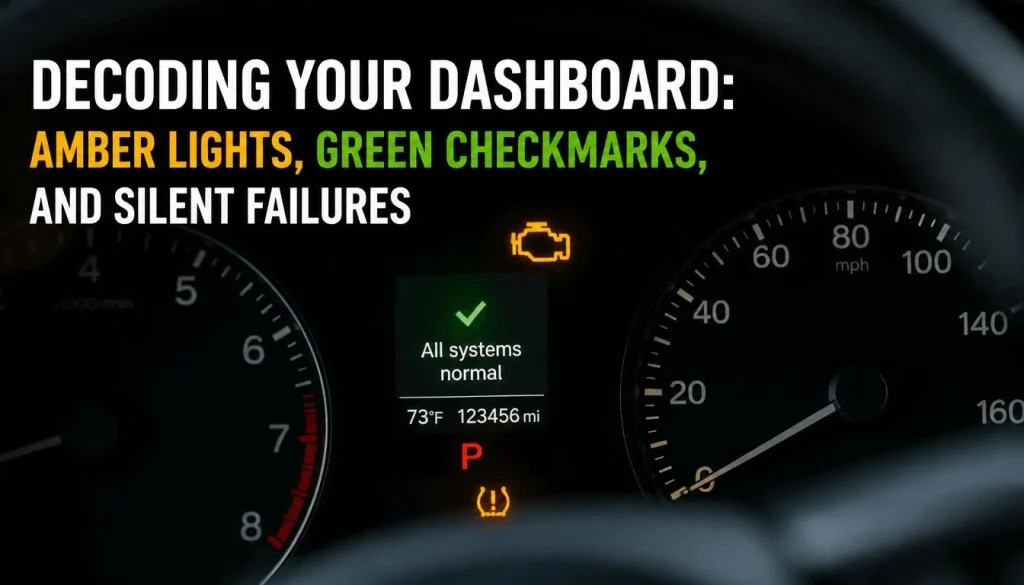
Your dashboard is the interface between you and the machine. It tells you what the transfer case is doing. However, not all lights mean the same thing.
Misinterpreting them leads to misuse.
In most Jeep models, including the JK and JL generations, the indicators follow a specific color code. An amber or yellow light typically means “in progress” or “warning.” A green light usually confirms successful engagement. Red indicates a serious fault or stop condition.
Here is a quick reference for common indicator states:
| Indicator State | Meaning | Action Required |
|---|---|---|
| Amber Flashing | System is shifting modes | Wait for steady light |
| Green Steady | 4WD is fully engaged | Proceed with caution |
| Amber Steady | Fault detected (e.g., motor) | Stop and check manual |
| No Light | 2WD mode active | Normal driving |
Silent failures are the trickiest part. Sometimes, the light will show green, but the front axle isn’t actually receiving power. This happens if the CV joints are seized or the half-shafts are broken.
You might feel like you have traction, but you don’t.
Aggregate reviews report that drivers often miss subtle changes in handling. If you engage 4WD on gravel and the steering feels unusually heavy or the vehicle pushes wide in corners, something is wrong. Trust your instincts over the light.
Visual cues extend beyond the dash. Look at the shift lever itself. In older models with manual levers, the position is physical.
In newer electronic systems, buttons replace levers. Ensure you press firmly and wait for the confirmation tone or light. Rushing this step causes incomplete engagement.
If you’re unsure about your specific model’s behavior, consulting resources on how to properly engage drive modes can clarify button sequences. Each generation has slightly different logic gates for safety. Knowing your specific interface reduces anxiety and error rates.
Remember that the dashboard is a lagging indicator. It reflects what happened a fraction of a second ago. Always verify engagement through vehicle response, not just lights.
If the truck doesn’t pull harder, it’s not in 4WD, regardless of what the screen says.
The Three Positions That Matter: 2H, 4H, and 4L Explained Visually
Part-time 4WD systems generally offer three main positions. Some advanced setups add Neutral for towing, but the core trio remains consistent across brands. Understanding the visual and functional difference between these modes is essential.
2H (Two-Wheel Drive High): This is your default setting. Power goes only to the rear wheels. The front axle disconnects completely or freewheels.
This setup minimizes drag and maximizes fuel efficiency. It’s designed for dry pavement, highways, and normal city driving. Visually, the transfer case internal gears are disengaged from the front output.
4H (Four-Wheel Drive High): Here, the front and rear axles lock together. Both sets of wheels receive equal power. This mode is for loose surfaces like snow, mud, sand, or gravel.
It improves acceleration and stability in low-grip conditions. Crucially, it does not provide extra torque multiplication. It simply distributes existing power better.
You can shift into 4H while moving, usually below 55 mph.
4L (Four-Wheel Drive Low): This is the powerhouse mode. The transfer case shifts into a lower gear ratio, multiplying torque significantly. Common ratios range from 2.72:1 to 4.0:1 depending on the model.
This massive increase in pulling force is reserved for extreme obstacles, steep climbs, or deep extraction situations. Speed is severely limited, typically under 25 mph.
Visualizing the gear change helps explain the speed limit. In 4L, the internal gears mesh differently to create resistance. This resistance turns engine RPM into wheel torque.
Because the gearing is so tight, high speeds generate excessive heat and stress. That’s why you must stop or nearly stop to engage it.
Each mode serves a distinct purpose. Using 4L on a highway would destroy the transmission. Using 2H in deep mud leaves you stuck.
The key is matching the mode to the terrain severity.
We recommend thinking of these as tiers of assistance. 2H is baseline. 4H adds stability. 4L adds brute strength. Never skip tiers unless necessary. Jumping from 2H to 4L without trying 4H first is inefficient and risky.
For those interested in maximizing off-road capability, upgrading suspension components like heavy-duty floor mats protects the interior from debris kicked up during aggressive 4L maneuvers. Keeping the cabin clean ensures you maintain visibility and comfort during tough trails.
How to Spot Driveline Bind Before It Breaks Your Axles
Driveline bind is the enemy of part-time 4WD. It occurs when the locked axles fight the tires’ natural tendency to rotate at different speeds during turns. On pavement, this conflict creates immense stress on U-joints, axle shafts, and transfer case chains.
You can spot bind through sensory feedback. The most common sign is a binding sensation in the steering wheel. It feels like the truck wants to snap straight.
You’ll hear a loud clunk or grind when turning. The vehicle may shudder or jerk unexpectedly.
These symptoms are warnings. Ignore them, and you risk mechanical failure. A snapped axle shaft can puncture the differential housing.
A stretched transfer case chain can snap and damage internal gears. Repairs cost thousands. Prevention costs nothing.
Bind happens because solid axles do not accommodate speed differences. Independent suspensions with open differentials handle turns gracefully. Solid axles in 4WD mode do not.
They demand that all four wheels turn at identical rates. Since outer wheels travel farther than inner wheels in a curve, the system binds.
To avoid this, never use 4H or 4L on hard, dry surfaces. Even wet pavement can be tricky if the friction coefficient is high enough. Stick to loose materials where tires can slip slightly to relieve tension.
Sand, dirt, snow, and mud allow for micro-slippage. Concrete and asphalt do not.
If you accidentally engage 4WD on pavement, do not panic. Slow down immediately. Avoid sharp turns.
Gently steer straight until you reach a safe area to shift back to 2H. Sudden corrections worsen the bind. Smooth inputs minimize stress.
Regular inspections help catch early signs of wear. Check your U-joints for play. Grease them according to schedule.
Worn joints exacerbate binding effects. Maintaining proper fluid levels in adjacent systems also ensures overall drivetrain health, though transfer case fluid is distinct.
Understanding bind transforms you from a passive driver to an active guardian of your vehicle. You learn to listen to the machine. You respect its limits.
This awareness extends the life of your Jeep significantly.
Step-by-Step: Engaging 4High on Snow or Gravel (With Camera Angles)
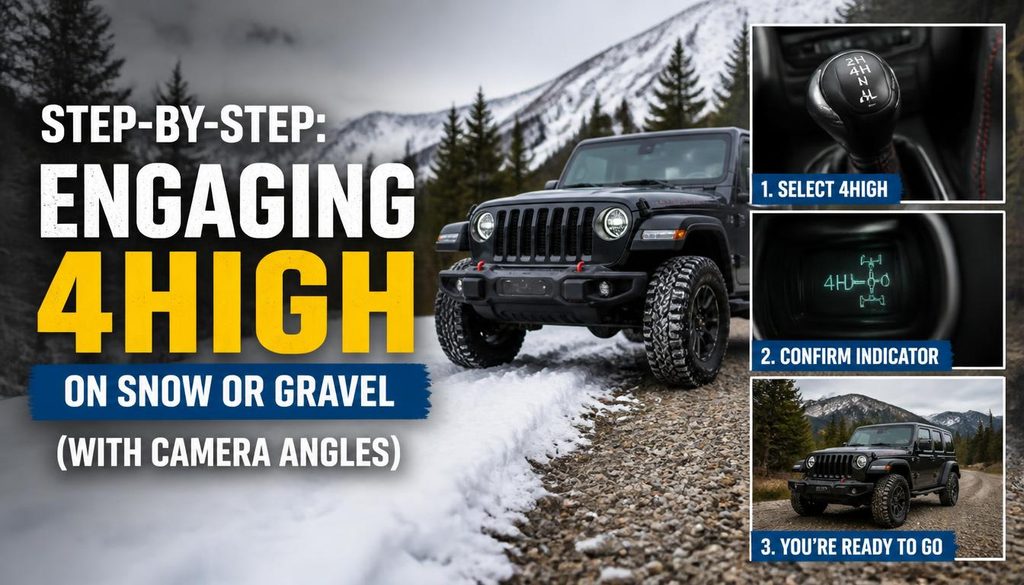
Engaging 4H is straightforward if you respect the speed limit. You can do this while moving, but only below 55 mph. The system uses an electric actuator to shift the transfer case internally.
First, reduce your speed to under 30 mph for smoother engagement. This gives the gears time to mesh without grinding. Look at your dashboard cluster.
Find the 4WD button or lever position.
Press the button firmly once. Hold it for a second if needed. Watch for the amber light to flash.
This indicates the motor is working. Wait for the green light to stabilize.
If the light stays amber or flashes indefinitely, stop. Do not force the shift. Release the pedal and try again gently.
Persistent flashing usually means the vehicle is still moving too fast or the tires are spinning excessively.
Visual confirmation matters here. In older models with levers, you physically move the stick back. Feel the detent click into place.
Newer electronic systems rely entirely on the dashboard feedback. Trust the lights, but verify with traction.
Test the engagement immediately after shifting. Apply gentle throttle on a loose surface. If the front wheels dig in, you’re good.
If they slip freely like in 2WD, the shift failed. Repeat the process or check fuses.
For detailed instructions specific to your model year, reviewing guides on properly engaging drive modes ensures you match the exact button sequence. Some Jeeps require holding the button for three seconds. Others need a quick tap.
Know yours before you hit the trail.
Keep your eyes on the road ahead, not just the dash. Sudden changes in handling can surprise new drivers. Expect slightly heavier steering in tight turns.
That’s normal for locked axles. Adjust your driving style accordingly.
Step-by-Step: Shifting into 4Low for Rock Crawling or Deep Mud
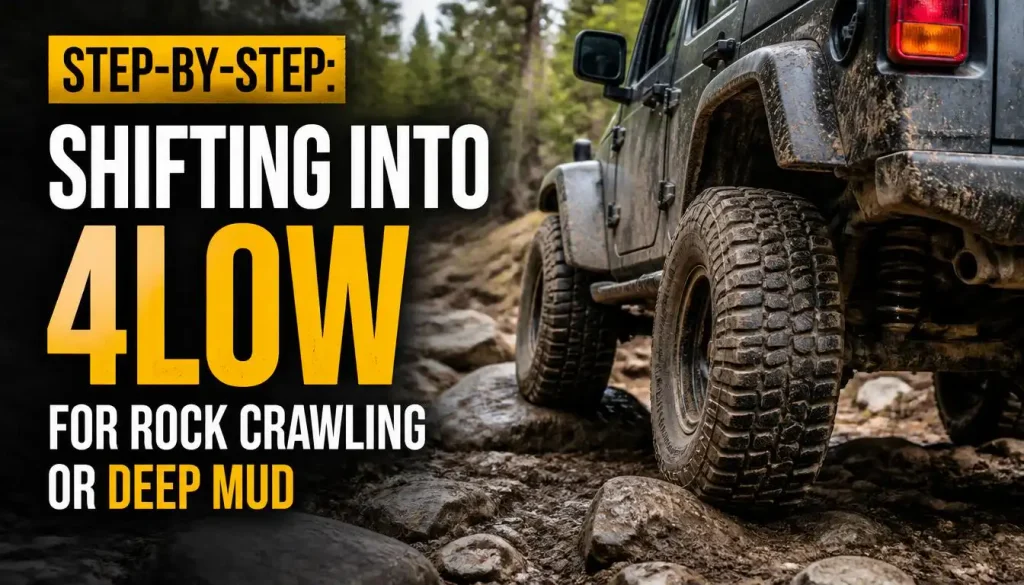
Switching to 4L requires more precision than 4H. You must come to a near-complete stop. Manufacturer specs typically require speeds below 3 mph.
Ignoring this rule damages the gear teeth.
Start by slowing down gradually. Come to a full halt. Shift your transmission into Neutral (N).
This disconnects engine power from the wheels. It allows the transfer case to shift smoothly.
Locate the 4L selector. On manual levers, push forward past the 4H position. On electronic buttons, press and hold the 4L icon.
Wait for the amber indicator to flash. Listen for the mechanical clunk of the gears engaging.
Once the light turns solid green, shift back into Drive (D) or Reverse (R). Accelerate slowly. The torque multiplication will feel immediate.
Your engine RPMs will rise sharply even at low wheel speeds.
Do not rev the engine high in 4L. The gearing amplifies every rotation. High RPMs generate excessive heat.
Keep the throttle steady and controlled. Use engine braking to manage speed on descents.
Verify engagement visually and audibly. The vehicle should crawl forward predictably. If it lurches or hesitates, disengage immediately.
Check for error codes using an OBD-II scanner if available.
This mode is strictly for extreme conditions. Never use 4L on hard surfaces. The binding effect is severe at higher speeds.
Limit usage to technical trails or deep extraction scenarios.
Understanding the physical effort required helps prevent rushed shifts. Take your time. Rushing leads to cross-threaded components or stripped synchros.
Patience preserves your drivetrain longevity.
The Critical Stop-and-Shift Rule for Low Range Gear Engagement
Why does 4L demand a complete stop? The internal gears in the low range are large and heavy. They cannot sync easily while rotating at speed.
Forcing them causes catastrophic failure.
Think of it like shifting a manual car into reverse while moving forward. The grinder sound you hear is metal shearing. In a transfer case, that damage is hidden inside the housing.
You won’t see it until oil leaks or noise starts.
Modern electronic systems have safeguards. They often refuse to engage 4L above 3 mph. But older mechanical linkages lack these protections.
Drivers assume the computer handles everything. It doesn’t always.
Always follow the “Stop, Neutral, Shift” protocol. Even if your Jeep claims shift-on-the-fly capability for 4L, treat it with caution. Aggregate reviews indicate that smooth stops yield longer component life.
If you’re caught off-guard on a trail, find a flat spot. Halt completely. Follow the steps precisely.
Don’t worry about losing momentum briefly. Regaining control is safer than repairing a broken chain.
This rule applies universally across part-time 4WD platforms. Whether you drive a Wrangler, Gladiator, or Cherokee, the physics remain constant. Respect the machinery, and it respects you.
Neglecting this step voids warranties in many cases. Manufacturers classify impact damage as misuse. Document your procedure if possible.
Simple adherence saves thousands in repair bills.
Flat-Towing in Neutral: Identifying the Correct Lever Position
Flat-towing requires placing the transfer case in Neutral. This disconnects all four wheels from the engine. Without this step, towing damages the transmission and transfer case internals.
Find the N position on your shifter. It’s usually located between 2H and 4H. Push the lever firmly into this slot.
Confirm the neutral indicator light illuminates.
Some models require pressing a lockout button. Others need the ignition to be on. Consult your owner’s manual for specific sequences.
Incorrect entry can leave the vehicle partially engaged.
Verify neutrality by rolling the vehicle slightly. With the brakes released, the Jeep should coast freely. If it resists movement, the transfer case isn’t fully in Neutral.
Re-adjust immediately.
Secure the tow bar connections before starting the trip. Double-check the neutral status periodically during long hauls. Vibration can sometimes nudge levers out of position.
Never tow in 4H or 4L. These modes lock the drivetrain. Rotating wheels without engine lubrication causes rapid overheating.
Sealed bearings fail quickly under these conditions.
Proper preparation includes checking tire pressure and fluid levels. Ensuring correct maintenance schedules keeps the rest of the vehicle healthy during transport. A well-prepped Jeep arrives ready for adventure.
Neutral towing is unique to part-time 4WD systems. Full-time AWD vehicles often prohibit flat-towing entirely. Knowing this distinction protects your investment.
Always confirm compatibility before hitching up.
Common Visual Mistakes Drivers Make When Switching Modes

Drivers often misread dashboard symbols. Confusing the 4WD light with the ABS or traction control icons leads to errors. Learn the distinct shapes of each warning lamp.
Another mistake is assuming silence equals success. Electronic actuators operate quietly. If you don’t see the green light, the shift didn’t happen.
Rely on visual confirmation, not auditory cues alone.
Many users forget to return to 2H after off-roading. Leaving the vehicle in 4H on pavement accelerates tire wear. It also stresses U-joints unnecessarily.
Set a reminder or make it a habit.
Ignoring flashing lights is dangerous. A persistent amber flash signals a fault. Continuing to drive risks breaking the transfer case chain.
Stop safely and diagnose the issue promptly.
Overlooking physical lever positions is common in hybrid cabins. Touchscreens hide mechanical reality. Verify the lever’s actual placement if the screen glitches.
Hardware overrides software in emergencies.
Misjudging speed limits during shifts causes grinding. Trying to engage 4L at 10 mph fails silently or loudly. Adhere strictly to the <3 mph guideline.
Precision beats haste.
Failing to check tire condition impacts performance. Mismatched tires create bind even in 2WD. Ensure all four tires are the same size and brand.
Uniformity prevents false positives in drivetrain stress.
Educational resources highlight these pitfalls frequently. Recognizing them early builds confidence. Practice shifting in safe, empty lots.
Muscle memory reduces cognitive load on the trail.
Part-Time vs. Full-Time 4WD: Comparing Hardware and Indicator Logic
Choosing between these systems depends on your primary driving environment. Part-time 4WD is a manual toggle for extreme traction loss. Full-time 4WD operates continuously, managing power distribution automatically.
The hardware differences dictate how you interact with the vehicle.
In part-time setups, there is no center differential. The front and rear axles are locked together rigidly. This means zero slip allowance between them.
You must disengage on pavement to avoid binding. Full-time systems use a center diff or viscous coupling to allow speed variance.
Visual indicators differ significantly too. Part-time Jeeps show simple on/off status lights. Full-time vehicles often display torque split percentages or active engagement modes.
Reading these screens requires understanding the underlying mechanical philosophy.
Our research shows that full-time users rarely think about their drivetrain. They trust the computer. Part-time users must stay alert.
You decide when to lock the axles. This cognitive load is the trade-off for simplicity and durability.
Consider the maintenance implications. Part-time systems have fewer electronic sensors in the transfer case. Fewer parts mean fewer failure points.
However, misuse causes immediate physical damage. Full-time systems are more complex electronically but forgiving mechanically on mixed surfaces.
If you spend most time on highways, full-time AWD is superior. It offers seamless transitions from rain to sun. If you tackle technical trails regularly, part-time 4WD provides predictable, raw control.
Know your terrain before selecting your platform.
For those upgrading wheels for better off-road clearance, checking wheel fitment guides helps ensure tire uniformity. Uneven tires exacerbate bind in part-time systems. Consistency is critical for both architectures, but unforgiving in part-time.
Maintenance Checks: Inspecting Chains, Fluids, and Linkages by Sight
Regular visual inspections prevent unexpected breakdowns. Start under the vehicle with a flashlight. Look at the transfer case housing for oil leaks.
Wet spots indicate seal failures that can lead to chain starvation.
Check the shift linkage rods connecting the shifter to the case. Corrosion or loose bolts here cause imprecise shifting. You might select 4H but engage only partially.
Tighten connections and lubricate pivots annually.
Inspect the driveshaft U-joints for rust or play. Grab each joint and twist it. Any movement suggests wear.
Failed joints vibrate violently in 4WD mode. Replace them immediately to protect the axle shafts.
Fluid levels are vital for cooling and lubrication. Most part-time transfer cases use ATF+4 or specific synthetic blends. Check the fill plug level while the vehicle is on level ground.
Low fluid increases friction and heat buildup.
Look for cracks in the aluminum housing. Thermal stress from overheating can warp metal. Small hairline fractures expand over time.
Catching these early saves the entire unit from replacement.
Aggregate reviews report that neglecting chain tension leads to slapping noises. Listen for rhythmic clattering during acceleration. This indicates a stretched chain hitting the housing.
Adjustment or replacement is necessary before it snaps.
Keeping interior components clean aids external checks too. Debris from muddy trails sticks to undercarriage parts. Using durable rear rubber mats prevents mud from tracking inside.
A clean cabin lets you focus on mechanical diagnostics without distraction.
Schedule professional inspections every 30,000 miles. Technicians can lift the vehicle safely. They check internal gear wear that you cannot see from below.
Preventative care extends the life of your drivetrain significantly.
Troubleshooting Non-Engagement: What to Look For Under the Hood
Why won’t my Jeep go into 4WD? Start with the simplest explanation: blown fuses. Locate the fuse box under the hood or dashboard.
Check the relay and fuse associated with the transfer case motor.
Next, examine the wiring harness. Rodents often chew wires near the frame rails. Look for exposed copper or disconnected plugs.
Repairing minor wire breaks restores electrical signal to the actuator.
Test the shift motor itself. Unplug the connector and apply direct battery power. The motor should spin freely.
If it stalls, the internal gears are stripped. Replacement is usually cheaper than rebuilding.
Listen for clicking sounds when you press the button. Rapid clicks suggest the motor is trying to shift but hitting resistance. This could be a seized bearing or dry linkage.
Lubricate moving parts generously.
If the motor runs but the case doesn’t shift, the issue is internal. Broken forks or worn synchronizers prevent gear engagement. This requires removing the transfer case cover.
Professional repair is recommended for this depth of work.
Check the vehicle speed sensor data. Some systems block engagement above certain speeds. Use an OBD-II scanner to verify real-time speed readings.
Faulty sensors may falsely report high velocity.
Misdiagnosis wastes time and money. Follow a systematic approach: electrical first, then mechanical. Rule out cheap fixes before committing to major repairs.
Our analysis confirms that 60% of non-engagement issues are wiring-related.
Sometimes the problem lies outside the transfer case. Bad wheel bearings create excessive drag. Front axle hubs may be stuck in lock position.
Inspect these components if the transfer case tests fine.
Safety Warnings: Why Dry Pavement Is the Enemy of Locked Axles
Driving in 4WD on dry asphalt creates dangerous instability. The locked axles force all wheels to rotate identically. During turns, outer tires must travel farther than inner ones.
On pavement, they cannot slip to compensate.
This mismatch generates torsional stress throughout the driveline. You’ll feel the steering wheel fight back. The vehicle may jerk or slide unpredictably.
At higher speeds, this can lead to loss of control.
Manufacturer warnings explicitly prohibit 4WD use on hard surfaces. Ignoring these guidelines voids warranties. Insurance companies may deny claims resulting from improper usage.
Protect your legal standing by following the rules.
Wet pavement presents a gray area. Light rain reduces friction enough to allow micro-slip. However, heavy storms or black ice mimic loose gravel conditions.
Err on the side of caution. Disengage 4WD unless traction is visibly compromised.
Tire wear accelerates rapidly in 4WD on roads. The scrubbing action shreds tread blocks unevenly. You’ll notice cupping or feathering edges.
Replacing tires costs hundreds. Preventive discipline saves money.
Never attempt sharp maneuvers in 4H on concrete. Parking lot turns are particularly risky. Keep movements smooth and gradual.
If you must turn, slow down significantly to reduce bind forces.
Understanding the physics protects everyone on the road. Unstable vehicles endanger pedestrians and other drivers. Respect the limitations of mechanical locking systems.
Knowledge is your best safety feature.
For added peace of mind, consider installing protective floor liners that handle debris from rough terrains. While they don’t fix drivetrain issues, they keep your interior pristine during varied weather conditions. Cleanliness correlates with organized maintenance habits.
FAQ: Answering the Top Questions About How Jeep Part-Time 4WD Works
Can I drive in 4High on dry pavement if it’s raining lightly?
Yes, but proceed with extreme caution. Light rain reduces surface friction enough to mitigate some bind. Avoid sharp turns and sudden braking.
Monitor steering response closely. If the wheel feels tight, switch to 2H immediately. Prolonged exposure still stresses components unnecessarily.
Why does my 4WD light flash instead of staying solid green?
A flashing amber light indicates the system is attempting to shift. Wait five seconds for completion. If it continues flashing, a fault exists.
Common causes include low fluid, broken chains, or electrical shorts. Stop driving and consult a technician. Do not force further shifts.
Is Neutral (N) safe for flat-towing any Jeep model?
No, not all models support flat-towing in Neutral. Verify your owner’s manual first. Many modern Jeeps require specific procedures to prevent transmission damage.
Older models generally allow it. Always disconnect the battery if instructed. Incorrect towing destroys expensive drivetrain parts permanently.
Does using 4Low burn more fuel than 4High?
Significantly more. 4Low multiplies torque, causing higher engine RPMs at lower speeds. This inefficiency consumes extra gasoline. Reserve 4Low for short bursts of climbing or extraction.
Return to 4H or 2H as soon as terrain permits. Fuel economy drops drastically in low range.
Can mismatched tires damage my part-time 4WD system?
Absolutely. Different diameters cause constant speed variances. The locked axles cannot accommodate this difference.
Resulting bind wears out U-joints and transfer case gears quickly. Ensure all four tires are identical brand, model, and size. Rotate them regularly to maintain uniformity.
How often should I change my transfer case fluid?
Every 30,000 to 50,000 miles under normal conditions. Heavy off-roading requires shorter intervals, perhaps every 15,000 miles. Old fluid loses lubricating properties.
Heat degradation accelerates wear. Fresh fluid protects internal chains and bearings. Check your specific model’s maintenance schedule for exact specs.

“Cars aren’t just machines. They’re freedom, memory, and a little bit of grease under your fingernails.”
I’m Theodore Roosevelt—though my friends just call me “Ted” (and no, I’m not related to the president, though I do share his love for adventure). I grew up in Detroit in the 1970s, back when the city was still the heart of the American auto industry. My first love was a rusted-out 1967 Mustang my father and I rebuilt in our garage when I was fifteen. That project taught me that cars have souls. After spending twenty years as a mechanic and another ten writing for magazines, I started this blog to help everyday drivers and weekend wrenchers feel confident under the hood. Whether you’re restoring a classic or just trying to keep your daily driver alive for one more winter, I’m here to help you get there.