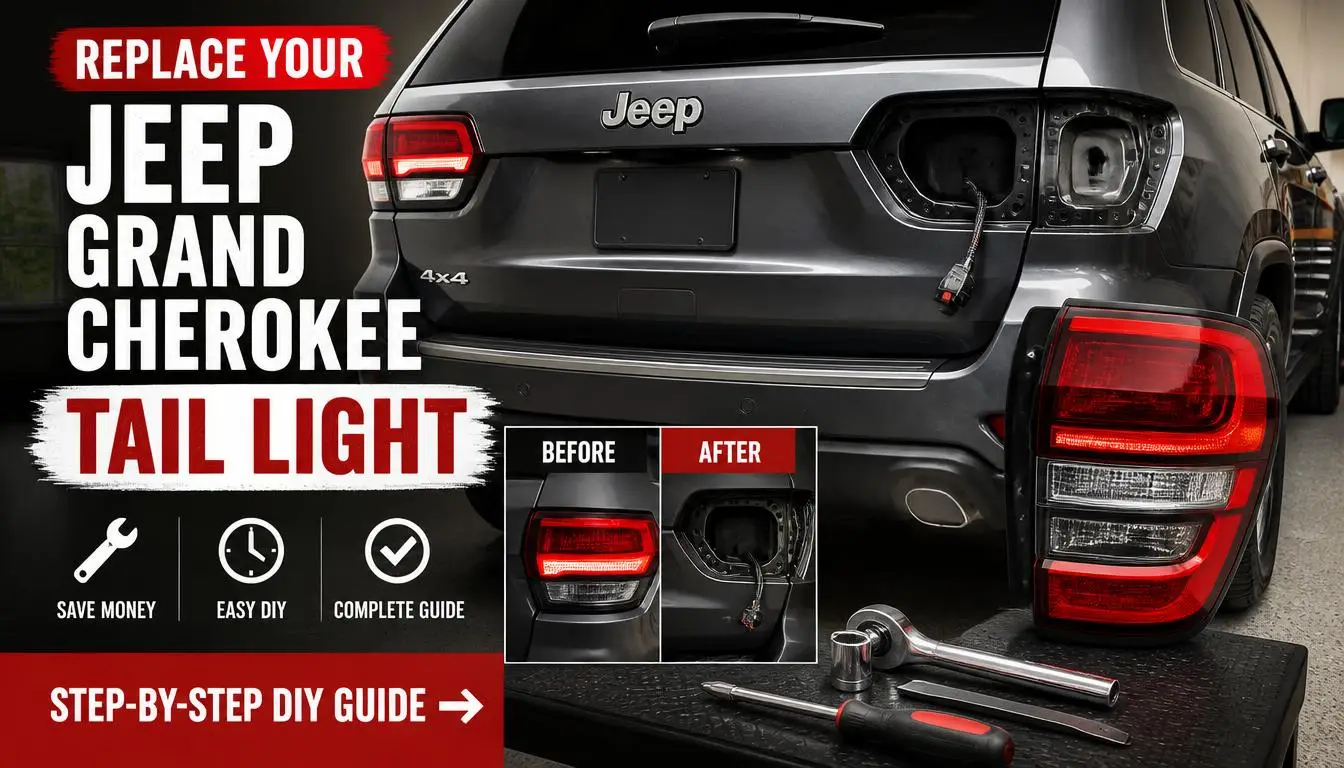
How To Replace Jeep Grand Cherokee Tail Light Assembly is a straightforward DIY repair that most owners can handle in under an hour. Whether you are dealing with a cracked lens from off-road debris or a flickering brake light after a minor bump, swapping the unit yourself saves money and keeps you mobile. As of 2026, aftermarket and OEM replacement assemblies range from $50 to over $400 per side, making this one of the more affordable automotive body repairs you can tackle at home.
This guide walks you through exactly what to expect, step by step, so you can get your rear lights working safely and correctly.
Quick Answer
How To Replace Jeep Grand Cherokee Tail Light Assembly requires five simple steps. Most WK2 models need only basic hand tools. The job takes roughly 20 to 45 minutes per side.
Always test all lamp functions before final tightening. Your total savings compared to a shop visit run $100 to $250.
Why Your Jeep Grand Cherokee Tail Light Might Need Replacement
Tail light assemblies on the Grand Cherokee face several threats over the life of the vehicle. Off-roaders constantly deal with flying rocks, brush, and branches that crack lenses or bend housings. A fender bender at the grocery store is another common culprit.
You do not need a major collision to damage these units. Even a hard slam on the tailgate during loading can stress the mounting points and cause hairline fractures in the plastic.
Age and weather also take a toll. UV exposure slowly clouds the lens material, reducing light output over time. Road salt eats away at seals and connectors, leading to corrosion and intermittent failures.
Moisture gets inside the housing when the rubber gasket degrades, and that creates cloudy patches and premature bulb burnout.
Here are the most common triggers for a replacement:
- Cracked or shattered lenses from trail use or impacts
- Fogged, yellowed, or hazy lenses from UV degradation
- Water accumulation inside the assembly
- Broken or missing mounting tabs
- Intermittent or dead brake, turn, or reverse lights
- Failed sequential turn signals on higher trim levels
- Corroded electrical connectors preventing proper contact
If your Grand Cherokee fails a safety inspection because of non-functioning lights, a full assembly swap is usually faster and more reliable than chasing individual bulb replacements. A cracked lens alone will not pass in most states regardless of whether the bulbs work. Some owners also choose to upgrade to LED assemblies when the originals fail, since LED units eliminate bulb-related issues entirely and improve nighttime visibility.
The Basics: What's Involved in a Tail Light Swap
A tail light assembly is the complete housing that sits in the rear quarter panel opening on your Grand Cherokee. It contains the reflectors, lenses, sockets, and wiring connections for your running lights, brake lights, turn signals, and reverse lights all in one unit. Swapping it out means removing the old unit entirely and fitting a new one in its place.
The process is relatively simple on most Grand Cherokee generations. You open the tailgate, access the mounting bolts from behind, disconnect the electrical connector, and pull the assembly free. The reverse gets you the new one installed.
The trick is knowing which bolts hold it, how the connector releases, and what bulb types your specific year uses.
Here is a general sense of what the job entails:
- Gaining access to the back of the assembly, often through the tailgate opening or by removing an interior trim panel
- Removing two to four fasteners that secure the unit to the body
- Disconnecting the wiring harness by pressing a tab or twisting a socket
- Pulling the old assembly straight out, watching for any remaining clips or rubber gaskets stuck in place
- Preparing the new unit, which may involve transferring the gasket, checking the seal surface, or applying dielectric grease
- Setting the new assembly into position and reconnecting everything
- Testing all light functions before final tightening
Some model years require more disassembly than others. The WK2 generation, which ran from 2011 to 2022, generally has straightforward bolt access from behind the tailgate. Newer WL models may have more integrated designs that require interior panel removal.
If you are working on an older ZJ or WJ, the process is similar but the fastener types and connector styles differ noticeably. For bulb-specific issues on earlier models, changing the tail light bulb on a 2001 Grand Cherokee follows a similar access pattern but targets individual socket replacement rather than a full assembly swap.
Electrical considerations matter too. The wiring harness plugs into a multi-pin connector on the back of the assembly. You should always inspect that connector for green corrosion or bent pins before installing your new unit.
A clean connection prevents headaches down the road. Readers who enjoy troubleshooting electrical gremlins might also appreciate learning about warning light diagnosis on other Jeep models, since the approach to finding faulty connectors translates well across the brand.
Inside the Assembly: Key Components and How They Work
Understanding what sits inside your tail light housing helps you diagnose problems and choose the right replacement. Each component serves a specific function, and knowing the layout makes the swap go smoother.
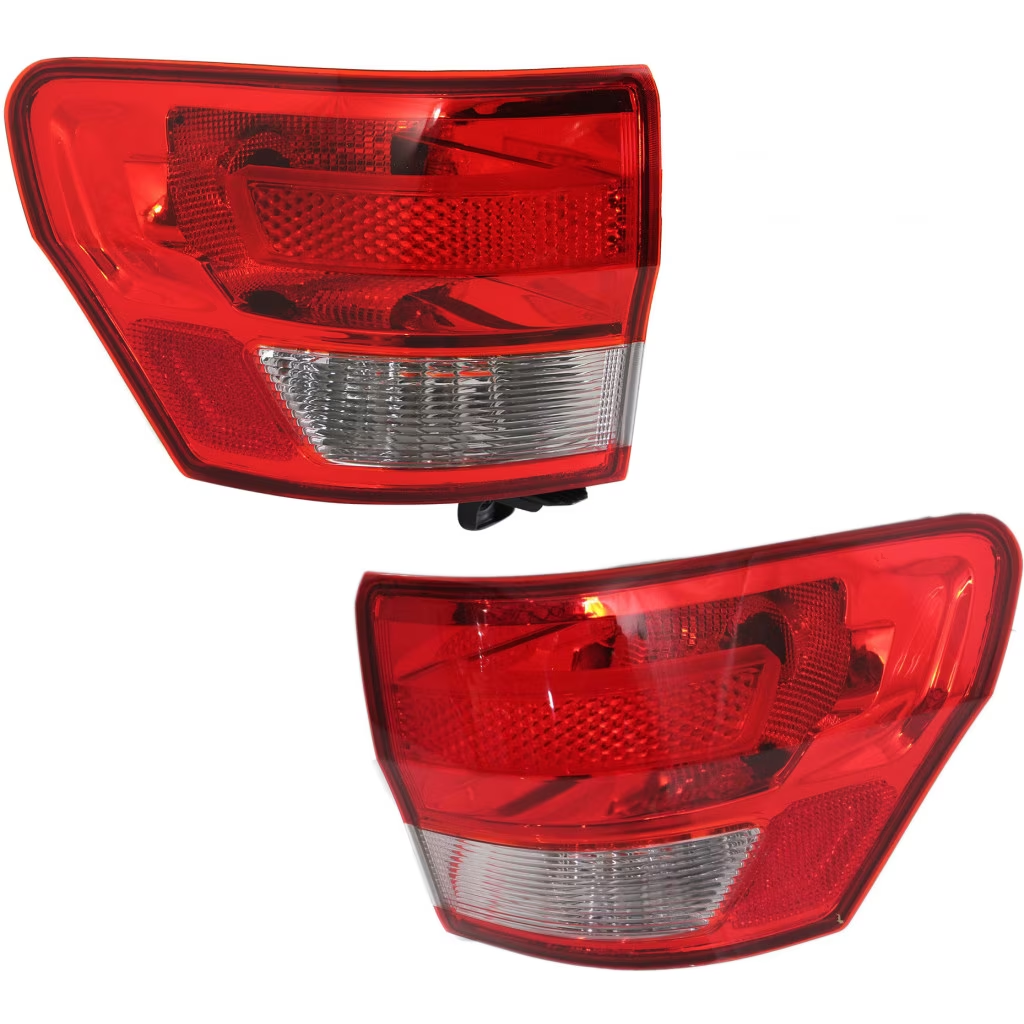
Lens and Housing
The outer lens is the colored plastic you see from the outside. It protects everything underneath and shapes how your lights appear. The housing is the internal structure that holds the reflectors and bulb sockets in place.
On factory assemblies, the housing is typically painted or molded to match your vehicle color. Aftermarket units may come in black or chrome finishes.
Reflectors
Reflectors sit behind the lens and direct light outward. They are usually molded into the housing itself. Red reflectors handle brake and tail light circuits.
Clear or amber reflectors serve turn signals and sometimes reverse lights depending on your model year and trim.
Bulb Sockets and Bulbs
Each circuit has its own socket wired to a specific bulb. Your Grand Cherokee tail light uses a combination of these standard bulb types:
| Function | Common Bulb Type | Notes |
|---|---|---|
| Tail/Brake | 3157 or 4157 | Dual filament, most common on WK2 |
| Turn Signal | 4157 | Amber or clear depending on state laws |
| Reverse | 912 or 921 | Wedge-base LED or halogen options |
| Third Brake | Varies | Often 7443 or integrated LED module |
The 3157 and 4157 bulbs look nearly identical. The key difference is the prong configuration on the base. Using the wrong type causes dim operation or complete failure.
If you are replacing individual bulbs instead of the whole assembly, make sure you grab the correct part numbers for your model year. Readers with later-model Jeeps might also find this guide to updating bulb sockets on a 2002 Jeep Liberty useful for understanding socket mechanics across the Chrysler platform.
Wiring Harness and Connector
The multi-pin connector plugs into the back of the assembly and supplies power to all circuits. On some Grand Cherokees, the connector is a simple push-on plug. On others, you must twist the socket counterclockwise to release it from the assembly.
Always note how the connector seats before pulling it free. Damaging the terminals during removal is one of the most common mistakes DIYers make.
Corroded electrical connectors are no joke. They cause the same kind of gremlin issues that show up when diagnosing electrical warnings on a Wrangler. A quick spray of electrical contact cleaner and a light coat of dielectric grease goes a long way toward preventing repeat problems.
Seal and Gasket
A rubber or foam gasket runs around the perimeter of the assembly. It creates a waterproof barrier between the light housing and the body panel. When you remove the old unit, this gasket often stays stuck to either the car or the old assembly.
You need to transfer it cleanly to the new unit or replace it if damaged. A compromised seal lets water and road grime into your trunk area.
Mounting Points
The assembly attaches to the body with two to four bolts, depending on the model year. These bolts thread directly into metal studs or inserts molded into the quarter panel. Stripped threads here are annoying but fixable with thread insert kits or replacement studs.
Checking the mounting area for rust or damaged studs before buying your new assembly saves a trip back to the parts store.
Choosing Between OEM and Aftermarket Parts
This is where many Grand Cherokee owners hesitate. The parts counter at your Jeep dealer will hand you an assembly that costs significantly more than the option from an auto parts retailer. Both work.
Both fit. The question is which one makes sense for your situation.
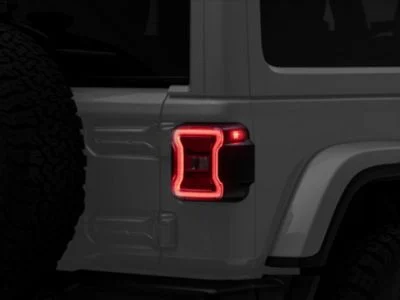
OEM assemblies come from Mopar, Chrysler's parts division. They are identical to what came on your vehicle from the factory. The fitment is exact.
The color match is perfect. The electrical connectors align without modification. The trade-off is price.
A single OEM tail light assembly for a WK2 Grand Cherokee typically runs between $200 and $400 depending on whether it includes LEDs or just halogen bulbs.
Aftermarket assemblies cover a wide quality spectrum. Budget options in the $50 to $100 range often use thinner plastic housings and cheaper lens material that yellows faster in sunlight. Mid-range units around $100 to $200 tend to be closer to OEM quality, especially brands that specialize in Jeep parts.
Some aftermarket lights also offer smoked lenses or black housings that give your Grand Cherokee a different look than the factory setup.
| Factor | OEM (Mopar) | Aftermarket |
|---|---|---|
| Price per side | $200–$400 | $50–$200 |
| Fitment | Exact factory match | Usually good, occasional trimming needed |
| Color match | Perfect | May vary, especially on black housings |
| Lens longevity | Excellent UV resistance | Variable, budget units fade faster |
| LED functionality | Full factory features | May lack sequential turn signals |
| Availability | Dealership and online | Widely available online and in stores |
| Warranty | Usually 12 months | Varies by brand, 6 to 24 months common |
If your Grand Cherokee is a daily driver and you want the lights to look and function exactly like the day you bought it, OEM is the way to go. If you are building a trail rig, want smoked looks, or are repairing an older vehicle where appearance matters less than function, a quality aftermarket unit is perfectly adequate.
One thing to watch out for: some aftermarket assemblies advertise as DOT compliant but the lens tint is too dark for legal road use in certain states. Check your local regulations if you go the aftermarket route with tinted lenses. The National Highway Traffic Safety Administration sets federal motor vehicle safety standards including requirements for rear lamp visibility and intensity that your lights must meet to be street legal.
LED upgrade paths are worth considering too. Several companies sell LED retrofit kits that replace the halogen bulbs in your existing assembly. These brighten your rear lights significantly and draw less power from your vehicle.
If you go this route, make sure the kit is CANbus-compatible, otherwise your dashboard may throw a bulb-out warning. Some owners pair this upgrade with interior protection upgrades since LED conversions often happen during the same maintenance window when the rear seats come out.
Visual Guide: Step-by-Step Replacement Process
Now let us walk through the actual replacement. I will describe each step clearly and point out what you should be looking for visually at every stage. If you can follow along with this, you do not need fancy tools or a service manual to get the job done.
Step 1: Prepare Your Workspace
Open the tailgate fully and secure it. Grab a flashlight and a pair of gloves. Lay down a clean rag or small towel on the floor of your trunk area so you do not drop anything into the weeds.
A rubber cargo mat for your Grand Cherokee already in place gives you a grippy surface that keeps hardware from sliding around. Having a dedicated spot for your bolts and screws prevents the classic DIY nightmare of losing a critical fastener under the seat.
Step 2: Access the Mounting Hardware
On most WK2 Grand Cherokees, you can reach the tail light mounting bolts from behind the tailgate opening. You do not necessarily need to remove any interior trim panels, though some model years benefit from peeling back the side trim to get better hand access. Look into the cavity next to where the tail light sits.
You should see two or three bolts holding the assembly in place. These are typically Torx bolts, most commonly T20 or T25 size.
Step 3: Remove the Mounting Bolts
Using the correct Torx bit in a ratchet or screwdriver, loosen and remove each bolt. Keep them somewhere safe. Do not set them on the edge of the tailgate where they can fall out.
One bolt tends to be longer than the others. Note which position each one came from so you can match them up later. If a bolt is corroded and refuses to budge, a penetrating oil applied five minutes beforehand can make all the difference.
Step 4: Disconnect the Wiring Harness
Gently pull the tail light assembly forward just enough to expose the back. You will see a plastic connector with wires going into it. There are usually two things happening here.
First, the main electrical plug connects to a socket on the assembly. Second, individual bulb sockets may twist into the back of the assembly itself. Press the locking tab on the main connector and pull it straight off.
Do not yank on the wires. Pull on the connector body itself.
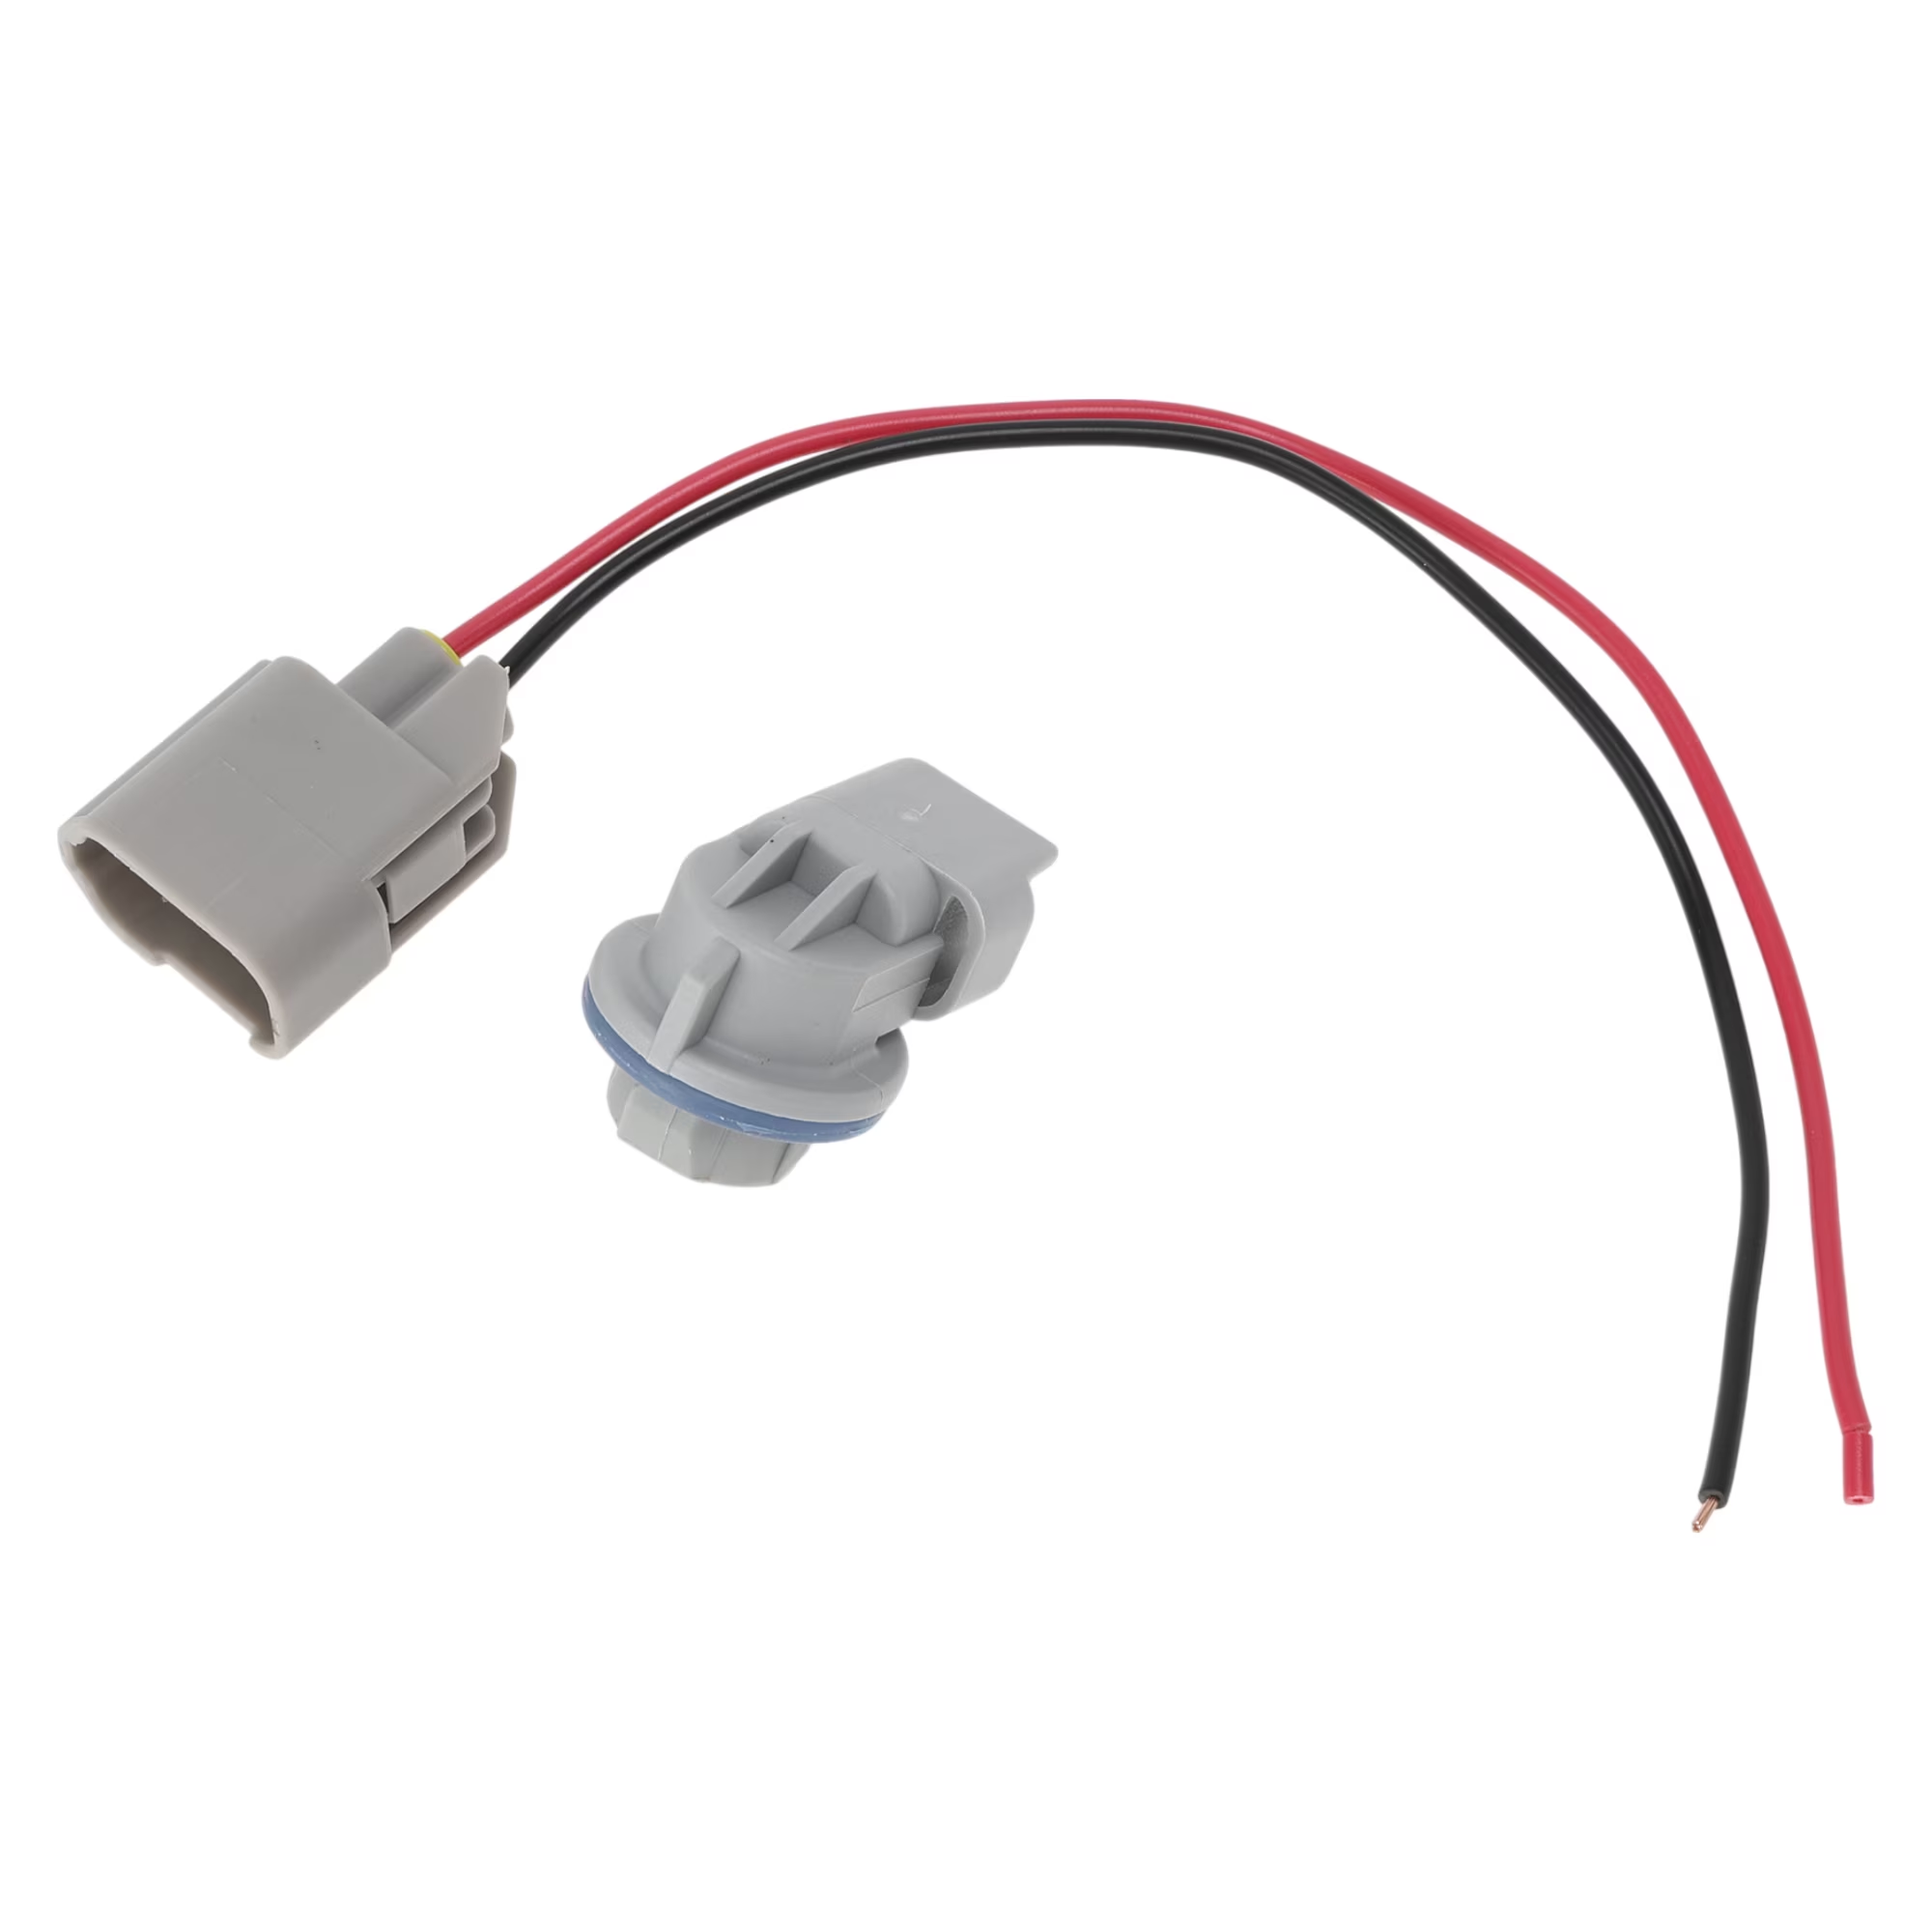
If your new assembly does not come with a pre-wired harness, you will need to transfer the original connector or install a replacement pigtail. The image above shows a typical pre-wired harness option that bolts right in. These save time and reduce the chance of messing up the connections during swap.
Step 5: Remove the Old Assembly
With the bolts out and the connector free, the old assembly should come straight out. Sometimes a rubber gasket will stick to the body or to the old housing. Either way, try to keep it intact.
If it tears, you may need to buy a replacement gasket or use a bead of automotive silicone sealant to prevent water intrusion. Take a moment to inspect the paint around the opening for chips or rust before moving on.
Step 6: Prepare the New Assembly
Compare the new unit with the old one. Make sure the bolt pattern matches. Check that the connector shape is the same.
If the new assembly has a gasket already seated, verify it is flush and not twisted. If yours does not, you can transfer the old gasket if it is in good shape or install a new one. A quick dab of dielectric grease on the connector pins before plugging in helps prevent future corrosion.
Step 7: Install the New Assembly
Set the new unit into the opening from the outside. Guide the connector through the hole in the back. Press the main electrical plug back onto the assembly until it clicks.
Start all the mounting bolts by hand to avoid cross-threading. Once they are threaded properly, tighten them down. Do not overtighten.
These plastic housings strip easily. Snug is enough.
Step 8: Test Everything
Before you consider the job done, turn the ignition to the on position and test every light function. Have someone stand behind the vehicle or use a reflective surface to check:
- Parking lights illuminate evenly
- Brake lights glow brightly when you press the pedal
- Left and right turn signals flash correctly
- Reverse lights come on when shifted into reverse
- Third brake light activates with the brake pedal
If anything is not working, double-check your connector seating and bulb orientation. A bulb installed upside down in a dual-filament socket will cause exactly one function to fail.
Step 9: Final Tightening and Cleanup
Once all functions check out, go back and give each mounting bolt a final snug turn. Replace any interior trim panels you moved. Clean up your workspace.
Dispose of the old assembly and any worn bulbs responsibly.
This process takes most people about 20 to 45 minutes for one side. Two sides is still very manageable in a single afternoon. The biggest time sink is usually figuring out where the bolts are and dealing with a stuck gasket.
Plan for a little extra time on first-timers. And if you find yourself popping the rear seats to grab tools, that is a perfect moment to check on rear cargo protection for your Grand Cherokee.
Critical Identifiers: Spotting the Right Bulbs, Screws, and Connectors
Getting the right parts is half the battle. Wrong bulbs cause dim lights or error codes. Wrong screws strip threads.
Wrong connectors create poor electrical contact. Here is what you need to know before you buy anything.
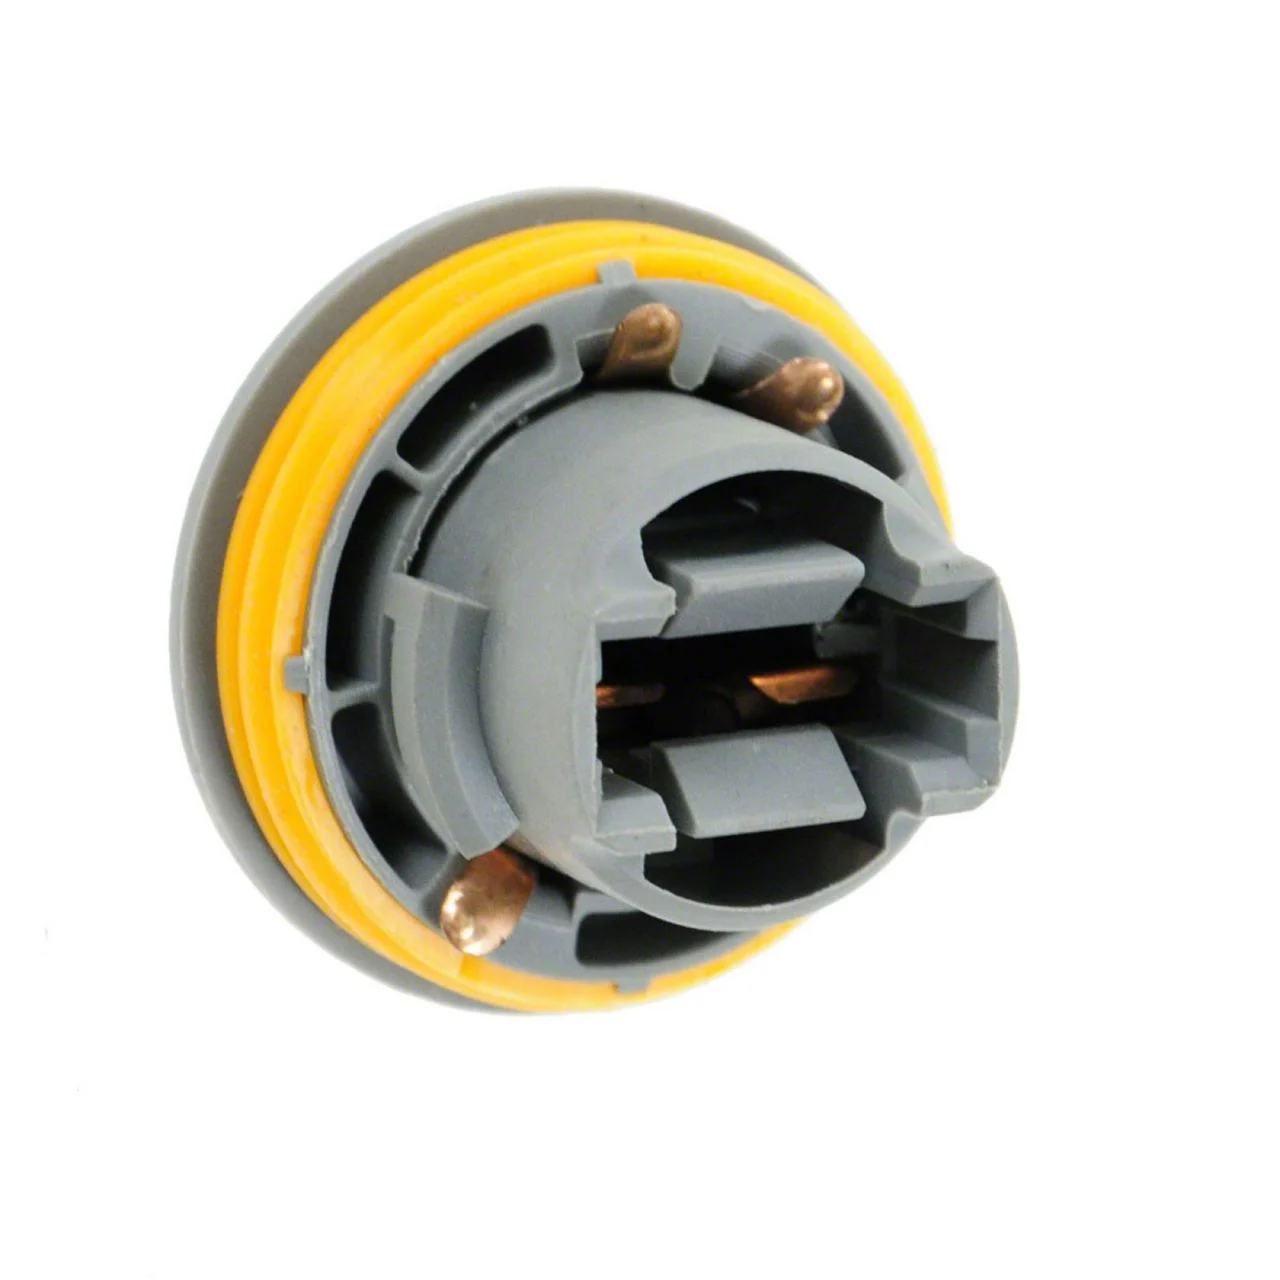
Bulb Types by Circuit
The 3157 and 4157 bulbs dominate Grand Cherokee tail light applications. They share the same physical size and base shape. The difference lies in the internal filament arrangement and the number of contact prongs.
The 3157 has two prongs on one side and one on the other. The 4157 has the opposite configuration. Plugging a 3157 into a 4157 socket (or vice versa) often results in the brake light working while the tail light does not, or both failing completely.
The reverse light socket is smaller and typically accepts a 912 or 921 wedge-base bulb. These are common in many modern vehicles beyond just Jeeps. If your reverse light is out, start by checking whether the wedge bulb is burned out before assuming the wiring is the problem.
Fastener Sizes
Most WK2 Grand Cherokee tail light assemblies use Torx fasteners. The most common sizes are:
- T20: Primary mounting bolts on most model years
- T25: Secondary mounting bolts on some years
- 10mm: Occasionally used on older ZJ and WJ generations
Bring the correct bit to the job. Using a socket that is slightly too large will round off the Torx head, turning a five-minute task into a frustrating nightmare. A Torx bit that is worn or dirty also strips heads.
Keep a spare set handy.
Connector Styles
Grand Cherokee tail light connectors vary by generation. The WK2 uses a flat plastic plug with a locking tab. You press the tab down and pull.
The earlier ZJ generation uses a round connector with a twist-lock mechanism. You turn it counterclockwise about a quarter turn to release. Knowing which style your vehicle has determines whether you need a simple pull or a twisting motion.
When buying a replacement harness or connector, verify the pin count matches your original. Most WK2 assemblies use a 4-pin or 5-pin connector. Using a mismatched harness causes missing functions and potentially shorted circuits.
Gasket Compatibility
Not all replacement assemblies include a gasket. Some ship with one pre-installed. Others expect you to reuse the old one.
If your new assembly comes without a gasket, order a replacement seal separately or carefully peel the old one off the vehicle body and transfer it to the new housing. A missing or poorly seated gasket is the #1 cause of water leaks into the trunk after a tail light swap.
Common Visual Pitfalls and How to Dodge Them
Even experienced DIYers make mistakes during tail light replacements. Most of these mistakes are visual in nature. You miss a detail because it is hidden, obscured, or simply not obvious from the outside.
Here are the pitfalls to watch for and how to avoid each one.
Misidentifying the Socket Orientation
The 3157 and 4157 bulbs look almost identical at a glance. The pin layout is the visual clue. Hold the bulb up to the light and compare the base.
Two pins on one side, one on the other tells you which is which. If you force a bulb into a socket, you risk breaking the contacts or damaging the socket. Always align the pins before pushing the bulb in.
Forgetting the Ground Wire
Some Grand Cherokee tail light assemblies include a separate ground wire in addition to the power connector. This wire is usually black and connects to a grounding point on the body panel. If you overlook it during removal, the new assembly may not ground properly.
Check for a standalone ground wire before disconnecting anything. Clip it back in place on the new assembly if needed.
Cross-Threading the Bolts
Starting a bolt at an angle guarantees stripped threads in the plastic housing insert. Always begin threading by hand, feeling for the bite before applying any tool torque. If a bolt resists, back it out and realign.
Forcing it is the fastest way to destroy the mounting point and create a much more expensive repair.
Damaging the Connector Tab
The plastic locking tab on the wiring harness connector is fragile. Pull on the wires instead of the connector body and you will snap this tab. Without the tab, the connector vibrates loose while driving.
Inspect the tab before plugging in the new assembly. If it is broken, use a small zip tie through the connector housing as a temporary retention measure until you can replace the harness.
Ignoring the Seal Surface
Before setting the new assembly into place, wipe the paint surface on the body where the gasket sits. Any dirt, old sealant residue, or paint flakes left there create a gap that lets water in. A quick wipe with a clean cloth and a spray of brush cleaner ensures a clean bonding surface.
Overlooking the Third Brake Light
The third brake light is often mounted separately on the high-mounted position. Some Grand Cherokee models integrate it into the tail light assembly itself. If you are only replacing one side, check whether your third brake light is affected.
A broken third brake light is an easy inspection failure and a serious safety concern. Verify its operation after completing your swap.
Cost Breakdown: DIY vs. Professional Replacement
Money often drives the decision to tackle this repair yourself or hand it to a professional. Here is a realistic breakdown of what each option costs as of 2026.
DIY Costs
| Item | Estimated Cost |
|---|---|
| Aftermarket tail light assembly (single side) | $50–$200 |
| OEM tail light assembly (single side) | $200–$400 |
| LED retrofit kit (optional) | $30–$120 |
| Dielectric grease | $3–$8 |
| Replacement gasket (if needed) | $5–$15 |
| Torx bits (if you do not own them) | $8–$20 |
| Typical total DIY cost | $58–$355 |
Professional Repair Costs
| Item | Estimated Cost |
|---|---|
| Parts (aftermarket, installed) | $100–$250 |
| Parts (OEM, installed) | $300–$500 |
| Labor (0.5 to 1.0 hour) | $75–$150 |
| Typical total pro cost | $175–$650 |
The savings are clear. Even spending on premium aftermarket parts plus minimal supplies comes in well below a professional installation using the same parts. Going fully OEM through a dealership pushes the cost closer to the DIY ceiling, but you still avoid labor charges.
When Professional Help Makes Sense
DIY is the right call when you have basic tools, some mechanical confidence, and time to spare. Hand it to a pro if you are uncomfortable working around electrical connectors, if your mounting points are severely corroded, or if you suspect wiring damage beyond the tail light connector. A shop can also perform a full lighting system diagnostic that checks for upstream issues like a faulty brake light switch or ground problem.
Some owners opt for professional installation when they buy from a body shop that sources OEM parts at wholesale rates. In those cases, the parts markup is lower and the labor charge may be reasonable. Always ask for an itemized quote before authorizing work.
Safety and Legal Must-Ks Before You Drive
A tail light replacement is not just about making your Jeep look good. It is about staying legal and keeping yourself and other drivers safe. Skipping the safety steps here can result in a citation, a failed inspection, or worse.
Legal Requirements
All 50 states require functioning rear tail lights, brake lights, and turn signals on public roads. The specific intensity and color requirements vary. Red is mandatory for tail and brake lights.
Amber or red for turn signals depending on your state. White for reverse lights. Tinted lenses that reduce light output below the manufacturer's specification may violate state law even if the bulbs work.
The Federal Motor Vehicle Safety Standard 108 sets the baseline for lighting equipment requirements on vehicles sold in the United States. Any replacement assembly should meet FMVSS 108 standards to remain street legal. Look for the DOT mark on the lens of your new assembly as proof of compliance.
Electrical Safety
Disconnect the negative battery terminal before working on any electrical components if you want to eliminate shock risk entirely. This is especially important if you plan to modify the wiring or splice into the harness. For a simple plug-and-play swap, you can leave the battery connected and rely on the vehicle's fused circuits for protection.
Just be careful not to touch bare wire ends against metal while the ignition is on.
Physical Safety
The tail light assembly sits close to sharp body edges and potential pinch points. Wear gloves when handling the old unit, especially if the lens is cracked. Glass shards or sharp plastic fragments can cut your hands.
Keep children and pets away from the work area. Secure the tailgate in the open position with the support strap to prevent it from accidentally closing on your fingers.
Post-Installation Checks
Do not drive your vehicle until you have confirmed all lights function correctly. Have a helper stand behind the Jeep while you cycle through each function. Check from a distance to verify brightness and coverage.
If a light appears dim, investigate before driving. A dim brake light may not be visible to following drivers in daylight conditions, creating a serious rear-end collision risk.
After the Swap: Testing, Sealing, and Long-Term Care
Installing the new assembly is only the beginning. Proper testing and sealing ensure your repair lasts and your vehicle stays road-worthy.
Function Testing Protocol
Run through each light function systematically after installation:
- Turn the key to accessory mode and verify parking lights
- Press the brake pedal firmly and confirm both brake lights illuminate at full brightness
- Activate left and right turn signals separately and watch for proper flash rate
- Shift into reverse and confirm white reverse lights activate
- Check the third brake light one final time
Note any abnormal behavior such as hyper-flashing turn signals, which indicates a CANbus mismatch, or dim brake lights, which suggests a poor ground connection. Address these issues before considering the job complete.
Sealing and Weatherproofing
Apply a thin bead of clear automotive silicone sealant along the seam between the assembly and the body panel if your gasket shows any signs of compression or uneven seating. This extra layer adds insurance against water intrusion during heavy rain or car washes. Wipe away any excess sealant immediately with a cloth dampened with mineral spirits before it cures.
Check the gasket seating once more after a week of driving. Temperature changes cause materials to expand and contract, which can shift the gasket slightly. If you notice any moisture entering the trunk area after rain, reseat the gasket and apply additional sealant as needed.
Ongoing Maintenance
Inspect your tail lights periodically during routine vehicle checks. Look for cracks, cloudiness, or moisture buildup. Clean the exterior lens with automotive glass cleaner and a soft microfiber cloth to maintain maximum light output.
Check bulb brightness every few months, especially if you tow frequently or drive in dusty conditions.
Keep spare bulbs in your glove box or tool kit. A 3157 or 4157 bulb costs about $3 to $8 and takes two minutes to replace if one burns out between assembly replacements. Having spares on hand prevents being stranded with a non-functioning brake light.
If you are also refreshing other interior elements while the rear seats are out, consider pairing this repair with floor protection upgrades for your Grand Cherokee to keep the cabin clean during future maintenance sessions.
Real Scenarios: Off-Road Damage, Accidents, and Aging Lights
Every Grand Cherokee owner encounters tail light issues differently. Understanding how these problems typically arise helps you prepare and respond appropriately.
Trail Damage Scenario
You are running a technical trail and a low branch catches the passenger side tail light. By the time you notice, the lens is cracked and water has begun seeping in. You limp back to camp with the hazards flashing.
The next morning, you pull into a parts store and grab an aftermarket replacement. The process takes about 30 minutes. You transfer the good gasket from the damaged unit, apply a bit of dielectric grease, and get back on the trail by noon.
Total cost: $85 for the assembly plus a spare set of bulbs.
Rear-End Collision Scenario
Someone bumps your parked Jeep from behind. The impact cracks both tail light lenses and shatters the passenger side housing completely. You file an insurance claim and wait for the adjustor.
Meanwhile, you borrow a temporary assembly from a friend to keep the vehicle legal. Once the insurance payout arrives, you purchase two OEM replacements and install them over a weekend. The driver side takes 25 minutes.
The passenger side takes 40 minutes because the impact bent a mounting stud. Total out-of-pocket cost after deductible: $320 for parts, zero for labor.
Aging Vehicle Scenario
Your 2014 Grand Cherokee has 120,000 miles on it. The tail light lenses are significantly clouded from years of sun exposure. The brake lights work but look dim through the fogged plastic.
Rather than investing in restoration products, you decide a full replacement makes more sense. You order two mid-range aftermarket assemblies with clear lenses and black housings for a refreshed look. Installation goes smoothly on both sides.
The vehicle passes inspection with flying colors, and the new look gives the aging SUV a updated presence. Total investment: $180 for both assemblies plus $12 for supplies.
Each scenario plays out differently, but the core process remains the same. Know your model year specifics, gather the right parts upfront, and take your time with the electrical connections.
Frequently Asked Questions
Can I replace just one tail light or do I need both?
You can replace a single tail light assembly if only one side is damaged. However, if both units are showing age-related clouding or frequent failures, replacing both at the same time saves you duplicate labor. Matching color and brightness is also easier when both sides are new.
How long does a tail light assembly last?
Factory assemblies typically last the lifetime of the vehicle under normal conditions. Aftermarket units vary widely. Quality brands last five to eight years.
Budget units may show significant fading or cracking within two to three years. Lens clarity and housing integrity are the main indicators of remaining lifespan.
Will an aftermarket tail light pass inspection?
Most aftermarket assemblies pass inspection as long as they emit the correct colors at adequate brightness and bear a DOT compliance marking. Smoked or heavily tinted lenses often fail inspection in states with strict lighting laws. Check your local DMV requirements before purchasing tinted units.
What tools do I absolutely need for this job?
A basic Torx socket set covering T20 and T25 sizes, a Phillips screwdriver, needle-nose pliers, and a flashlight are the essentials. Dielectric grease and a clean rag are highly recommended. Beyond that, you do not need anything specialized.
A ratchet with extensions helps if your hands cannot reach comfortably.
Is it harder to replace the driver side or passenger side?
Difficulty varies by model year and trim level. On most WK2 Grand Cherokees, both sides are equally accessible from behind the tailgate. Some owners report the driver side feels slightly tighter due to the placement of the liftgate hinge.
The process and time required are essentially the same for both sides.
Can I use LED bulbs in my existing tail light assembly?
Yes, but you need CANbus-compatible LED bulbs to avoid dashboard error codes. Standard LED bulbs draw less current than halogen bulbs, which tricks the vehicle's bulb-out detection into thinking a bulb is failed. CANbus resistors or smart LED bulbs resolve this issue.
Verify compatibility with your specific model year before purchasing.
Model Year Variations: What Changes Across Generations
Understanding how tail light designs evolved across Grand Cherokee generations helps you avoid ordering the wrong parts or encountering surprises during installation. Each generation introduced different mounting styles, connector types, and access methods that affect the replacement process.
ZJ Generation (1993–1998)
The original Grand Cherokee used round or rectangular tail light assemblies depending on the model year. These earlier units typically featured:
- Round brake/turn signal combinations on 1993, 1995 models
- Rectangular assemblies on 1996, 1998 models
- 10mm bolts rather than Torx fasteners
- Round twist-lock connectors instead of plug-in style
- Separate backing plate mounted to the body
The ZJ tail light swap requires removing interior quarter panel trim to access mounting hardware. This adds approximately 15 to 20 minutes to the job compared to later generations. The wiring harness connectors are also more prone to corrosion due to age.
WJ Generation (1999–2004)
The second-generation Grand Cherokee introduced a more integrated tail light design. Key differences include:
- Larger assembly covering more of the rear quarter panel
- Torx T20 mounting bolts became standard
- Multi-pin connectors replaced the simple round plugs
- Some models featured sequential turn signal indicators
- Interior trunk lining often needs partial removal for access
The WJ generation represents a transition period between the older simpler designs and the modern WK2 complexity. Parts availability is excellent since these vehicles are now 20+ years old. Junkyard sources often have clean used assemblies in decent condition.
WK Generation (2005–2010)
The third-generation Grand Cherokee refined the tail light design with:
- Sleeker housing profiles matching the updated exterior styling
- Improved weather sealing compared to the WJ
- Standard Torx T25 mounting fasteners
- More complex wiring harnesses with additional circuits
- Integrated third brake light mounting points
Some WK models offered factory LED upgrade options that require different handling during replacement. If your vehicle came with OEM LEDs, aftermarket halogen replacements may trigger dashboard error codes without adding load resistors.
WK2 Generation (2011–2022)
The most common tail light replacement scenario involves the WK2 generation. These models feature:
- Two distinct facelift periods with different designs
- 2011, 2013: Larger, more angular assemblies
- 2014, 2022: Refinement with improved LED options
- Consistent Torx T20/T25 bolt patterns throughout
- Plug-and-play connector compatibility within each facelift period
- Sequential turn signals available on Overland and Summit trims
When shopping for WK2 parts, verify whether your vehicle has the pre-facelift or post-facelift design. The mounting bolt locations differ slightly between the two periods even though the overall process remains similar.
WL Generation (2023–Present)
The current generation introduces significant changes that affect tail light replacement:
- Fully integrated LED modules replace individual bulbs
- Assembly removal requires interior panel disassembly
- Software-controlled lighting functions including animated sequences
- Proprietary connectors that resist generic replacements
- Higher part costs reflecting the technology complexity
WL owners should expect a more involved replacement process. Professional installation becomes more attractive given the software calibration requirements and higher parts costs. DIY replacement remains possible but demands more technical knowledge.
| Generation | Years | Bolt Type | Connector Style | Access Difficulty |
|---|---|---|---|---|
| ZJ | 1993–1998 | 10mm | Round twist-lock | Moderate |
| WJ | 1999–2004 | Torx T20 | Multi-pin plug | Moderate |
| WK | 2005–2010 | Torx T25 | Multi-pin plug | Easy |
| WK2 | 2011–2022 | Torx T20/T25 | Multi-pin plug | Easy |
| WL | 2023+ | Specialized | Proprietary | Moderate to Hard |
If you own an earlier generation vehicle, the guide to changing tail light bulbs on a 2001 Grand Cherokee covers similar principles that apply across these older designs. Understanding your specific generation upfront prevents part ordering mistakes and installation headaches.
Advanced Troubleshooting: When Replacement Is Not Enough
Sometimes the tail light assembly itself is fine, but other components cause the same symptoms you might blame on a failed unit. Before spending money on a new assembly, rule out these common underlying issues.
Electrical Connection Problems
Corroded connectors account for roughly 40 percent of apparent tail light failures according to automotive diagnostic studies. The multi-pin connector on your Grand Cherokee sits in a location exposed to road moisture and temperature cycling. Over time, the metal terminals inside the plastic housing oxidize.
Signs of connector issues include:
- Intermittent light operation that changes when you wiggle the connector
- Lights working after tapping the assembly but failing again later
- Corrosion visible as green or white residue on terminal pins
- Burn marks or melting on the connector housing
Clean corroded terminals with electrical contact cleaner and a small brush. Apply dielectric grease before reconnecting. If the connector housing is cracked or melted, replace the entire harness section rather than attempting temporary repairs.
Ground Circuit Failures
A bad ground creates the same symptoms as a bad bulb. The electrical current cannot complete its circuit back to the battery negative terminal. Grand Cherokee tail lights share grounding points with other rear lights and sometimes interior illumination circuits.
Locate the main ground strap near the rear quarter panel. It typically connects to a chassis bolt near the spare tire well or inside the trunk area. Clean the contact surface with sandpaper until you see bare metal.
Retighten the ground bolt securely.
Test the ground by measuring voltage drop between the tail light housing and the battery negative terminal with the lights on. A reading above 0.1 volts indicates excessive resistance in the ground path.
Bulb Socket Damage
The plastic sockets that hold your bulbs can crack or melt from heat exposure. Dual-filament 3157 bulbs generate significant heat, especially in enclosed housings. Over time, this heat softens the socket material.
Cracked sockets lose contact with the bulb prongs, causing flickering or complete failure. Melted sockets may fuse to the bulb base, making removal difficult. Inspect each socket for discoloration, cracking, or deformation before installing new bulbs.
Replace damaged sockets with aftermarket repair sockets that splice into the existing wiring. These cost $2 to $5 each and prevent the frustration of dealing with melted factory sockets.
Wiring Harness Damage
Rodents love chewing wiring harnesses, and the rear of your Grand Cherokee provides easy access behind the tail light assemblies. Inspect the wire insulation for teeth marks, cuts, or fraying. Damaged wires expose copper conductors that can short against the metal body.
Repair damaged wiring with solder and heat shrink tubing rather than electrical tape. Tape degrades over time and fails to provide reliable electrical connections. If multiple wires are damaged, consider running a new harness section rather than attempting extensive repairs.
Brake Light Switch Issues
If both brake lights fail simultaneously, the problem likely involves the brake light switch rather than the tail light assemblies. This switch mounted on the brake pedal assembly sends power to both brake circuits when you press the pedal.
Test the switch by having someone watch the brake lights while you press and release the pedal. If the lights do not respond, check for power at the switch connector with a test light. No power indicates a blown fuse or faulty relay.
Power present but no output suggests a bad switch.
The brake light switch replacement is a separate repair that costs $20 to $60 for the part and takes about 15 minutes to complete. Do not confuse this issue with tail light assembly problems.
Fuse and Relay Checks
Before assuming the worst, verify that relevant fuses and relays function correctly. The brake light circuit typically shares a fuse with other systems. Check your owner's manual for the fuse diagram location, usually found on the under-dash fuse panel cover.
Replace any blown fuses with the exact amperage rating. Installing a higher-amperage fuse to prevent blowing again creates a fire hazard. If a new fuse blows immediately, you have a short circuit somewhere in the wiring that requires proper diagnosis.
Tool Recommendations and Preparation Checklist
Having the right tools makes this job go smoothly. Skipping tool preparation is one of the most common reasons DIY repairs stall halfway through. Here is what you need before starting.
Essential Tools
Every tail light replacement requires these basic tools:
- Torx socket set covering T15, T20, and T25 sizes
- Ratchet with extension bar for hard-to-reach bolts
- Phillips head screwdriver for trim clips and retainers
- Needle-nose pliers for connector tab manipulation
- Flashlight or work light for illuminating dark cavities
- Clean rags or paper towels for workspace maintenance
Optional but highly recommended tools include:
- Trim removal tool set for interior panel removal
- Wire strippers and crimpers for harness repairs
- Multimeter for electrical diagnostics
- Penetrating oil for corroded bolts
- Dielectric grease for connector protection
- Socket set with various sizes for ground point access
Safety Equipment
Protect yourself during the replacement process:
- Gloves to prevent cuts from sharp edges and glass shards
- Safety glasses when working near cracked lenses
- Knee pads if you plan to work lying on the trunk floor
- Mask if cleaning corroded electrical contacts
Pre-Job Preparation
Organize your workspace before removing anything:
- Park on a level surface with the tailgate fully open
- Lay down a clean mat or blanket to keep hardware organized
- Gather all tools within arm's reach before starting
- Take photos of the existing assembly before removal for reference
- Label or bag each bolt according to its position
- Keep the old assembly nearby to compare against your new purchase
Having everything prepared beforehand prevents the frustration of searching for tools while partially disassembled components sit exposed to the elements. A Jeep Renegade oil change light reset guide demonstrates how proper preparation applies across all Jeep maintenance tasks.
Tool Maintenance Tips
Keep your Torx bits in good condition by storing them separately from other hardware. Worn Torx bits strip bolt heads faster than any other tool failure mode. Replace bits that show rounding on the tip.
A fresh Torx bit costs $3 to $8 and saves hours of frustration.
Store dielectric grease in a sealed container to prevent contamination. Old grease collects dust and debris that defeats its purpose. Fresh applications ensure optimal connector protection.
When to Call a Professional Instead of DIY
While most tail light replacements suit capable DIYers, certain situations warrant professional assistance. Recognizing these scenarios early saves money and prevents complications.
Situations Requiring Professional Help
Consider professional installation when:
- Multiple tail light circuits fail simultaneously indicating wiring issues
- The mounting studs are stripped or broken requiring specialized repair
- You lack confidence working with electrical connectors
- The vehicle is under warranty and DIY work might void coverage
- You need sequential turn signal programming for aftermarket LED units
- Interior trim removal proves difficult without proper tools
- Corrosion has compromised structural mounting points
Cost-Benefit Analysis
Professional installation costs typically range from $100 to $250 depending on labor rates and complexity. Compare this against:
- Your hourly value for the time invested
- Risk of damaging costly components during installation
- Potential need for additional repairs if mistakes occur
- Guarantee of proper function and warranty coverage
For straightforward bolt-on replacements with clean mounting points, DIY saves significant money. For complex situations involving electrical diagnostics or structural repairs, professional help provides peace of mind.
Finding Qualified Professionals
Seek professionals with specific Jeep experience when possible:
- Dealership service departments understand model-specific quirks
- Independent shops specializing in domestic SUVs bring relevant expertise
- Mobile mechanics offer convenience if you cannot tow the vehicle
- Body shops handle collision-related damage comprehensively
Verify credentials and read reviews before committing. Ask about warranties on both parts and labor. Reputable professionals stand behind their work.
Long-Term Optimization: Keeping Your Tail Lights Working Perfectly
Proper installation is only the beginning. Maintaining your tail lights ensures they continue functioning reliably for years to come. A few simple habits prevent most common problems.
Regular Inspection Schedule
Check your tail lights monthly or before long trips:
- Verify all functions operate correctly
- Look for cracks, cloudiness, or moisture in the lenses
- Inspect the gasket condition around the assembly perimeter
- Check for loose mounting bolts
- Clean lenses with automotive glass cleaner and microfiber cloth
Monthly inspections catch small problems before they become expensive repairs. A cracked lens discovered early costs $80 to fix. Ignored until complete failure costs $300 plus potential inspection failure fines.
Cleaning Best Practices
Use the correct cleaning products to maintain lens clarity:
- Automotive glass cleaner removes road film without damaging plastic
- Microfiber cloths prevent scratching that reduces light output
- Avoid abrasive pads or household cleaners that degrade lens coating
- Apply plastic restorer products annually to combat UV yellowing
Never use wax or polish products designed for paint on tail light lenses. These products fill microscopic scratches temporarily but wash away quickly, creating a false sense of restoration.
Weather Preparation
Prepare your tail lights for seasonal challenges:
- Spring: Clean connectors and apply fresh dielectric grease
- Summer: Check for heat-related socket softening
- Fall: Inspect gaskets before winter moisture arrives
- Winter: Clear snow and ice from lenses after storms
Temperature extremes stress seals and connectors. Proactive maintenance before harsh weather prevents emergency failures when you need your lights most.
Storage Considerations
If you store your Grand Cherokee for extended periods:
- Cover the rear windows to reduce UV exposure to lenses
- Check battery voltage periodically to prevent electrical drainage
- Inspect for rodent nesting near wiring harnesses
- Start and run the vehicle monthly to circulate electrical systems
Storage damage accounts for more tail light failures than people realize. Rodents chew wiring, and UV exposure clouds lenses even through window glass.
Upgrade Decision Timeline
Consider upgrading to LED assemblies when:
- Original halogen bulbs fail repeatedly
- Lens cloudiness reaches unacceptable levels
- Sequential turn signal functionality is desired
- Vehicle resale value justification exists
LED upgrades cost $150 to $400 per pair installed but eliminate bulb replacements for the life of the vehicle. Calculate whether the convenience and brightness improvement justify the investment for your usage pattern.
Maintenance Integration: Pairing Tail Light Care With Other Jeep Upkeep
Smart owners integrate tail light maintenance into existing service routines rather than treating it as a separate chore. This approach ensures nothing gets overlooked while maximizing efficiency.
Oil Change Integration
During routine oil changes, ask the technician to verify tail light operation. Most service bays include light checks in their standard inspection procedures. This catches issues you might miss between visual checks.
Related Jeep Wrangler floor mat guides demonstrate how interior protection pairs naturally with exterior maintenance routines. Similar integration applies to lighting care.
Tire Rotation Timing
Schedule tail light inspections during tire rotations when the vehicle is already lifted and accessible. This doubles the utility of each service visit without additional time investment.
Seasonal Transition Checks
Align tail light inspections with seasonal vehicle preparation:
- Before winter: Verify brake light intensity for low-visibility conditions
- Before summer road trips: Confirm all functions for extended highway driving
- Before off-road adventures: Check resilience of mounting hardware
- After extreme weather events: Inspect for water intrusion or damage
Integrating lighting checks into established routines prevents them from falling through the cracks. A Jeep TJ slush mat recommendation shows how practical accessories support comprehensive vehicle care strategies.
Documentation Practice
Maintain a simple log of tail light maintenance:
- Date of last inspection
- Any issues discovered and resolved
- Bulb replacement dates
- Assembly replacement dates
- Next scheduled check
Documentation helps track patterns and predict future failures. If bulbs consistently fail every 18 months, investigate underlying causes like voltage regulation issues rather than simply replacing them repeatedly.
Final Tips for Success
Replacing your Grand Cherokee tail light assembly succeeds when you combine preparation with patience. Here are the final insights that separate smooth installations from frustrating struggles.
Preparation Beats Speed
Rushing causes mistakes. Taking time prevents them. Spend the extra five minutes organizing your workspace and verifying part compatibility.
That investment pays dividends during installation when everything fits correctly the first time.
Photo Documentation Helps
Take pictures during disassembly. Modern smartphones make this effortless. Photos show bolt positions, connector orientations, and routing paths that memory forgets.
Refer back to them if anything confuses you during reassembly.
Quality Parts Matter Long-Term
Budget assemblies save money initially but cost more over time through premature failures and repeat replacements. Mid-range to premium options deliver better value when you factor in longevity and reduced hassle.
Know When to Stop
If you encounter unfamiliar problems during installation, pause and research rather than forcing solutions. Forcing damaged components creates additional damage. Researching proper procedures prevents compounding mistakes.
Share Knowledge
Help other Grand Cherokee owners succeed by sharing what you learn. Online forums and local Jeep clubs benefit from practical installation experiences. Your success story helps someone else avoid the same pitfalls.
State-Specific Lighting Regulations and Inspection Requirements
Tail light replacement is not just about function. It is about staying legal on your state's roads. Each state has different rules regarding light color, brightness, and modifications.
Understanding these requirements prevents fines and inspection failures.
Color and Brightness Standards
All states require red rear lights for brake and tail functions. Turn signals can be amber or red depending on state law. Reverse lights must be white.
Some states permit amber front turn signals with red rear turn signals. Others require matching colors front and back.
Brightness standards focus on minimum candlepower outputs. Your replacement assembly must meet or exceed factory specifications. Aftermarket assemblies with overly dark tints often fail to provide adequate illumination.
This creates safety risks and inspection failures.
Inspection Frequency and Requirements
State inspection schedules vary widely:
- Annual inspections common in northeastern and midwestern states
- Biennial inspections in many southern and western states
- No periodic inspections in several states with vehicle safety self-certification
- Emissions-focused states may combine safety and emissions testing
- New vehicle exemptions apply in some jurisdictions for first few years
During inspections, technicians typically test:
- Parking/tail light operation
- Brake light intensity and function
- Turn signal flash rate and brightness
- Reverse light illumination
- Third brake light activation
- Lens condition and clarity
Tint and Modification Restrictions
Tinted lenses face increasing scrutiny across states. Many prohibit any tint that reduces visible light transmission below 70 percent. Smoked or colored lenses often fail inspection regardless of bulb brightness.
Some states allow factory-installed tinted lenses if they meet Federal Motor Vehicle Safety Standards. Aftermarket tints applied over clear lenses typically violate regulations. Clear lens replacements remain the safest choice for legal compliance.
Commercial and Private Vehicle Differences
Commercial vehicles sometimes face stricter lighting requirements than personal vehicles. Fleet operators should verify state commercial vehicle inspection standards. These may include additional requirements for reflector placement and intensity.
Documentation and Compliance Records
Maintain records of lighting modifications and replacements. Receipts showing DOT compliance markings help demonstrate legality during inspections. Some states require proof of compliance for modified vehicles during registration renewal.
If you are updating other exterior components alongside your tail lights, consider how floor mat choices complement overall vehicle presentation while maintaining practical functionality.
LED Conversion: Benefits, Challenges, and Compatibility
LED tail lights offer significant advantages over traditional halogen bulbs. Understanding both benefits and drawbacks helps you decide whether conversion makes sense for your Grand Cherokee.
Efficiency and Longevity Benefits
LEDs consume substantially less power than halogen bulbs. A typical 3157 halogen bulb draws 21 watts for brake mode. Equivalent LED replacements draw 5 to 8 watts while producing equal or greater brightness.
This reduced electrical load decreases strain on your vehicle's charging system.
LED lifespan dramatically exceeds halogen alternatives. Quality LED modules last 25,000 to 50,000 hours compared to 500 to 1,000 hours for halogen bulbs. This translates to years of trouble-free operation without bulb replacements.
| Metric | Halogen Bulb | LED Replacement |
|---|---|---|
| Power draw (brake mode) | 21 watts | 5–8 watts |
| Lifespan | 500–1,000 hours | 25,000–50,000 hours |
| Brightness (lumens) | 1,100–1,400 | 800–1,200* |
| Heat generation | High | Low |
| Cost per unit | $3–$8 | $15–$40 |
*Lumen output varies significantly by LED quality and design.
Hyperfluorescence and Error Code Challenges
LED conversion introduces unique challenges specific to modern vehicle electronics. Your Grand Cherokee's bulb monitoring system detects resistance changes between halogen and LED circuits. Lower LED current draw triggers dashboard warning lights and hyper-flashing turn signals.
Solutions include:
- CANbus-compatible LED bulbs with built-in resistors
- External load resistors wired in parallel with LED modules
- Relay modules that simulate halogen bulb resistance
- Programming adjustments through dealership or specialized tools
Each solution varies in cost, complexity, and reliability. CANbus-compatible LEDs cost more upfront but eliminate additional hardware. External resistors generate excess heat requiring careful mounting.
Programming solutions may void warranties and require specialized equipment.
Heat Management Considerations
LEDs produce less radiant heat but concentrate thermal energy in small areas. Proper heat sinking prevents premature LED degradation. Aftermarket LED assemblies must include adequate cooling fins or fans.
Improper heat management causes several problems:
- LED brightness reduction over time
- Color shift toward blue or purple hues
- Complete module failure within months
- Lens melting from concentrated heat points
Quality LED assemblies address thermal management through design. Budget conversions often sacrifice cooling for cost savings.
Sequential Turn Signal Integration
Higher-trim Grand Cherokees feature sequential turn signals that animate along the lens. LED conversions can replicate or enhance this effect. Some aftermarket LED assemblies include integrated sequential programming.
However, sequential functionality requires proper communication with your vehicle's body control module. Incorrect wiring or incompatible modules cause erratic behavior or complete signal failure. Professional installation ensures proper integration with existing vehicle electronics.
Legal Compliance Verification
LED conversions must meet Federal Motor Vehicle Safety Standard 108 requirements. Look for DOT-approved LED assemblies bearing compliance markings. Some LED products claim "off-road use only" due to insufficient brightness or improper beam patterns.
Before purchasing LED conversions, verify compatibility with your specific model year and trim level. Consult manufacturer documentation and customer reviews for real-world performance data.
Corrosion and Rust: Prevention and Repair Strategies
Grand Cherokee tail light areas face constant exposure to road moisture, salt, and debris. Corrosion develops in mounting points, connectors, and body panels over time. Addressing these issues prevents costly repairs and ensures proper sealing.
Connector Corrosion Identification
Green or white crusty deposits on electrical terminals indicate active corrosion. This oxidation increases electrical resistance and causes intermittent lighting failures. Severe corrosion melts connector plastic and destroys terminal integrity.
Inspect connectors before purchasing replacements. Clean minor corrosion with electrical contact cleaner and a brass brush. Replace connectors showing extensive damage or melted plastic.
Mounting Point Rust Management
Rust around tail light mounting studs compromises structural integrity. Stripped threads prevent secure assembly attachment. Water intrusion through corroded mounting holes damages interior trunk panels.
Address rust during replacement:
- Remove surface rust with wire brushing or sandpaper
- Apply rust converter to stabilized metal surfaces
- Treat with rust preventive coating before reassembly
- Replace severely corroded mounting studs entirely
Gasket Seal Degradation
Rubber gaskets harden and crack from UV exposure and temperature cycling. Compromised seals allow water intrusion into trunk areas. Moisture accumulation promotes further corrosion and electrical issues.
Replace worn gaskets with new OEM or high-quality aftermarket units. Silicone sealant provides additional protection when applied properly around the assembly perimeter.
Interior Panel Protection
Water entering through compromised tail light seals damages interior trim and carpeting. Inspect trunk lining and spare tire well for moisture after rain or car washes. Dry affected areas completely to prevent mold and mildew development.
Consider interior protection products alongside tail light maintenance to address moisture-related issues comprehensively.
Preventive Maintenance Schedule
Incorporate corrosion prevention into regular vehicle care:
- Clean connectors and apply dielectric grease annually
- Inspect mounting points for rust development each season
- Verify gasket condition before winter storage periods
- Treat exposed metal surfaces with rust inhibitor after off-road exposure
Early intervention prevents minor corrosion from becoming major repair scenarios.
Emergency Field Repairs: Getting Home When You Can't Wait
Sometimes tail light failures happen far from home. Understanding temporary repair options helps you reach safety while planning permanent fixes.
Emergency Assessment Procedures
When a tail light fails en route, quickly determine the nature of the problem:
- Single bulb out versus complete assembly failure
- Intermittent operation versus total darkness
- Visible physical damage versus electrical malfunction
- Weather conditions affecting visibility and safety
A single burned-out bulb represents the simplest emergency scenario. Complete assembly failure or multiple circuit losses require more creative solutions.
Temporary Electrical Solutions
When connector corrosion prevents proper contact, temporary fixes include:
- Cleaning contacts with available materials like clothing or paper
- Bypassing corrupted pins by jumping to adjacent terminals
- Using conductive materials like aluminum foil for emergency contact
- Applying conductive paste from first aid kits if available
These solutions provide limited functionality and should only bridge you to proper repair facilities.
Physical Damage Containment
Cracked or shattered lenses expose internal components to moisture and debris. Temporary containment prevents further damage:
- Clear packing tape over cracked lenses maintains weather sealing
- Plastic sheeting secured with rubber bands creates temporary covers
- Duct tape around assembly edges prevents water ingress
- Removing damaged assemblies entirely prevents hanging safety hazards
Never drive with loose or dangling tail light assemblies. Secure or remove them completely before continuing travel.
Alternative Lighting Strategies
When primary lights fail completely, maximize visibility through alternative means:
- Use hazard flashers continuously while driving to destination
- Pull over safely when possible to assess repair options
- Call roadside assistance for professional recovery services
- Use reflective triangles or flares if stopped on roadway
Safety always takes priority over reaching destination quickly.
Part Acquisition Planning
Research part availability before departure on extended trips. Knowing which parts stores or dealerships along your route stock Grand Cherokee tail lights enables faster permanent repairs. Save contact information for mobile auto parts services that deliver to your location.
Warranty Considerations and Insurance Claim Processes
Understanding warranty coverage and insurance procedures protects your investment and simplifies the repair process when covered events occur.
Manufacturer Warranty Coverage
OEM Mopar tail light assemblies typically carry 12-month or 12,000-mile warranties. This coverage protects against manufacturing defects and premature failures under normal use. Wear items like gaskets and bulbs may have different warranty terms.
Aftermarket assembly warranties vary significantly by manufacturer:
- Budget brands often provide 6-month limited coverage
- Mid-range manufacturers typically offer 12-to-24-month warranties
- Premium brands may provide lifetime defect warranties
- Warranty terms frequently exclude accidental damage or improper installation
Keep purchase receipts and warranty documentation throughout the product lifecycle. Some manufacturers require registration for full warranty coverage.
Insurance Claim Considerations
Collision damage to tail lights typically falls under comprehensive or collision coverage. Understanding your policy details helps maximize recovery and minimize out-of-pocket costs.
Factors influencing insurance claims:
- Deductible amounts relative to repair costs
- Claim frequency impact on future premiums
- Preferred repair network requirements
- Alternative transportation coverage during repairs
- Settlement options for partial versus total loss assemblies
For minor damage below your deductible threshold, out-of-pocket repair often proves more economical than filing claims that increase future premium costs.
Professional Installation Warranties
Reputable installation shops typically guarantee their work for 12 months or 12,000 miles. This coverage addresses installation errors and related electrical issues. Verify warranty terms before authorizing work.
Shop warranties complement part warranties but rarely replace them. Understand which warranty covers specific failure scenarios to avoid coverage gaps.
Documentation Best Practices
Maintain organized records supporting warranty and insurance claims:
- Photos documenting pre-repair condition and damage
- Itemized invoices specifying parts and labor separately
- Written estimates comparing repair versus replacement options
- Correspondence with insurers and repair facilities
- Proof of payment and warranty registration confirmations
Proper documentation streamlines claim processing and prevents disputes over coverage decisions.
Aftermarket Brand Evaluation: Quality Tiers and Selection Criteria
Not all aftermarket tail lights perform equally. Understanding quality tiers helps you make informed purchasing decisions based on intended use and budget constraints.
Economy Tier Characteristics
Budget assemblies in the $50 to $100 range prioritize function over longevity. Expect:
- Thinner plastic housings prone to cracking
- Lower-quality lens materials that yellow faster
- Basic wiring harnesses with minimal strain relief
- Simplified gasket designs with potential leakage
- Shorter warranty periods reflecting confidence levels
Economy tiers suit project vehicles, temporary replacements, or budget-conscious owners prioritizing immediate function over long-term durability.
Mid-Range Tier Balance
Mid-tier assemblies between $100 and $200 typically offer better value through:
- Improved housing thickness and impact resistance
- Better UV-resistant lens coatings slowing yellowing
- Enhanced wiring with proper strain relief
- More robust gasket designs reducing leak potential
- Longer warranty periods demonstrating manufacturer confidence
These represent the sweet spot for most daily drivers seeking reliable replacement without OEM pricing.
Premium Tier Performance
Premium assemblies approaching OEM pricing ($200 to $400) deliver:
- Exact fitment matching factory specifications
- Superior materials resisting environmental degradation
- Advanced features like sequential turn signals
- Comprehensive warranty coverage
- Consistent color matching with adjacent body panels
Premium tiers justify their cost for show vehicles, daily drivers prioritizing longevity, and owners wanting factory-equivalent appearance and function.
Selection Criteria Checklist
Evaluate aftermarket options using these criteria:
- Material composition and thickness specifications
- Lens coating technology and UV resistance ratings
- Wiring harness quality and connector durability
- Gasket design and sealing effectiveness
- Warranty terms and claim process simplicity
- Customer review patterns regarding longevity
- Compatibility verification for your specific model year
Reading verified buyer feedback reveals real-world performance patterns that specifications alone cannot predict.
Industry Certification Recognition
Look for assemblies meeting industry standards:
- SAE (Society of Automotive Engineers) certification marks
- DOT compliance markings on lens surfaces
- ISO quality management certifications for manufacturers
- Independent testing laboratory approvals
These certifications indicate commitment to safety and performance standards beyond basic functionality requirements.
“Cars aren’t just machines. They’re freedom, memory, and a little bit of grease under your fingernails.”
I’m Theodore Roosevelt—though my friends just call me “Ted” (and no, I’m not related to the president, though I do share his love for adventure). I grew up in Detroit in the 1970s, back when the city was still the heart of the American auto industry. My first love was a rusted-out 1967 Mustang my father and I rebuilt in our garage when I was fifteen. That project taught me that cars have souls. After spending twenty years as a mechanic and another ten writing for magazines, I started this blog to help everyday drivers and weekend wrenchers feel confident under the hood. Whether you’re restoring a classic or just trying to keep your daily driver alive for one more winter, I’m here to help you get there.