Installing a train horn on a Jeep Wrangler can improve audibility in certain off-road or private-property situations, but you should always check local laws before installation and use. A proper setup includes a horn unit, air compressor, air tank, wiring, relay, fuse protection, and secure mounting points that can handle vibration and weather exposure.
If you’re looking for a Jeep Wrangler train horn install guide, you’re probably searching for a horn that gets attention instantly. Many Jeep owners feel that the factory horn is too weak, especially during off-road adventures, trail rides, camping trips, and situations where extra sound projection may be useful.
I have seen many Wrangler owners struggle with choosing the right train horn kit, finding safe mounting locations, and avoiding wiring mistakes that lead to poor performance. This guide covers everything you need to know about installing a super loud train horn kit on a Jeep Wrangler in 2026, including planning, installation steps, common mistakes, safety considerations, and maintenance tips.
Before installing any aftermarket horn, remember that horn loudness claims such as “300db” are often marketing figures. Actual sound output varies based on the horn design, air pressure, testing distance, and environmental conditions.
Why Jeep Wrangler Owners Install Train Horns
A train horn kit offers several advantages over the stock horn.
Common Reasons Jeep Owners Upgrade
- Improved sound projection
- Better audibility on trails
- Increased awareness in certain situations
- Unique customization option
- Popular modification among off-road enthusiasts
- Distinctive horn tone
- Enhanced presence during Jeep events
Many Wrangler owners enjoy personalizing their vehicles, and a train horn is one modification that stands out immediately.
Common Pain Points Jeep Owners Face
Before installation, many owners encounter challenges.
Pain Point #1: Weak Factory Horn
The stock horn often lacks the volume some drivers prefer.
Solution: Install a high-quality train horn system with adequate air pressure and proper wiring.
Pain Point #2: Limited Installation Space
Wrangler models can become crowded after adding bumpers, winches, and skid plates.
Solution: Plan mounting locations before purchasing a horn kit.
Pain Point #3: Wiring Confusion
Many first-time installers struggle with relays, switches, and fuse placement.
Solution: Follow a wiring diagram and use automotive-grade components.
Pain Point #4: Compressor Failure
Poor installation can shorten compressor life.
Solution: Use proper fuse protection and weather-resistant mounting.
Pain Point #5: Excessive Vibration
Off-road driving creates constant vibration.
Solution: Use locking hardware and reinforced mounting brackets.
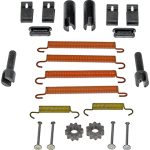
Components Found in a Typical Train Horn Kit
Most train horn kits include:
- Air horn assembly
- Air compressor
- Air tank
- Pressure switch
- Air line tubing
- Wiring harness
- Relay
- Fuse holder
- Mounting hardware
- Activation switch
Premium kits may include:
- Stainless steel horns
- Heavy-duty compressors
- Larger air tanks
- Waterproof electrical connectors
- Remote activation options
Choosing the Right Train Horn Kit for a Jeep Wrangler
Not every horn kit fits every Wrangler model.
Consider Your Wrangler Model
- Jeep Wrangler JK
- Jeep Wrangler JL
- Jeep Wrangler 4xe
- Jeep Wrangler Rubicon
- Jeep Wrangler Sahara
- Jeep Wrangler Sport
Each model has different available mounting areas.
Consider Available Space
Popular mounting locations include:
- Underbody
- Engine bay
- Rear cargo area
- Frame rails
- Rear bumper cavity
Consider Weather Resistance
If you frequently drive through:
- Mud
- Snow
- Rain
- River crossings
Choose corrosion-resistant components.
Tools Needed for Installation
Gather all tools before starting.
Basic Tools
- Socket set
- Ratchet
- Drill
- Drill bits
- Wire stripper
- Crimping tool
- Screwdrivers
- Wrenches
- Multimeter
- Zip ties
Safety Equipment
- Safety glasses
- Work gloves
- Hearing protection
Step-by-Step Jeep Wrangler Train Horn Installation
Step 1: Disconnect the Battery
Safety comes first.
Disconnect the negative battery terminal before touching electrical components.
Step 2: Select Mounting Locations
Choose secure locations for:
- Horn assembly
- Air tank
- Compressor
Keep components away from:
- Exhaust heat
- Moving suspension parts
- Sharp metal edges
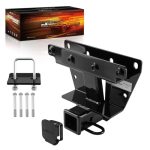
Step 3: Mount the Horn
Secure the horn using supplied brackets.
Tips:
- Point horn openings downward.
- Allow drainage for moisture.
- Leave space for maintenance.
Step 4: Install the Air Tank
Mount the air tank securely.
Best practices:
- Use reinforced brackets.
- Check ground clearance.
- Avoid contact with suspension travel areas.
Step 5: Mount the Compressor
Install the compressor in a protected area.
Popular locations include:
- Engine bay
- Rear cargo compartment
- Protected frame sections
Allow airflow around the compressor.
Step 6: Connect Air Lines
Route air lines carefully.
Avoid:
- Hot exhaust components
- Sharp corners
- Pinch points
Use protective loom where needed.
Step 7: Wire the Electrical System
Install:
- Relay
- Fuse
- Compressor wiring
- Horn trigger wiring
Use weatherproof connectors whenever possible.
Step 8: Install Activation Switch
Many Jeep owners choose:
- Factory-style switch panels
- Auxiliary switch systems
- Custom dashboard switches
Place the switch within easy reach.
Step 9: Reconnect Battery
Reconnect the negative battery terminal.
Inspect all connections before testing.
Step 10: Test the System
Perform a short test.
Check:
- Compressor operation
- Air leaks
- Horn activation
- Wiring temperature
If everything functions correctly, installation is complete.
Best Mounting Locations for Jeep Wrangler Models
Underbody Mount
Advantages:
- Hidden appearance
- Preserves engine bay space
Disadvantages:
- More exposure to mud and water
Engine Bay Mount
Advantages:
- Easy maintenance
- Better protection
Disadvantages:
- Limited space
Cargo Area Mount
Advantages:
- Excellent protection
- Easier wiring access
Disadvantages:
- Occupies storage space
Wiring Tips for Reliable Performance
Electrical issues are one of the most common installation problems.
Use Proper Wire Gauge
Undersized wiring can cause:
- Voltage drop
- Compressor overheating
- Reduced horn performance
Always Use a Relay
A relay protects switches from excessive current.
Install a Fuse Near the Battery
This helps protect the vehicle’s electrical system.
Protect Wiring
Use:
- Split loom tubing
- Heat shrink
- Waterproof connectors
Off-Road Considerations
Jeep Wranglers often face harsh conditions.
Protect Against Water
Water can damage:
- Compressors
- Electrical connections
- Pressure switches
Use sealed components whenever possible.
Prepare for Mud
Mud buildup can affect:
- Horn openings
- Air line connections
- Compressor cooling
Regular inspections help prevent issues.
Maintenance Tips
A train horn system requires periodic maintenance.
Monthly Inspection
Check:
- Wiring
- Mounting hardware
- Air lines
Air Tank Drainage
Moisture can accumulate inside tanks.
Drain periodically to reduce corrosion.
Compressor Maintenance
Inspect:
- Air filters
- Electrical connections
- Mounting bolts
Signs Your Train Horn Needs Attention
Watch for:
- Reduced volume
- Slow compressor operation
- Air leaks
- Frequent fuse failures
- Loose mounting brackets
Address issues early to avoid larger repairs.
Safety Tips
Safety should always be a priority.
Protect Your Hearing
Train horns are extremely loud.
Avoid standing directly in front of the horn during testing.
Follow Local Regulations
Different regions may have restrictions regarding aftermarket train horns.
Drivers in the United States, Canada, the United Kingdom, and Australia should review local vehicle equipment regulations before installation and use.
For vehicle safety information, I recommend reviewing guidance from the National Highway Traffic Safety Administration (NHTSA)
Avoid Unnecessary Use
A train horn should be used responsibly.
Excessive use can create unnecessary distractions and may violate local noise regulations.
Expert Quotes
“Quality is never an accident; it is always the result of intelligent effort.” — John Ruskin
This applies directly to vehicle modifications. Careful installation usually produces better results and longer component life.
“Safety doesn’t happen by accident.” — Unknown
Every electrical connection and mounting point should be checked carefully.
“The bitterness of poor quality remains long after the sweetness of low price is forgotten.” — Benjamin Franklin
Choosing reliable components often saves money over time.
Common Installation Mistakes to Avoid
Buying the Cheapest Kit
Low-quality kits often suffer from:
- Air leaks
- Weak compressors
- Poor hardware
Ignoring Mounting Strength
Loose brackets can fail during off-road driving.
Skipping Fuse Protection
This increases the risk of electrical damage.
Poor Air Line Routing
Incorrect routing may cause:
- Leaks
- Kinks
- Reduced airflow
Neglecting Maintenance
Routine inspections help maximize system lifespan.
Is a Train Horn Worth It for a Jeep Wrangler?
For many Jeep enthusiasts, the answer is yes.
Benefits include:
- Distinctive sound
- Greater audibility
- Fun customization
- Enhanced trail presence
However, installation quality and responsible use matter just as much as horn volume.
Frequently Asked Questions on Jeep Wrangler Train Horn Install Guide
Can I install a train horn on a Jeep Wrangler myself?
Yes. Many Jeep owners complete the installation with basic mechanical and electrical skills, though professional installation may be helpful for complex setups.
How long does installation take?
Most installations take between 4 and 8 hours depending on vehicle setup and mounting requirements.
Do train horns require an air tank?
Many traditional train horn systems use an air tank, although some compact kits use direct-compressor designs.
Will a train horn affect my Jeep battery?
A properly installed system generally has minimal impact, but high-demand compressors require adequate electrical support.
Are 300db train horns really 300 decibels?
Most advertised ratings are marketing claims. Actual measured sound levels are typically much lower and depend on testing conditions.
Conclusion
Installing a train horn on a Jeep Wrangler can be a rewarding project for owners who want a louder and more noticeable horn system. By choosing quality components, securing proper mounting locations, protecting electrical connections, and following safe installation practices, you can build a dependable setup that performs well both on and off the trail.
I always recommend planning the installation carefully before purchasing parts. Taking extra time during wiring, mounting, and testing can prevent many of the problems Jeep owners commonly experience. Whether you drive a Wrangler JK, JL, Rubicon, Sahara, Sport, or 4xe, a properly installed train horn system can provide years of reliable performance when maintained correctly.

“Cars aren’t just machines. They’re freedom, memory, and a little bit of grease under your fingernails.”
I’m Theodore Roosevelt—though my friends just call me “Ted” (and no, I’m not related to the president, though I do share his love for adventure). I grew up in Detroit in the 1970s, back when the city was still the heart of the American auto industry. My first love was a rusted-out 1967 Mustang my father and I rebuilt in our garage when I was fifteen. That project taught me that cars have souls. After spending twenty years as a mechanic and another ten writing for magazines, I started this blog to help everyday drivers and weekend wrenchers feel confident under the hood. Whether you’re restoring a classic or just trying to keep your daily driver alive for one more winter, I’m here to help you get there.