
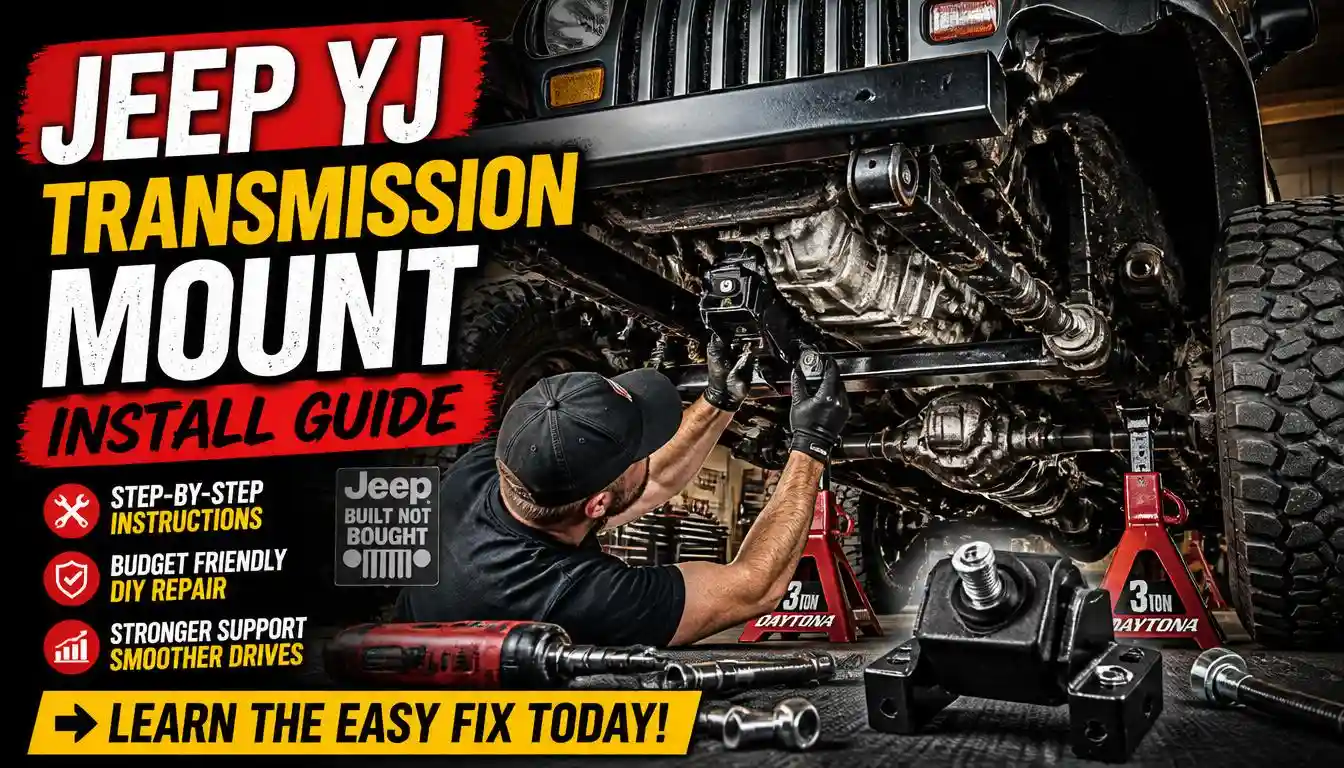
Quick Answer: Replacing the transmission mount on a Jeep YJ is a straightforward DIY job that typically takes 1–3 hours with basic hand tools. A new transmission mount can reduce vibrations, eliminate clunking noises, improve shifting feel, and help restore a smoother driving experience on and off the road.
If your Jeep YJ has started vibrating more than usual, producing clunking noises during acceleration, or feeling rough over normal roads, the transmission mount may be the culprit.
As Jeep YJs age, rubber components naturally deteriorate. The transmission mount plays a critical role in supporting the drivetrain and isolating vibration. When it wears out, the entire driving experience can suffer.
In this guide, I will walk you through everything you need to know about a Jeep YJ transmission mount install, including how to diagnose a bad mount, choose the right replacement, complete the installation safely, and test your work afterward.
Whether you use your YJ as a daily driver, weekend trail rig, or restoration project, this guide will help you get the job done correctly.
What Does a Transmission Mount Do?
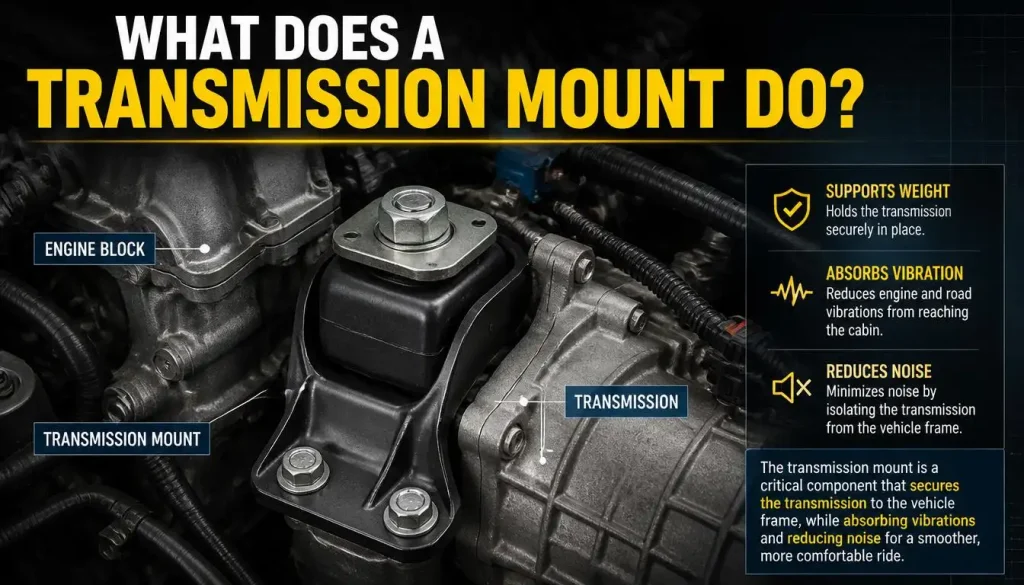
The transmission mount connects the transmission assembly to the crossmember while absorbing vibration and drivetrain movement.
Its primary functions include:
- Supporting transmission weight
- Reducing engine and drivetrain vibration
- Preventing excessive movement during acceleration
- Protecting drivetrain components from stress
- Improving ride comfort
Without a properly functioning transmission mount, excessive movement can place additional strain on driveshafts, exhaust components, engine mounts, and transmission connections.
Why Your Jeep YJ Vibrates or Rides Rough
Many Jeep owners immediately blame tires, driveshafts, or suspension components when vibrations appear.
However, a failing transmission mount can create similar symptoms.
Common signs include:
Vibration at Idle
You may notice increased vibration while sitting at stoplights or parked with the engine running.
Vibration During Acceleration
The drivetrain can shift excessively under load, creating vibration throughout the vehicle.
Clunking Underneath the Jeep
A damaged mount may allow metal components to contact each other, causing noticeable clunks.
Excessive Drivetrain Movement
The transmission may move more than normal during gear changes or throttle application.
Signs of a Bad Transmission Mount
A worn transmission mount often gives several warning signs before complete failure.
Excessive Vibrations
One of the most common symptoms is increased vibration throughout the cabin.
Hard or Rough Shifting
Movement in the drivetrain can affect shift quality.
Clunking Sounds
You may hear noises when accelerating, braking, or changing gears.
Visible Cracks
Inspecting the mount may reveal cracked rubber or separated components.
Transmission Sagging
Severely worn mounts can allow the transmission to sit lower than normal.
Expert Insight: “Transmission mount wear is frequently misdiagnosed as driveline imbalance. Always inspect the mount before investing in more expensive repairs.”
How to Diagnose a Bad Transmission Mount
Before replacing any part, proper diagnosis is essential.
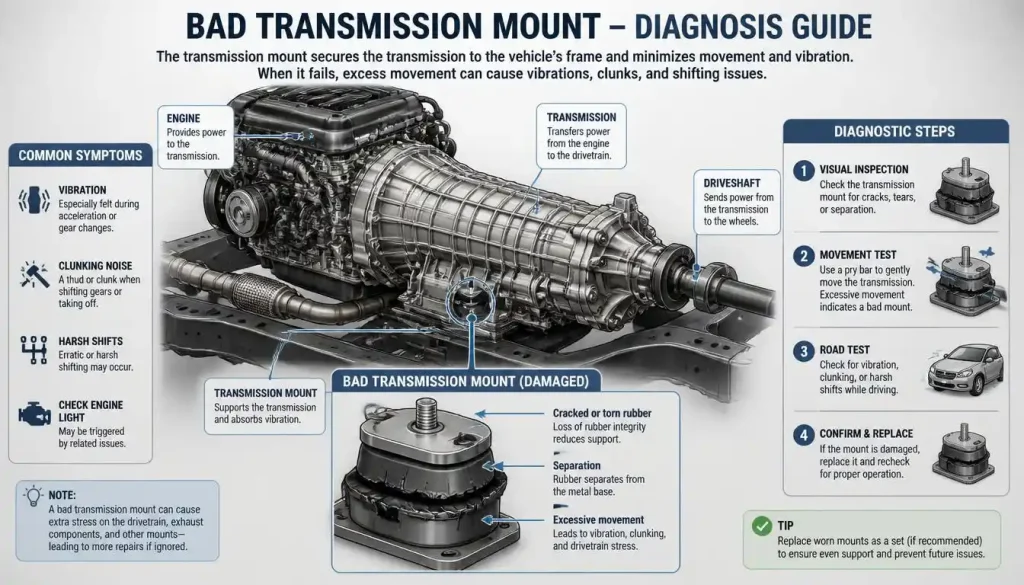
Perform a Visual Inspection
Look for:
- Cracked rubber
- Missing rubber sections
- Metal-to-metal contact
- Fluid contamination
Check for Excessive Movement
With the parking brake engaged, have an assistant gently apply throttle while observing drivetrain movement.
Use a Pry Bar Test
Carefully apply light pressure to check for excessive play.
Conduct a Road Test
Pay attention to:
- Vibrations
- Clunks
- Harsh shifting
- Drivetrain movement
If multiple symptoms are present, replacement is usually recommended.
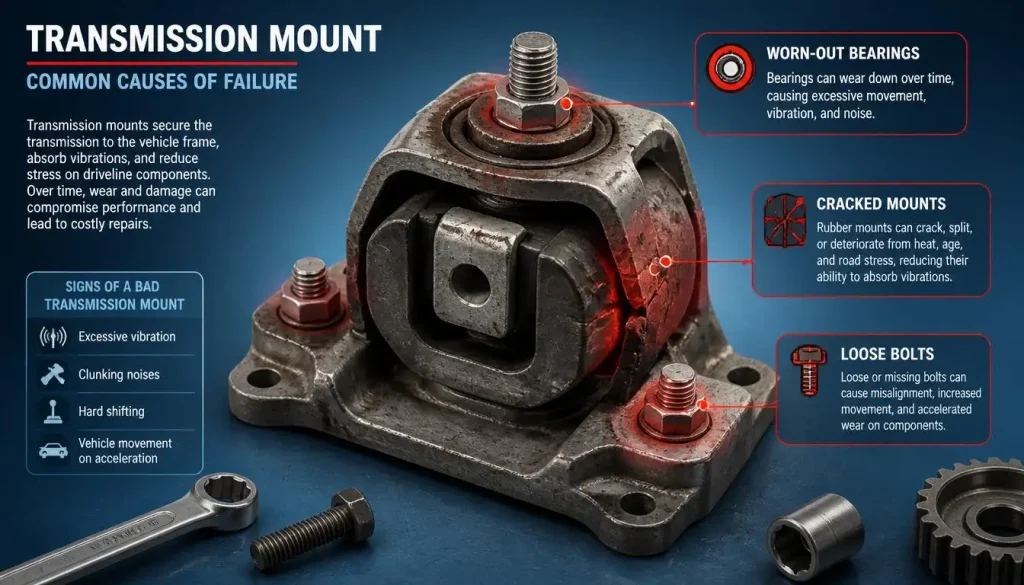
Common Causes of Transmission Mount Failure
Age and Wear
Most original YJ mounts have been exposed to decades of use.
Off-Road Driving
Rough terrain creates constant stress on drivetrain mounts.
Oil Contamination
Oil leaks can soften rubber and accelerate deterioration.
Heavy Towing
Additional drivetrain load increases wear.
Extreme Temperatures
Repeated heating and cooling cycles eventually degrade rubber components.
Best Jeep YJ Transmission Mount Replacement Options
Choosing the right replacement can significantly affect ride quality.
OEM Rubber Mount
Best for:
- Daily drivers
- Factory ride quality
- Reduced vibration
Pros:
- Comfortable
- Affordable
- Quiet
Heavy-Duty Rubber Mount
Best for:
- Mixed street and trail use
- Increased durability
Polyurethane Mount
Best for:
- Serious off-road use
- Performance applications
Pros:
- Extremely durable
- Resistant to oil contamination
Cons:
- Increased vibration
- Slightly harsher ride
Tools and Parts Needed
Before beginning the installation, gather all necessary equipment.
Required Tools
- Floor jack
- Jack stands
- Ratchet set
- Socket set
- Torque wrench
- Breaker bar
- Safety glasses
- Gloves
Recommended Parts
- New transmission mount
- Replacement hardware if needed
- Anti-seize compound
- Thread locker
Safety Precautions
Safety should always come first.
Park on Level Ground
Ensure the vehicle is stable.
Disconnect the Battery
Prevent accidental electrical issues.
Support the Vehicle Properly
Use quality jack stands.
Support the Transmission
Never allow the transmission to hang unsupported during removal.
Jeep YJ Transmission Mount Torque Specs
Always verify exact specifications using your Jeep service manual.
General guidelines include:
- Transmission mount bolts: Follow manufacturer recommendations
- Crossmember bolts: Tighten to factory specifications
- Recheck torque after several days of driving
Using proper torque helps prevent premature mount failure and hardware damage.
Jeep YJ Transmission Mount Install Step by Step
Step 1: Raise and Secure the Jeep
Lift the vehicle safely and support it with jack stands.
Ensure there is sufficient workspace underneath.
Step 2: Support the Transmission
Position a floor jack beneath the transmission.
Use a wood block between the jack and transmission housing to prevent damage.
Step 3: Locate the Transmission Mount
The mount is positioned between the transmission and crossmember.
Inspect the area for damage or corrosion.
Step 4: Remove the Skid Plate or Crossmember if Necessary
Some installations may require additional clearance.
Remove hardware carefully.
Step 5: Remove Mounting Bolts
Loosen and remove the bolts securing the transmission mount.
Penetrating oil can help with rusted hardware.
Step 6: Remove the Old Mount
Carefully remove the mount from the vehicle.
Compare it with the replacement part.
Step 7: Inspect Surrounding Components
Check:
- Crossmember condition
- Engine mounts
- Transmission housing
- Hardware
Replace damaged components as needed.
Step 8: Install the New Mount
Position the replacement mount correctly.
Install bolts by hand first to avoid cross-threading.
Step 9: Tighten Hardware
Tighten all bolts evenly according to manufacturer specifications.
Avoid overtightening.
Step 10: Reinstall Crossmember or Skid Plate
Reassemble any components removed earlier.
Double-check alignment.
Step 11: Lower the Transmission
Slowly lower the supporting jack.
Confirm the mount is seated properly.
Step 12: Lower the Vehicle
Remove jack stands and lower the Jeep safely.
Common Installation Problems and Fixes
Mount Does Not Line Up
Possible causes:
- Transmission not properly supported
- Incorrect replacement part
- Crossmember misalignment
Persistent Vibrations
Check:
- Engine mounts
- Driveshaft balance
- U-joints
- Crossmember condition
Hardware Will Not Thread
Inspect for:
- Damaged threads
- Dirt buildup
- Incorrect bolt size
New Noise After Installation
Verify:
- Proper torque
- Correct mount orientation
- Clearance around nearby components
Testing the New Transmission Mount
After installation, perform a complete inspection.
Start the Engine
Observe engine and transmission movement.
Shift Through Gears
Listen for unusual noises.
Conduct a Road Test
Monitor:
- Vibrations
- Shifting performance
- Acceleration smoothness
Reinspect Hardware
After the test drive, verify all bolts remain tight.
Expert Insight: “A properly installed transmission mount should noticeably reduce drivetrain movement without introducing new vibrations.
Engine Mount vs Transmission Mount
Many Jeep owners confuse these components.
Engine Mount Symptoms
- Engine movement
- Fan shroud contact
- Engine vibration
Transmission Mount Symptoms
- Drivetrain clunking
- Shifting issues
- Transmission movement
Which Fails First?
Either component can fail first depending on driving conditions and age.
Should You Replace Engine Mounts at the Same Time?
In many cases, yes.
Benefits include:
- Balanced drivetrain support
- Reduced labor later
- Improved vibration control
- Better long-term reliability
If engine mounts show visible wear, replacing them together often makes sense.
OEM vs Polyurethane Transmission Mounts
| Feature | OEM Rubber | Polyurethane |
|---|---|---|
| Ride Comfort | Excellent | Moderate |
| Vibration Control | Excellent | Good |
| Durability | Good | Excellent |
| Off-Road Performance | Good | Excellent |
| Noise Levels | Low | Higher |
| Daily Driving | Excellent | Good |
Jeep YJ Transmission Mount Replacement Cost
Costs vary depending on location and parts selected.
United States
- DIY: $30–$120
- Professional Installation: $150–$400
Canada
- DIY: CAD $40–$150
- Professional Installation: CAD $200–$500
United Kingdom
- DIY: £30–£100
- Professional Installation: £150–£350
Australia
- DIY: AUD $50–$180
- Professional Installation: AUD $250–$600
DIY installation can save significant labor costs.
Installation Time and Difficulty
Estimated Time
- Beginner: 2–3 hours
- Experienced DIYer: 1–2 hours
Difficulty Level
Moderate
Special Tools Required
No specialized tools are typically required beyond a torque wrench and floor jack.
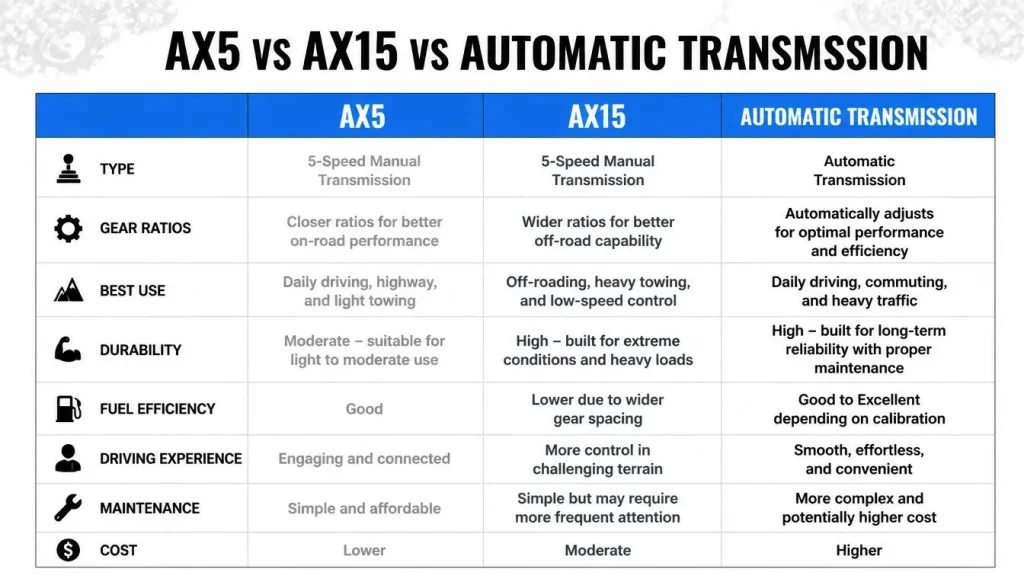
AX5 vs AX15 vs Automatic Transmission Notes
Different Jeep YJ transmissions may use slightly different mounting arrangements.
AX5
Typically found behind four-cylinder engines.
AX15
Common behind six-cylinder engines and often used in upgrades.
Automatic Transmissions
May use different mount configurations and hardware.
Always verify compatibility before purchasing replacement parts.
Crossmember and Skid Plate Inspection
While performing the installation, inspect:
- Rust damage
- Bent components
- Cracked welds
- Loose hardware
Repairing these issues early can prevent future drivetrain problems.
Expert Insight: “Many transmission mount failures are accelerated by damaged crossmembers or excessive drivetrain movement caused by worn supporting components.”
Maintenance Tips for Longer Mount Life
Fix Oil Leaks Quickly
Oil contamination is one of the leading causes of mount deterioration.
Inspect Annually
Check the mount during routine maintenance.
Avoid Excessive Drivetrain Shock
Aggressive launches and harsh impacts increase wear.
Inspect After Off-Road Trips
Trail use places additional stress on drivetrain components.
Frequently Asked Questions
Can I drive with a bad transmission mount?
Yes, but it is not recommended. Continued driving can place additional stress on drivetrain components.
How long does a Jeep YJ transmission mount last?
Most mounts last several years, but off-road use and environmental conditions can shorten lifespan.
Can a bad transmission mount affect shifting?
Yes. Excessive transmission movement can contribute to rough or inconsistent shifting.
Is a polyurethane mount worth it?
For dedicated off-road builds, polyurethane is often worth considering. Daily drivers may prefer OEM-style rubber mounts.
Can I replace the transmission mount myself?
Yes. Most Jeep YJ owners with basic mechanical skills can complete the installation at home.
Conclusion
A worn transmission mount can make an otherwise capable Jeep YJ feel rough, noisy, and unpleasant to drive. Fortunately, replacing the mount is one of the more accessible drivetrain maintenance jobs for DIY enthusiasts.
By properly diagnosing the issue, choosing the right replacement mount, following safe installation procedures, and inspecting related components, you can restore smoother operation and improve overall driving comfort.
Whether your Jeep spends its time on highways, back roads, or rugged trails, a properly installed transmission mount helps keep the drivetrain stable, reduces vibration, and contributes to a more enjoyable driving experience for years to come.

“Cars aren’t just machines. They’re freedom, memory, and a little bit of grease under your fingernails.”
I’m Theodore Roosevelt—though my friends just call me “Ted” (and no, I’m not related to the president, though I do share his love for adventure). I grew up in Detroit in the 1970s, back when the city was still the heart of the American auto industry. My first love was a rusted-out 1967 Mustang my father and I rebuilt in our garage when I was fifteen. That project taught me that cars have souls. After spending twenty years as a mechanic and another ten writing for magazines, I started this blog to help everyday drivers and weekend wrenchers feel confident under the hood. Whether you’re restoring a classic or just trying to keep your daily driver alive for one more winter, I’m here to help you get there.